I started as a technician, first setting up sound reinforcement and projection equipment at a convention facility, co-founded a DJ business and constructed our PA system from scrach, then got into electronics maintenance and repair at a community college. After obtaining a university degree in engineering, I designed integrated circuits for the first generation of 900 MHZ analog cellphones, the first generation of CA-code-phase tracking GPS receivers and digital pro-audio. I then progressed through a variety of leadership roles in product management, marketing, engineering product development and manufacturing, in fields such as industrial GPS-based positioning and navigation, pipeline integrity inspection and industrial process control.
SuiteCRM is a Customer Relationship Management (CRM) web application, used by a company to store and organize information relating to customers and potential customers in a shared trusted environment. A CRM application may be stand-alone, or may integrate with other enterprise applications, such as an Enterprise Resource Planning (ERP) system (CRM may also be a module within an ERP system).
SuiteCRM was created by forking Sugar CE v6.5. The company SugarCRM provided several editions of Sugar CRM, including the open-source Sugar CE and several proprietary-licensed commercial editions. When SugarCRM announced in 2013 that new features would no longer be included in Sugar CE, SalesAgility, a UK-based CRM consultancy with expertise developing client solutions using Sugar CE, created SuiteCRM based on the Sugar CE v6.5 codebase. The first release of SuiteCRM was v7.0 in October 2013, and since then SuiteCRM has become an award winning world leading CRM application.
Setup
I will be installing SuiteCRM v7.7.9 on FreeBSD 10.3-RELEASE, using Apache 2.4 and MariaDb 10.0.
Download a SuiteCRM zip distribution archive and extract to /usr/local/www/suitecrm-7.7.9
Change owner of the SuiteCRM directory tree to www:www
Create a soft link from /usr/local/www/suitecrm to /usr/local/www/suitecrm-7.7.9
Create “suitecrm” database and database user with full permissions to the database.
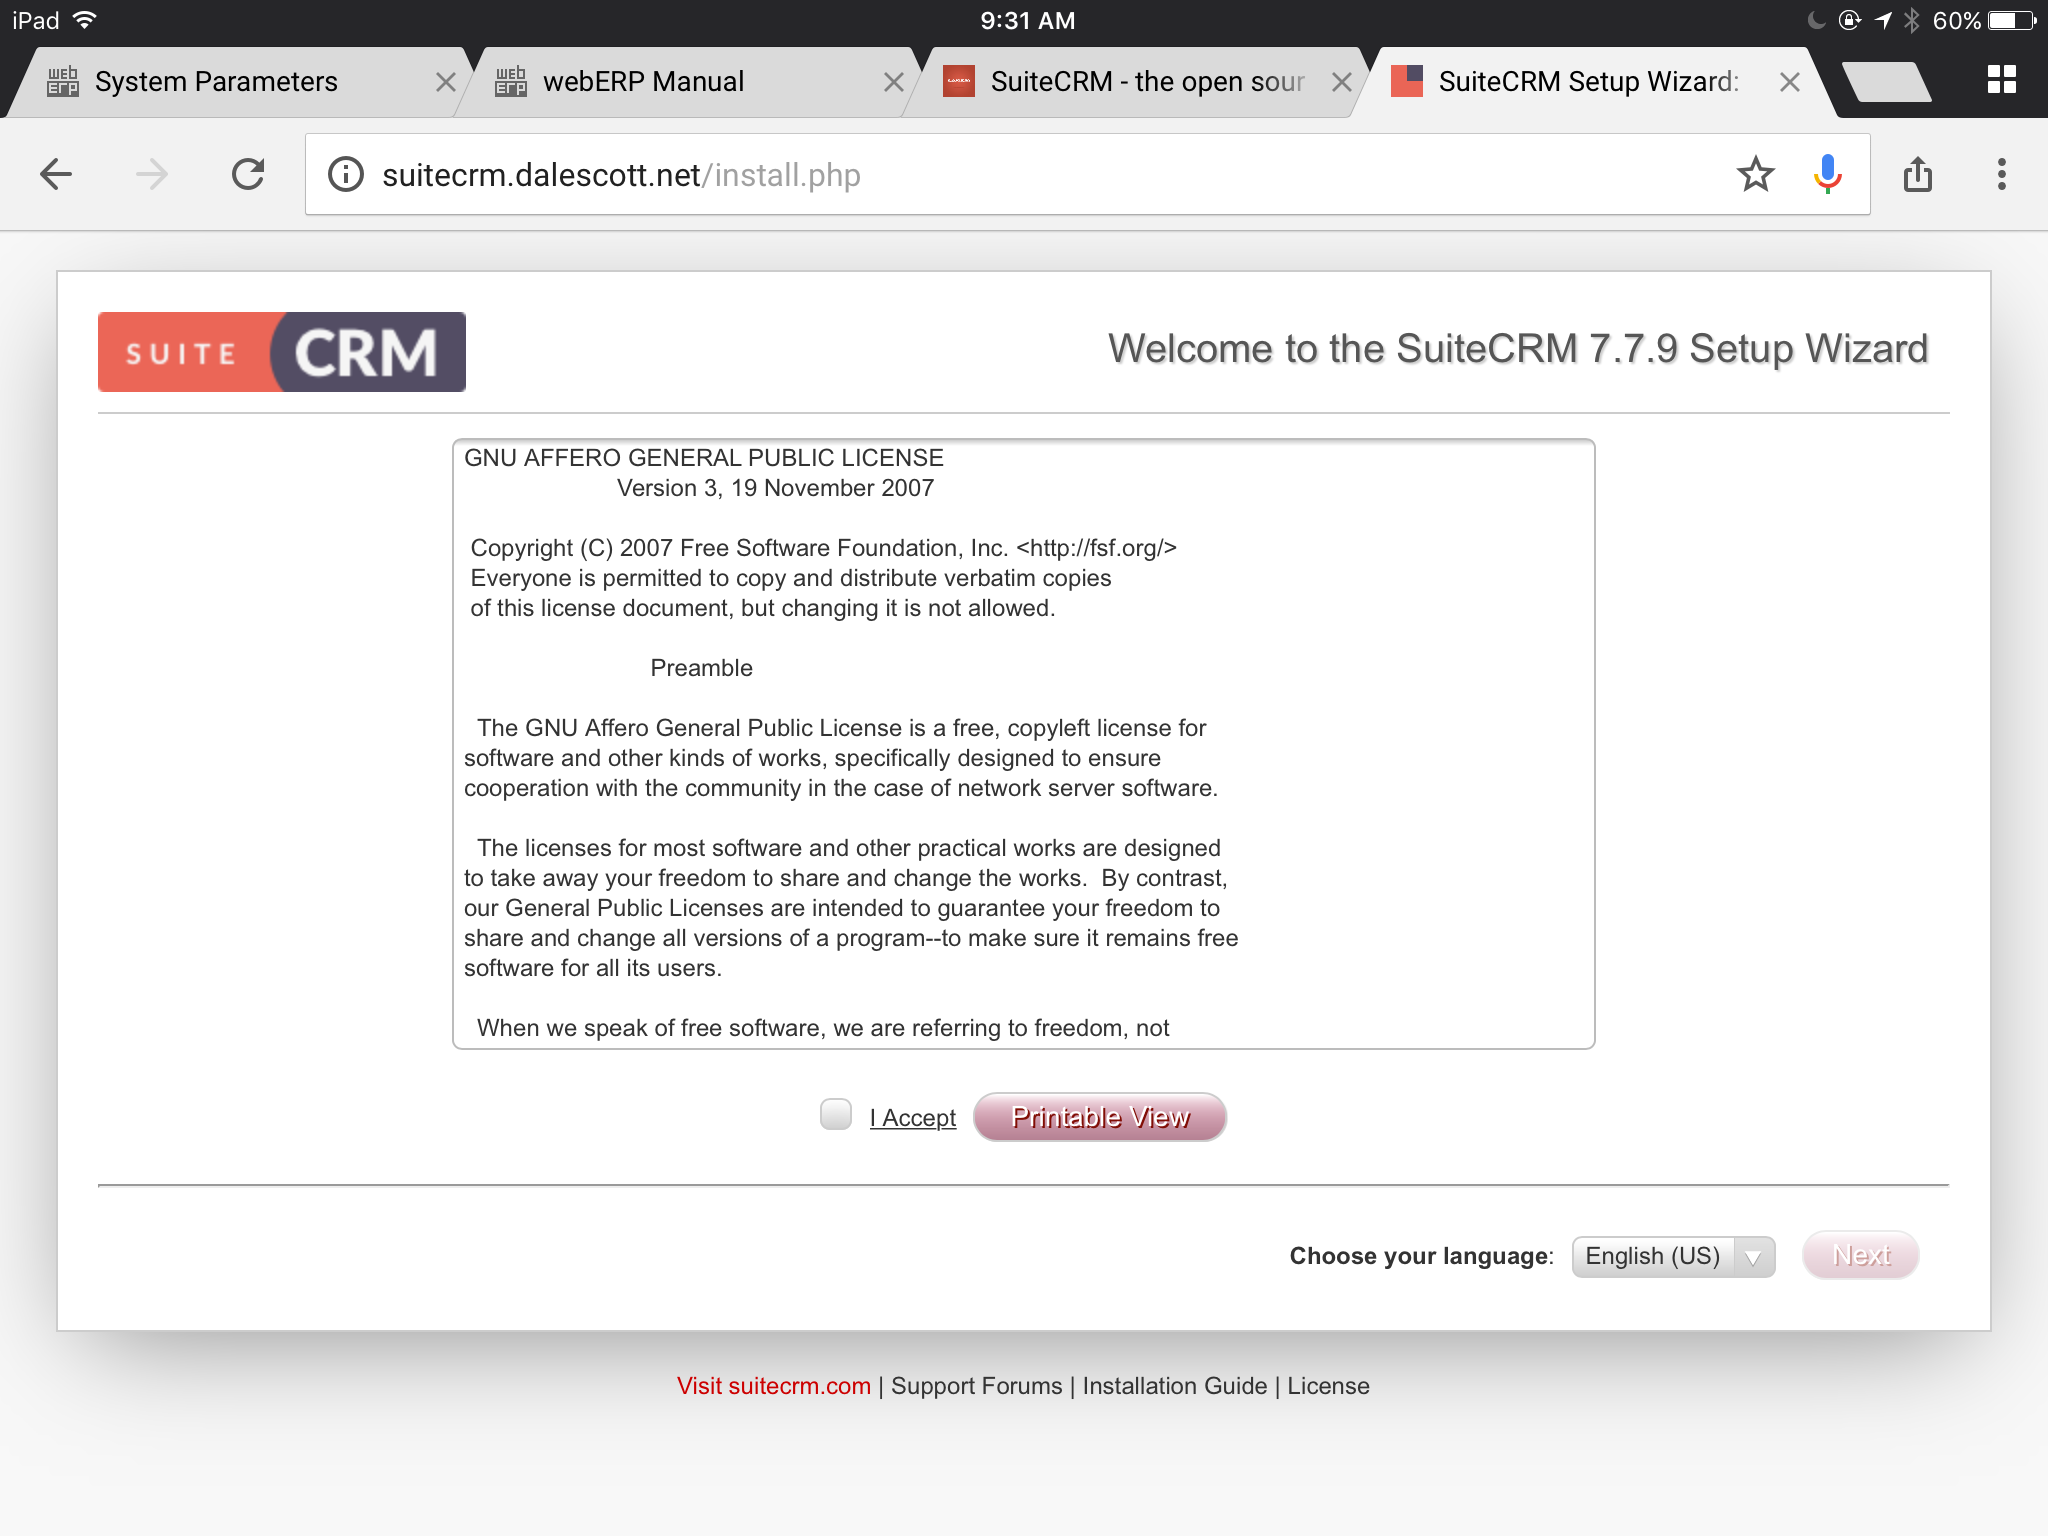
Run installer (http://suitecrm.dalescott.net).
The first thing the installer does is to confirm your acceptance of the AGPL license used by SuiteCRM.
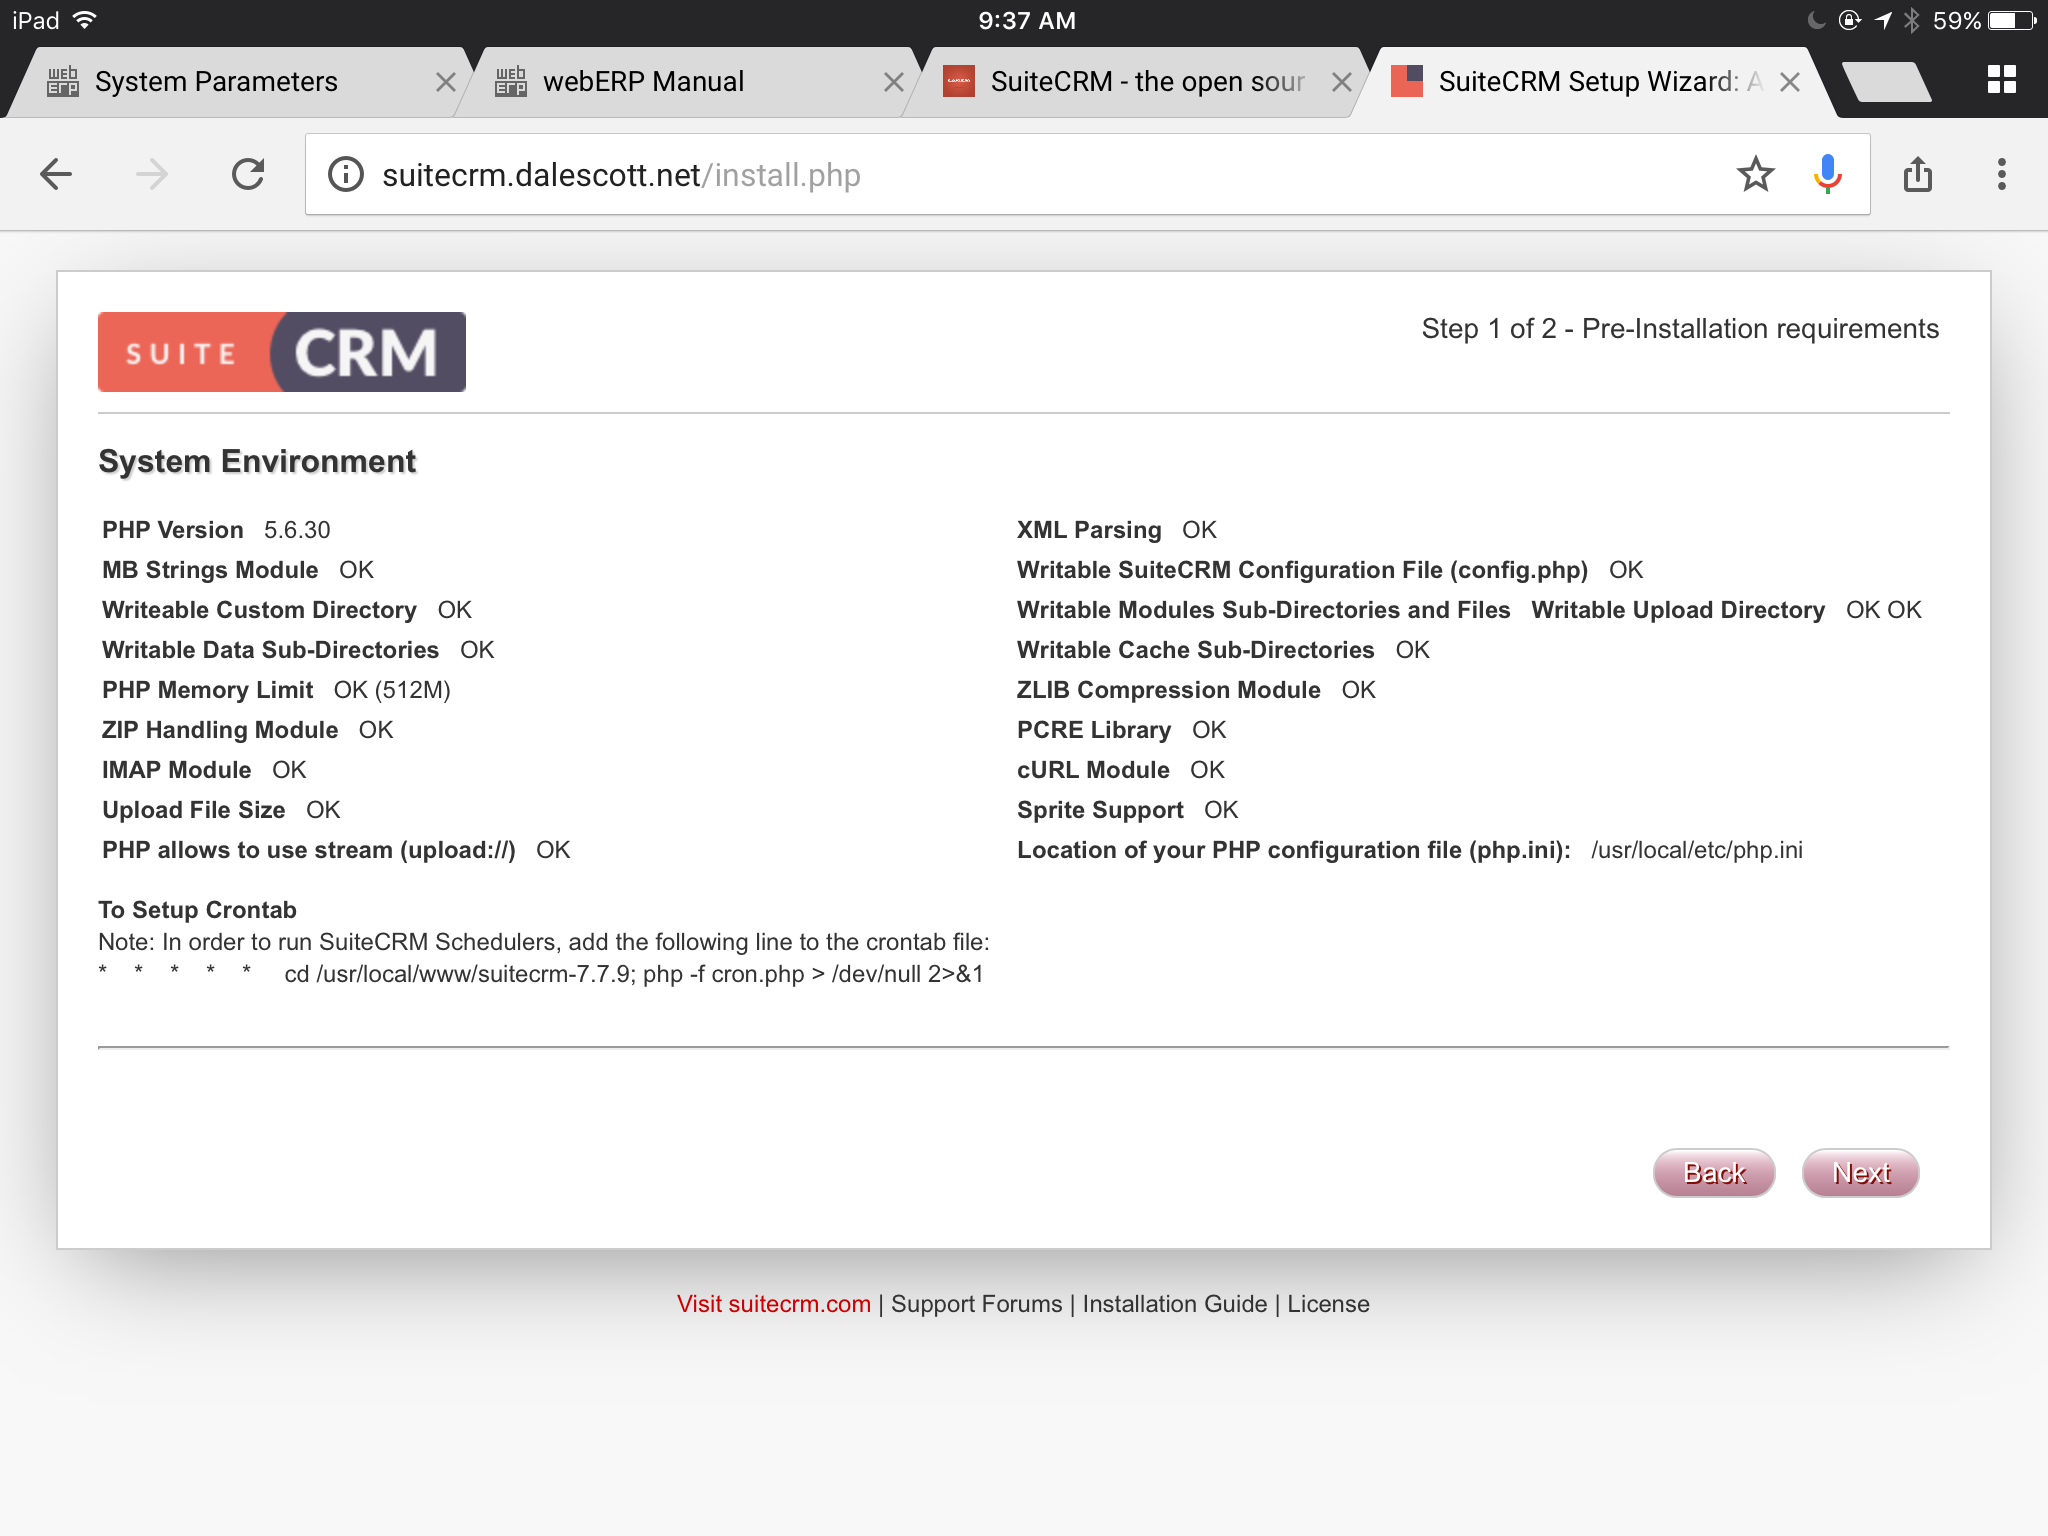
The installer then presents an overview of your system configuration, and identifies any issues preventing installation. In my case, I’m good to proceed.
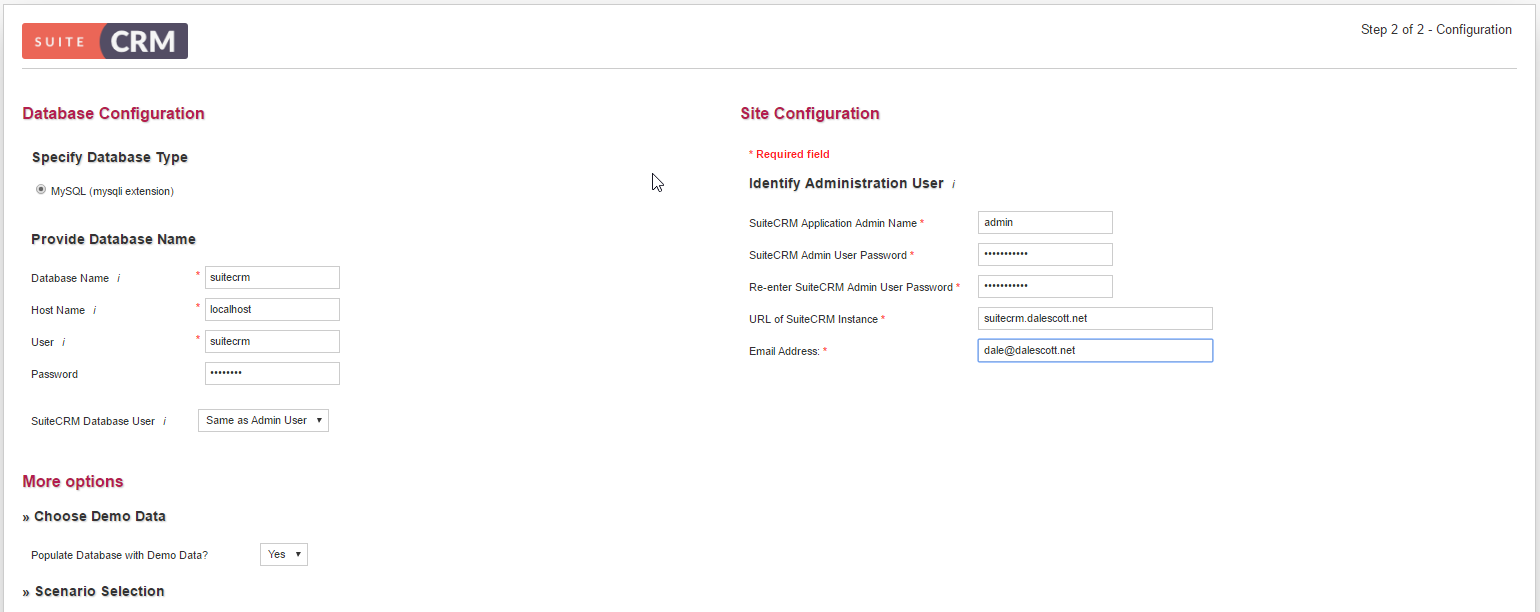
Next, enter your database credentials and other configuration data.
Select install demo data.
Enter admin user password and email.
Accept default visible modules.
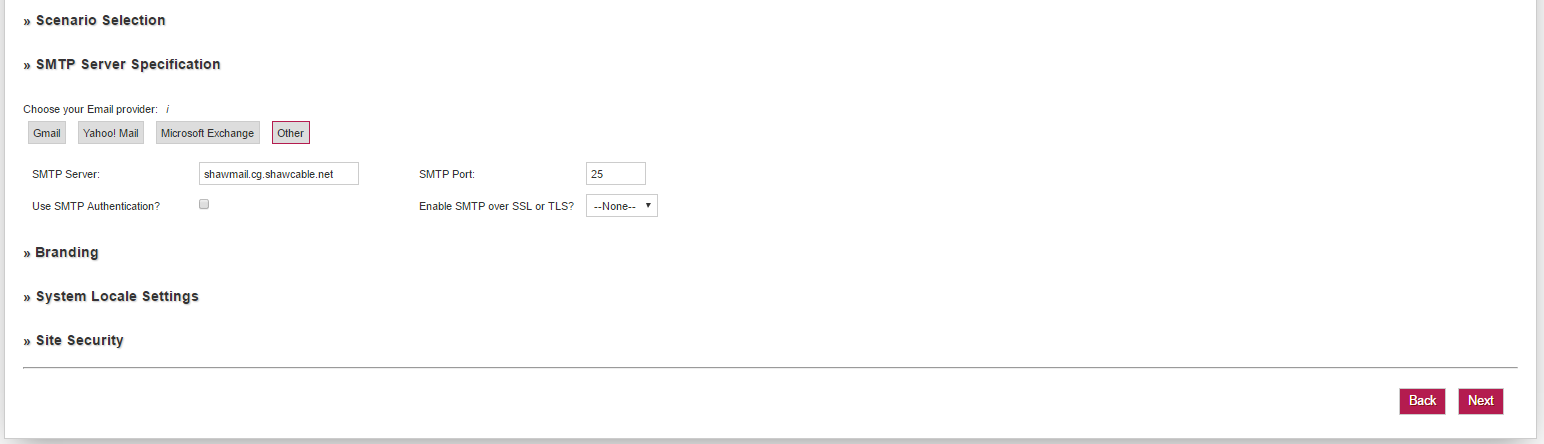
Enter SMTP server credentials required for SuiteCRM to send email.
The installer will setup the database and then let you login as the admin user.
The last setup item is to create a cron task used by SuiteCRM to run periodic internal tasks.
TODO show cron job
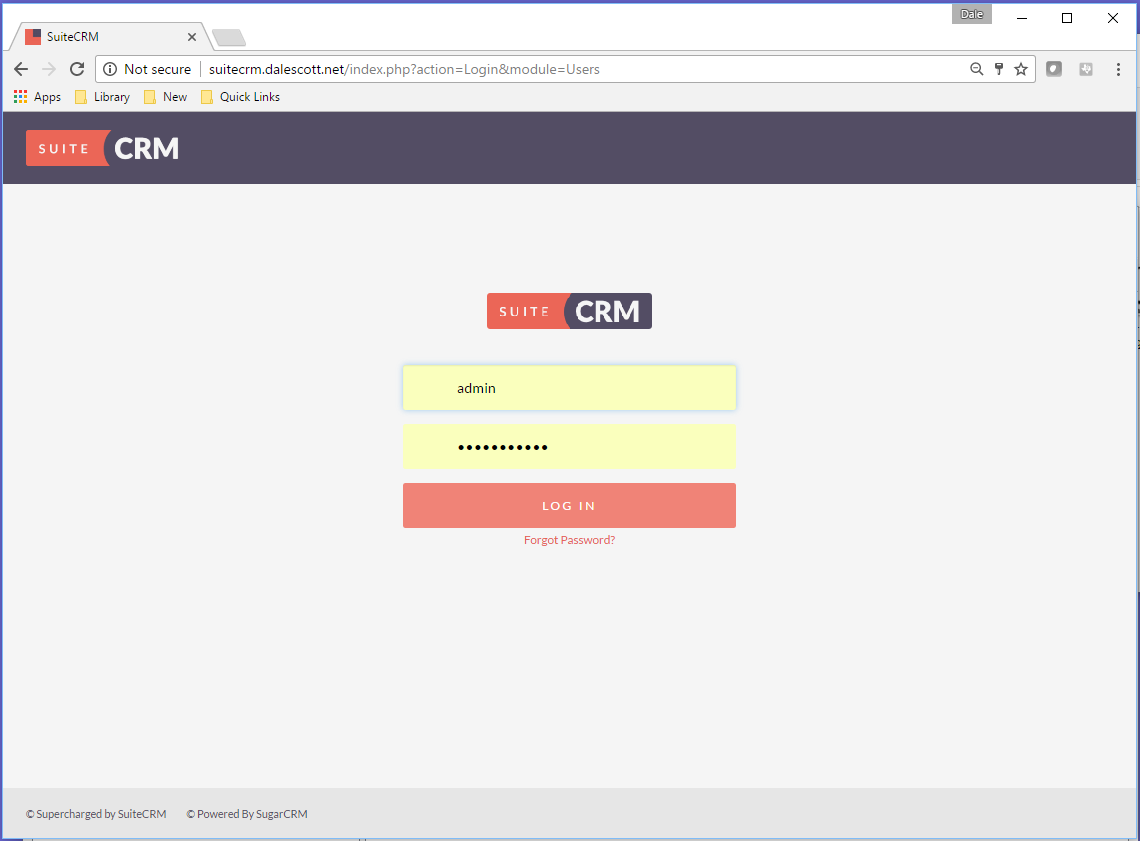
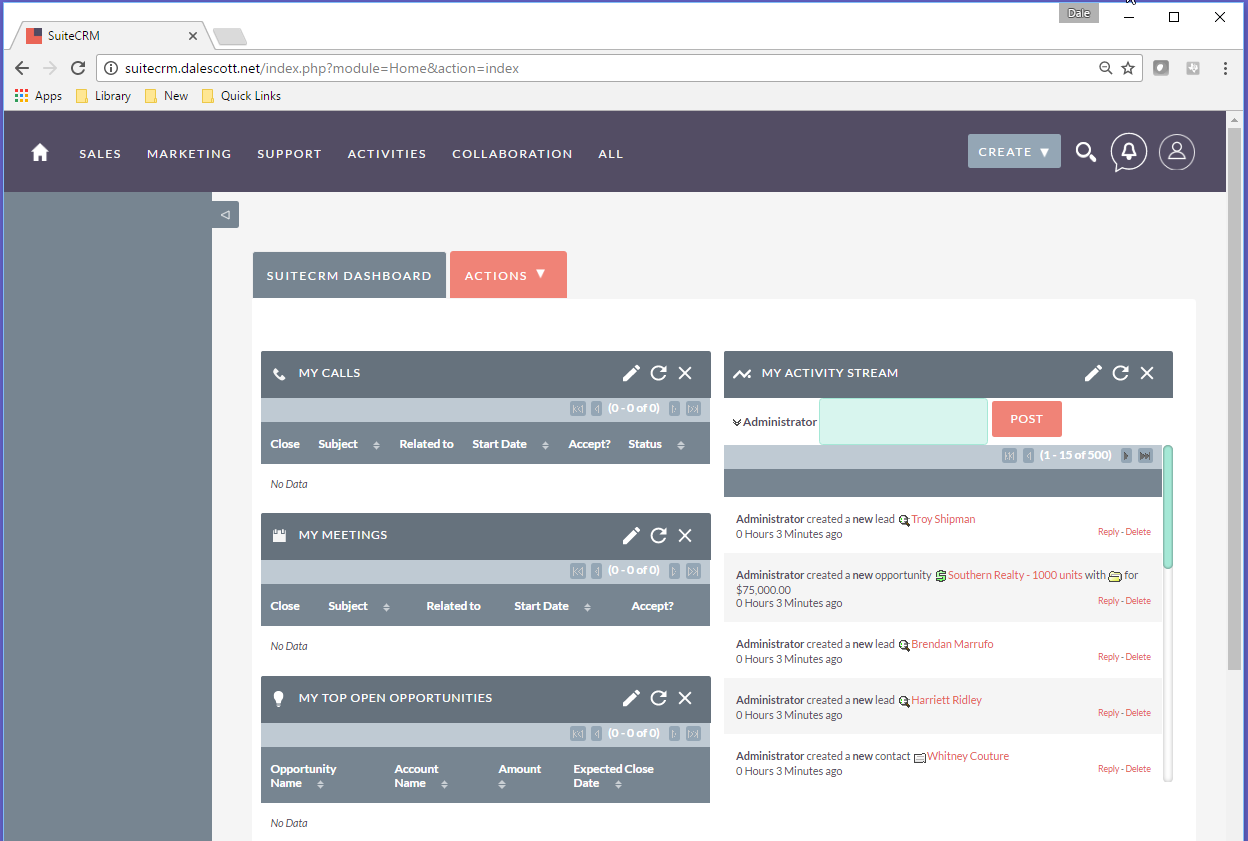
Login
Login using the admin user and password. After authentication the SuiteCRM dashboard will be displayed.
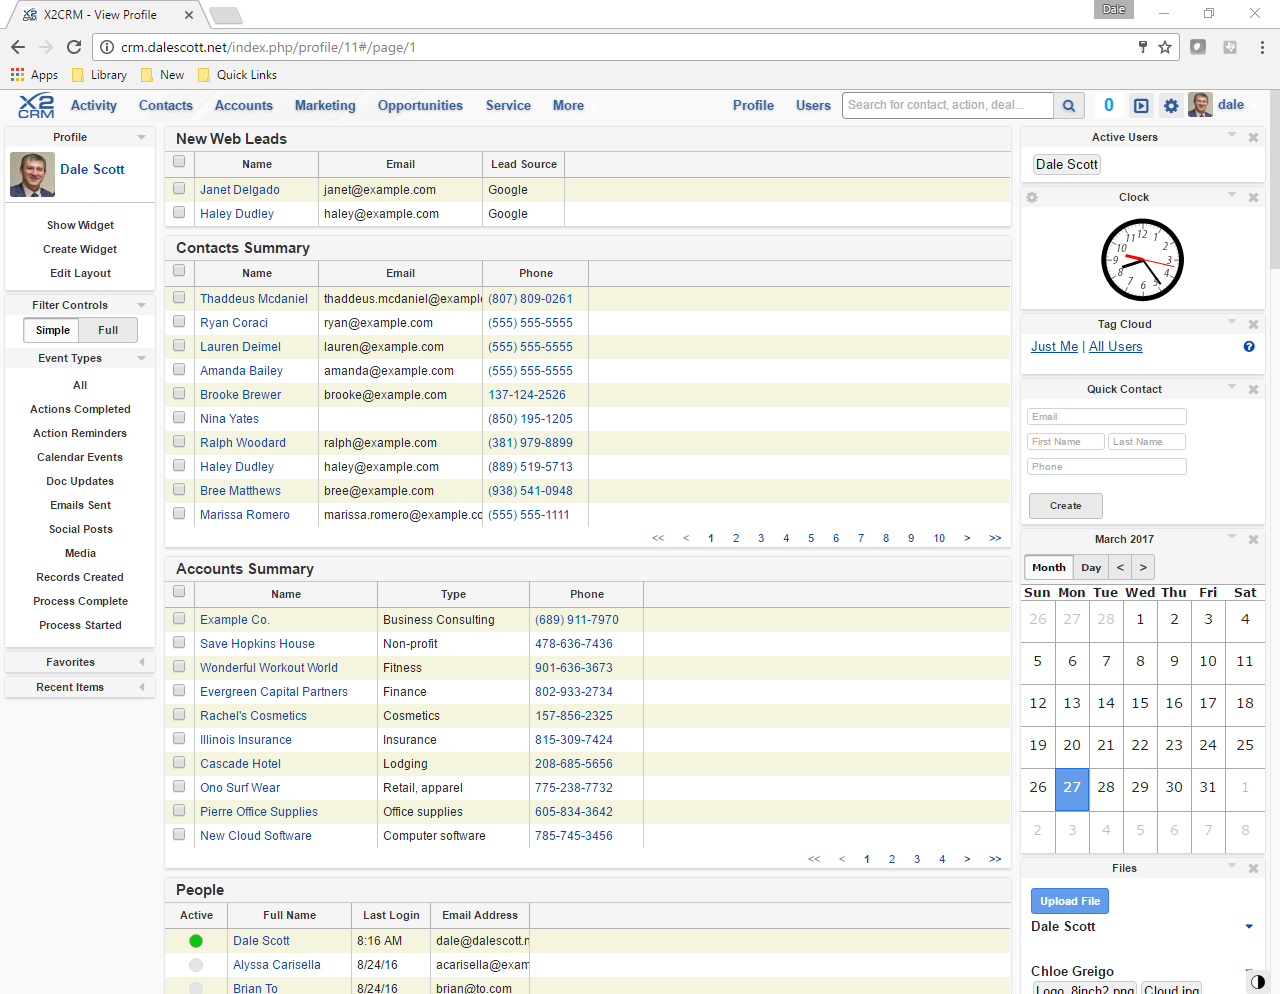
X2CRM (also known as X2Engine) is a Customer Relationship Management (CRM) web application, used by a company to store and organize information relating to customers and potential customers in a shared trusted environment. A CRM application may be stand-alone, or may integrate with other enterprise applications, such as an Enterprise Resource Planning (ERP) system (CRM may also be a module within an ERP system).
I became aware of X2CRM after discovering erpBooks “Online Inventory Management” , reportedly forked from webERP and including CRM functionality based on X2Engine (aka X2CRM).
X2CRM was founded by John Roberts, who had previously co-founded SugarCRM. His goal was to develop a superior user interface using a new data model, and to use current web technologies, compared to the first generation of open-source web CRMs. Coincidently, X2CRM was developed using the PHP Yii OO RAD framework, which I had used for my Maestro project.
X2CRM also affirmed John’s faith in an open-source development and business model. X2Engine initially used a “Freemium” business model to support itself, and provided commercial Professional and Platinum versions. However, in April 2016, X2Engine announced it had achieved revenue self-sufficiency as a company, and it was now appropriate to release all premium features of the Platinum version as open-source in the then upcoming v6.0 release (fyi, I will be installing v6.5.2).
Setup
I will be installing X2CRM on FreeBSD 10.3-RELEASE, using Apache 2.4 and MariaDb 10.0.
Download a X2CRM zip distribution archive and extract to e.g. /usr/local/www/x2crm-6.5.2.
Create a soft link from /usr/local/www/crm to /usr/local/www/x2crm-6.5.2
Configure Apache virtual host crm.dalescott.net (the server directory root will be /usr/local/www/crm/x2engine)
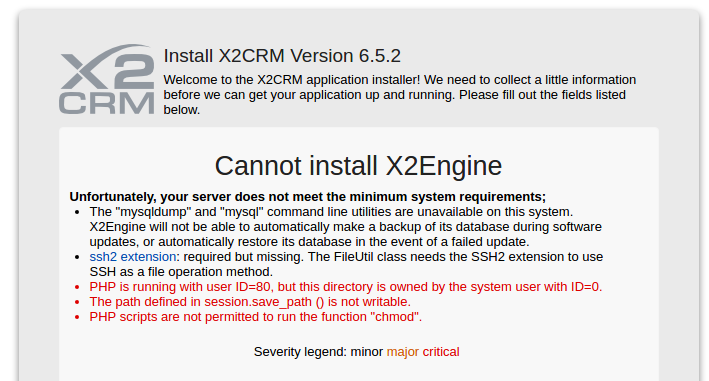
Run installer (http://crm.dalescott.net/x2engine)
Set owner of X2CRM directory tree to www:www
Install package pecl-ssh2
Install package php56-filter
Set session.save_path in /usr/local/etc/php.ini to /tmp
Add path to mysql executables to the path used by the Apache daemon.
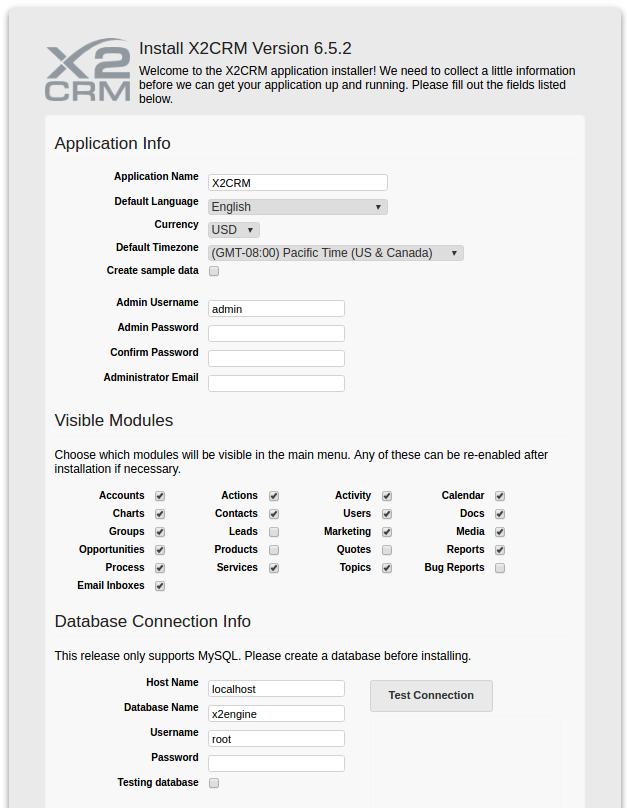
Create “x2engine” database and database user with full permissions to the database. Use these credentials in the install screen.
Check “Create sample data”.
Enter admin user password and email.
Accept default visible modules.
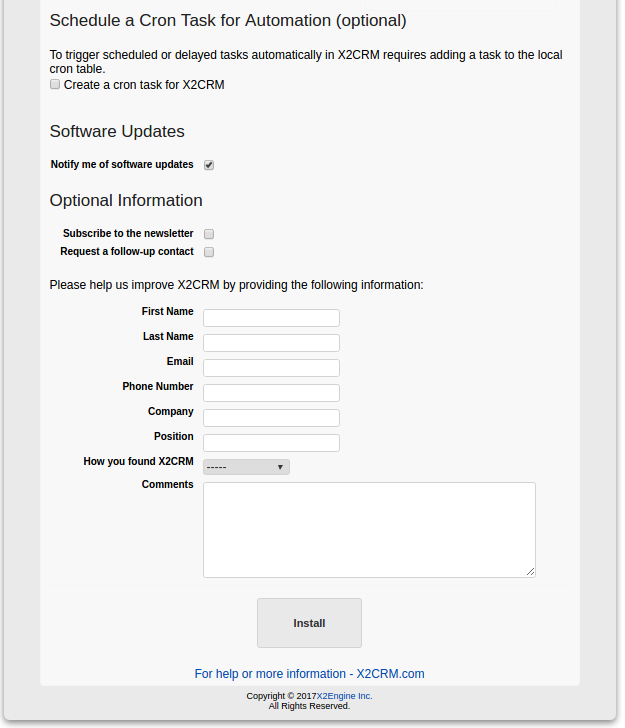
Create cron task. I selected “Create a cron task for X2CRM”, after which I was given the opportunity to select when to run the task, or simply hourly. I selected hourly, which resulted in creating a crontab file for user www (/var/cron/tabs/www).
# DO NOT EDIT THIS FILE - edit the master and reinstall.
# (/usr/local/www/x2crm-6.5.2/x2engine/.crontab.tmp installed on Sun Mar 26 20:44:57 2017)
# (Cron version -- $FreeBSD: releng/10.3/usr.sbin/cron/crontab/crontab.c 293132 2016-01-04 03:20:41Z pfg $)

#<X2CRM>
@hourly curl http://crm.dalescott.net/index.php/api/x2cron &>/dev/null #@X2CRM@default#@X2CRM@Run delayed or recurring tasks within X2CRM
#</X2CRM>
Install!
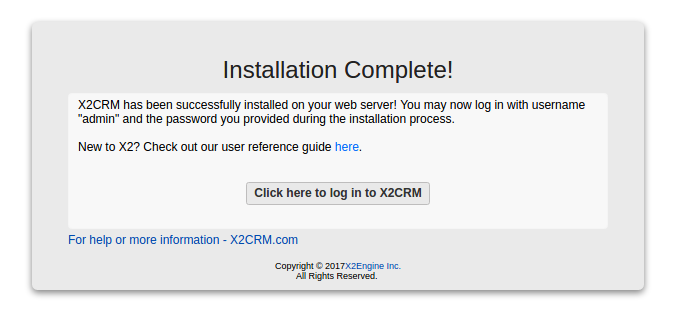
Login
Login using the admin user and password. I have already logged in as admin and created a new user for myself.
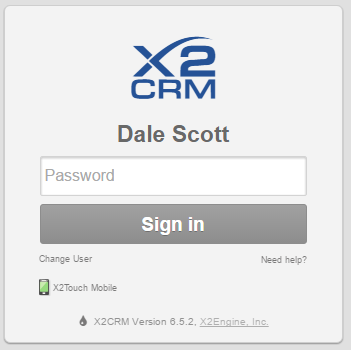
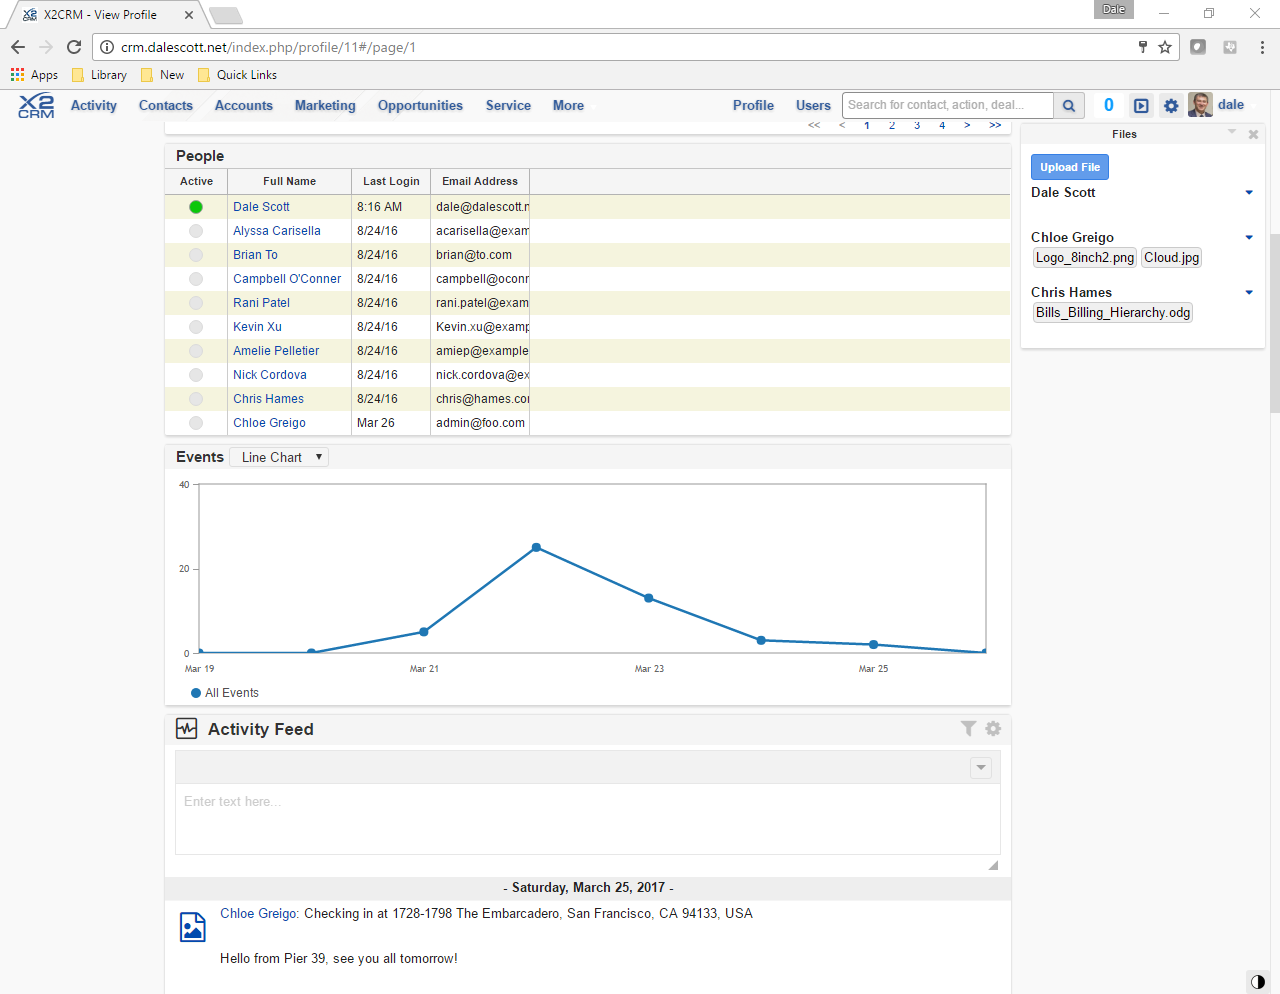
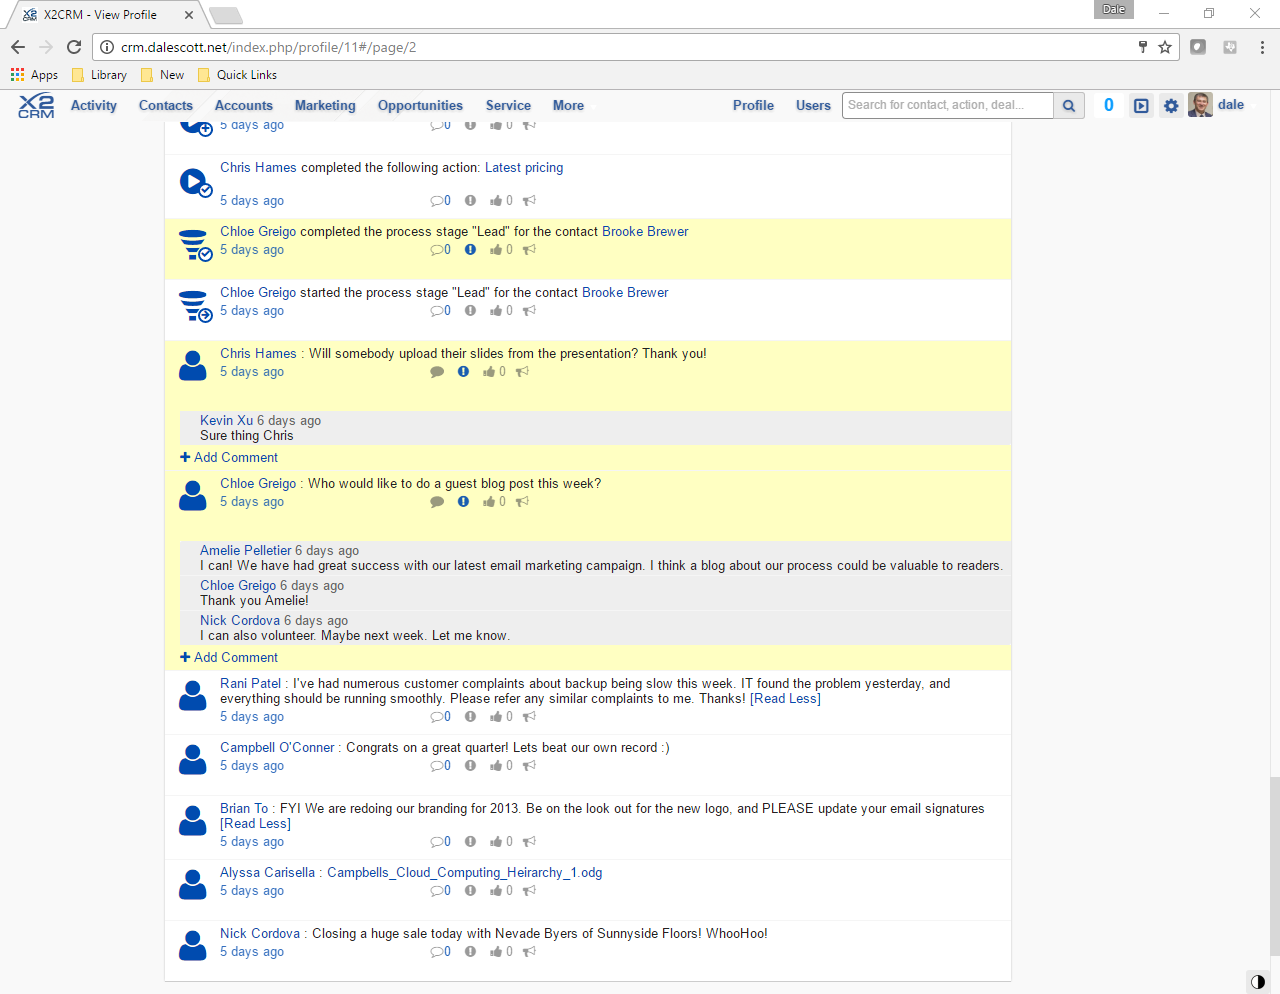
Once authenticated, the X2CRM dashboard is presented. There’s a lot of information, and the bottom of the dashboard is the message feed.
An ERP system offers numerous advantages for manufacturing operations, primarily by centralizing data and streamlining processes. It provides real-time visibility across the entire supply chain, from raw material procurement to finished goods delivery, enabling better inventory management and reducing lead times. Automation of repetitive tasks, such as production scheduling and order processing, significantly boosts efficiency and minimizes human error. Furthermore, by integrating financial, production, and sales data, ERP facilitates more accurate forecasting and data-driven decision-making, ultimately leading to cost reductions and improved profitability. This comprehensive integration fosters enhanced collaboration among departments, ensuring everyone works with consistent information and towards shared organizational goals.
Features of using webERP for manufacturing include:
Efficiency. Items, Vendors, Work Orders, etc. are managed within one controlled system. Fix a problem once and it’s fixed everywhere.
Visibility. A visible, trusted, change management process and a chain of truth.
Scalable. Readily scales with users, items, vendors and orders, and adapts as your processes change over time.
The custom inductor in the Aircraft Wireless will be used to explore basic manufacturing using webERP. Documentation will be stored in the webERP Knowledge Base (integration with WackoWiki CMS).
Goal
Manufacture an assembly automatically issuing items on the BOM.
Manufacturing Cycle
The general manufacturing cycle in webERP is:
Enter a Work Order to manufacture an item according to its bill of materials (BOM).
Receive the finished manufactured items (the output from the work order) into stock. Input items listed on the bill of materials to auto-issue input items will be transacted to the work order at this time.
Issue any additional input items used in in the manufacturing process to the work order).
Close the work order.
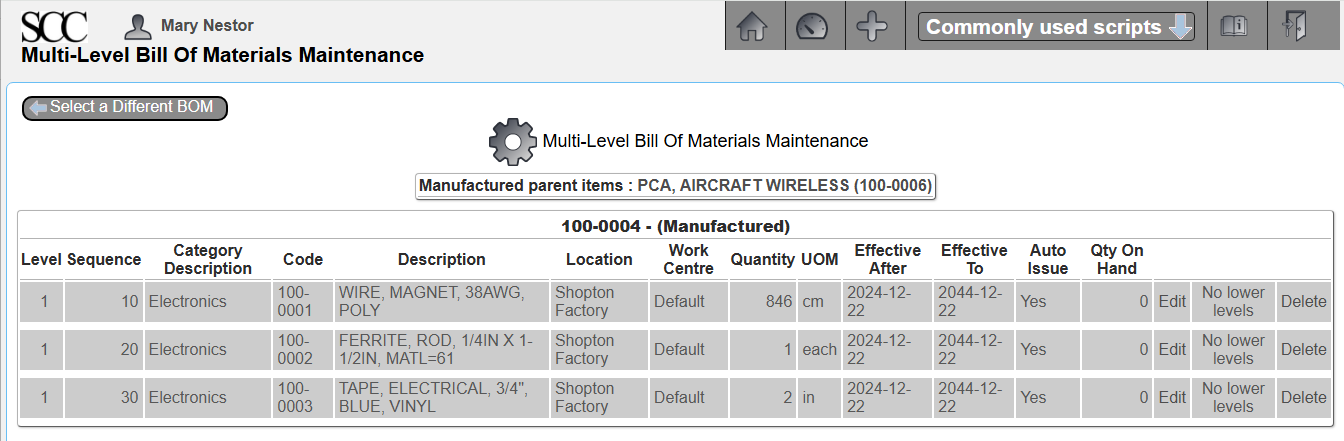
The item to be manufacutured is item 100-0004, a custom electrical inductor. The inductor has been designated as as Manufactured and a Bill of Materials (BOM) has been created (for details, see Manage Parts, Suppliers and BOMs using webERP).
The procedure will be:
The Manufacturing Scheduler creates work order and assigns to assembly technician.
The Manufacturing Technician:
Prints work order and kits required input materials from stock room.
Initials each input item quantity as removed from stock.
Completes finished coils.
Initials work order showing complete and returns to scheduler.
The Manufacturing Scheduler receives the output items into the work order, causing input items to be transferred from stock and closes the work order.
TODO add swim-lane diagrams showing manufacturing process.
TODO add examples of documentation.
User Permissions
We will login as user “mnestor” (Mary Nestor), who is assigned the Administrator security role so it won’t be necessary to understand the inner workings of the webERP role-based user security scheme before actually working with webERP. The Administrator role has all the necessary permissions for most operations (except occassionally a user with the Accountant security role will be needed for finance related operations).
In actual use however it is important each user has their own login with a password only they know. This allows correctly identifying the person performing an operation and provides tracibility. This is especially important if you will be using webERP in a regulated or controlled environment.
Default (out-of-the-box) security permissions will get you started but you should create bespoke security roles and token assignments based on the structure, staff and roles of your company.
Configuring user permissions is covered in more detail in the webERP User Permissions chapter.
Setup
TODO add setup unique to manufacturing.
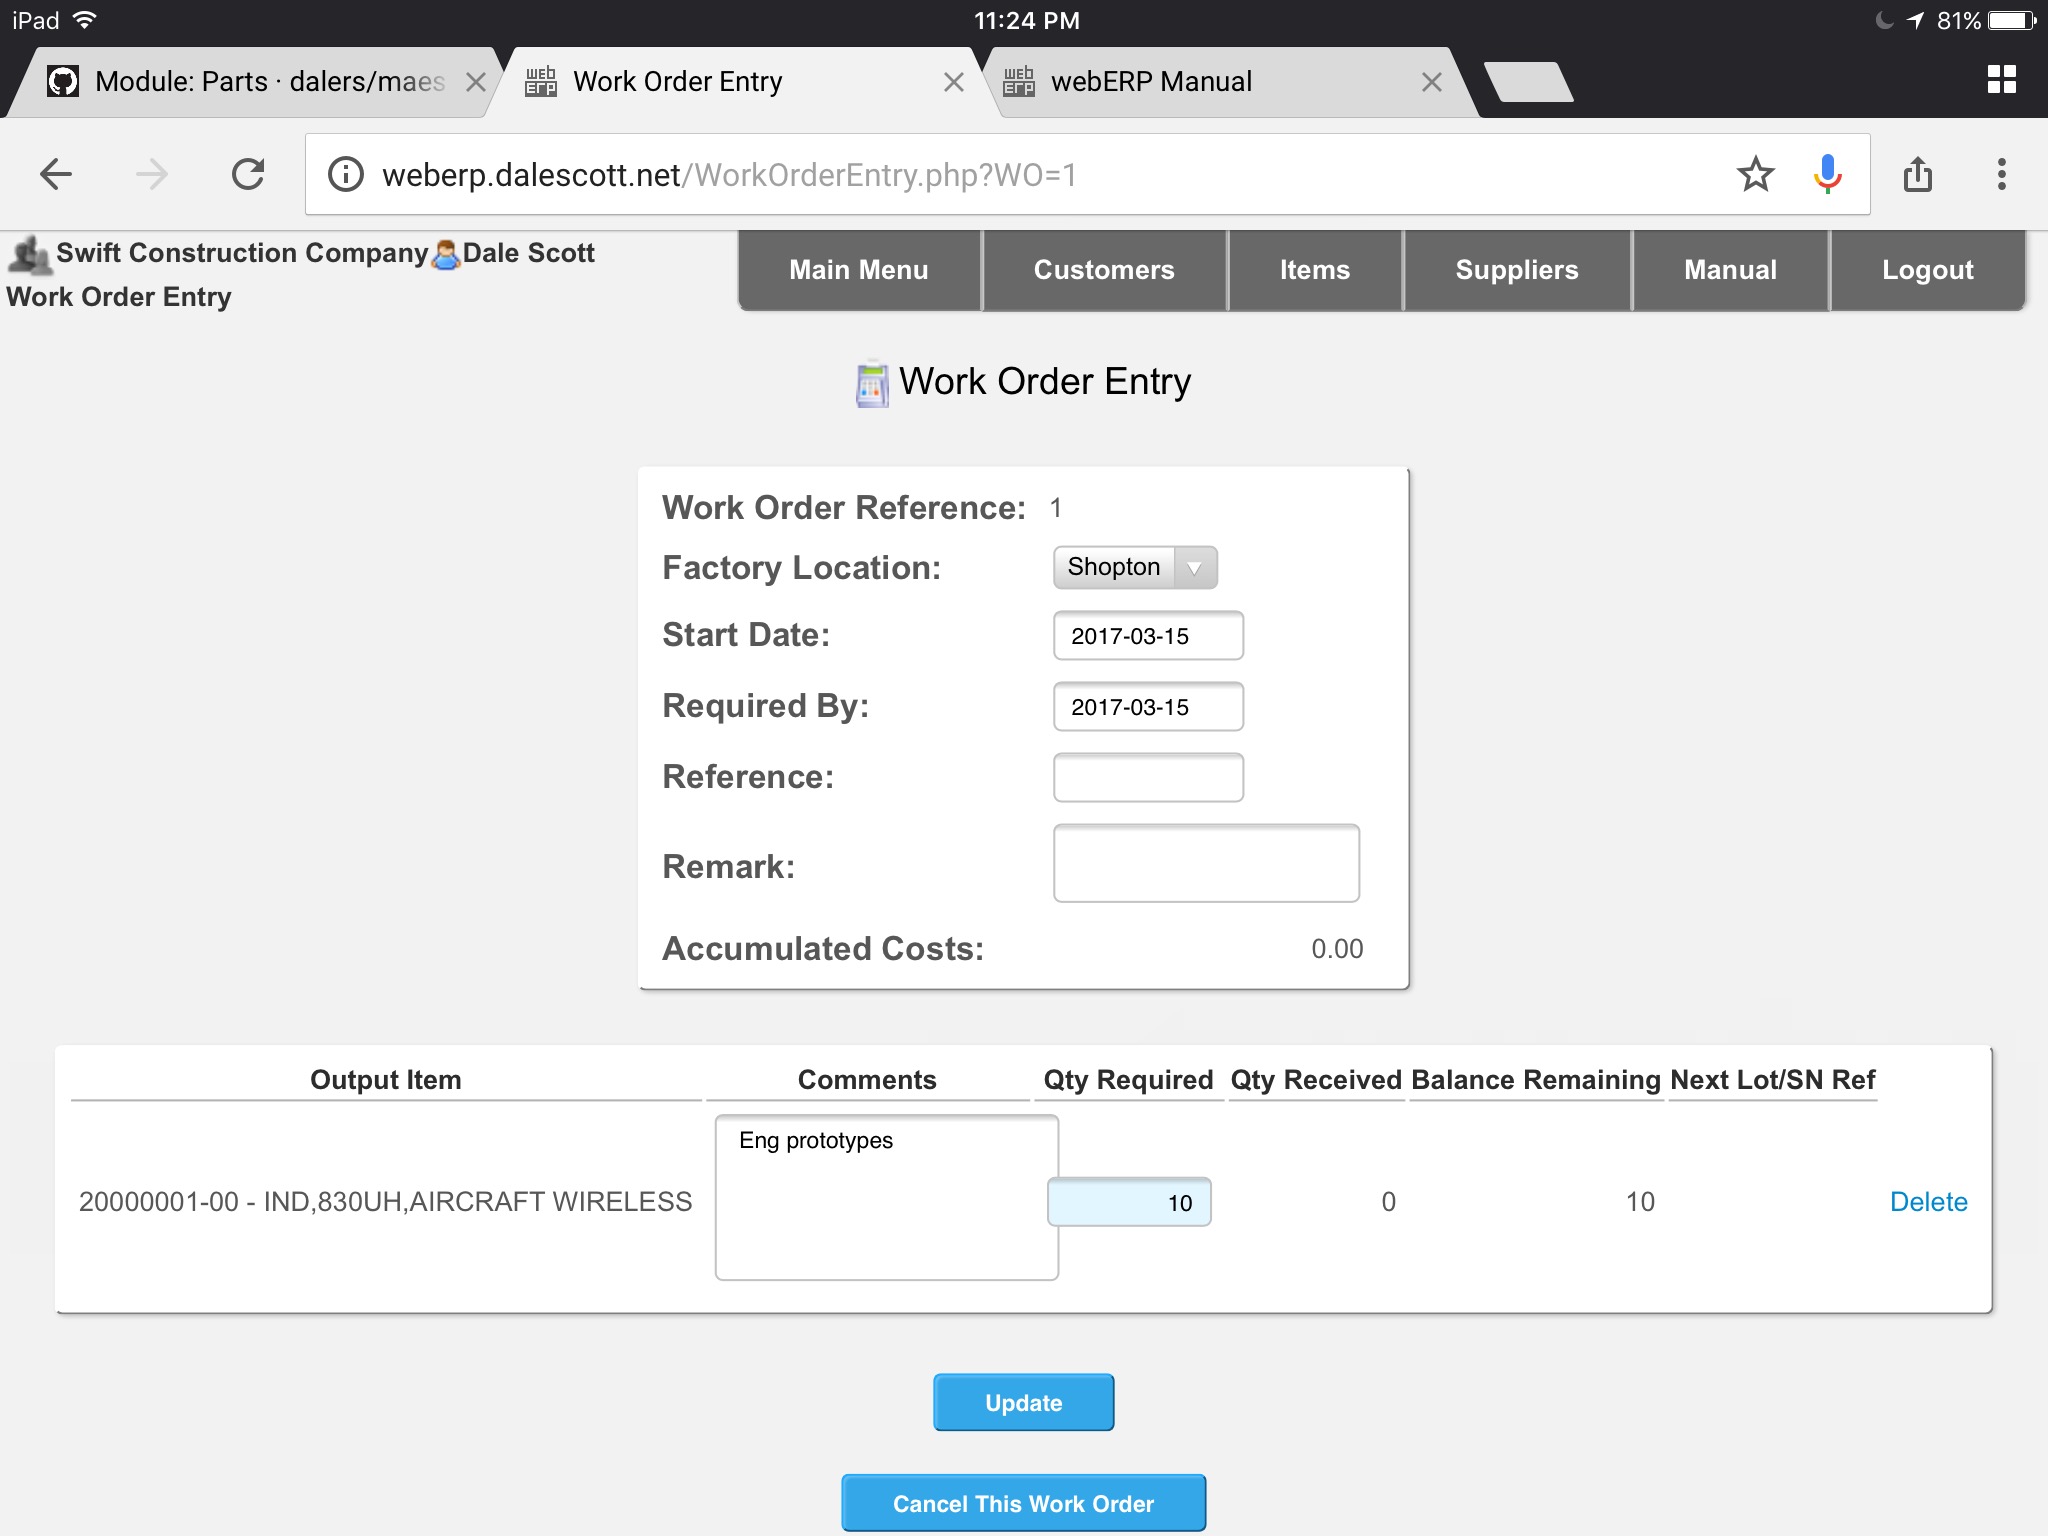
Create Work Order
FOLLOWING CONTENT HAS NOT BEEN UPDATED TO webERP v5 (images and text refer to v4)
A work order essentially converts the list of raw material required to manufacture an item (the Bill of Materials, or BOM) into one or more outputs. The work order can be printed and used to kit the necessary raw materials, and also used as a traveller for the Work in Process (WIP).
Create a new work order.
Enter optional Reference and Remark. TODO explain why
Search & select output item 20000001-00. Update.
Enter Qty 10 and comment for output 20000001-00. Update.
The work order can be printed and signed as record of kitting, and also as a record of additional input items to enter before closing the work order. A printed copy of the work order often travels with the WIP as identification (also called a traveler). Labels can also be printed for later attaching to the manufactured items.
[Main Menu > Manufacturing > Transactions > Work Order Entry]
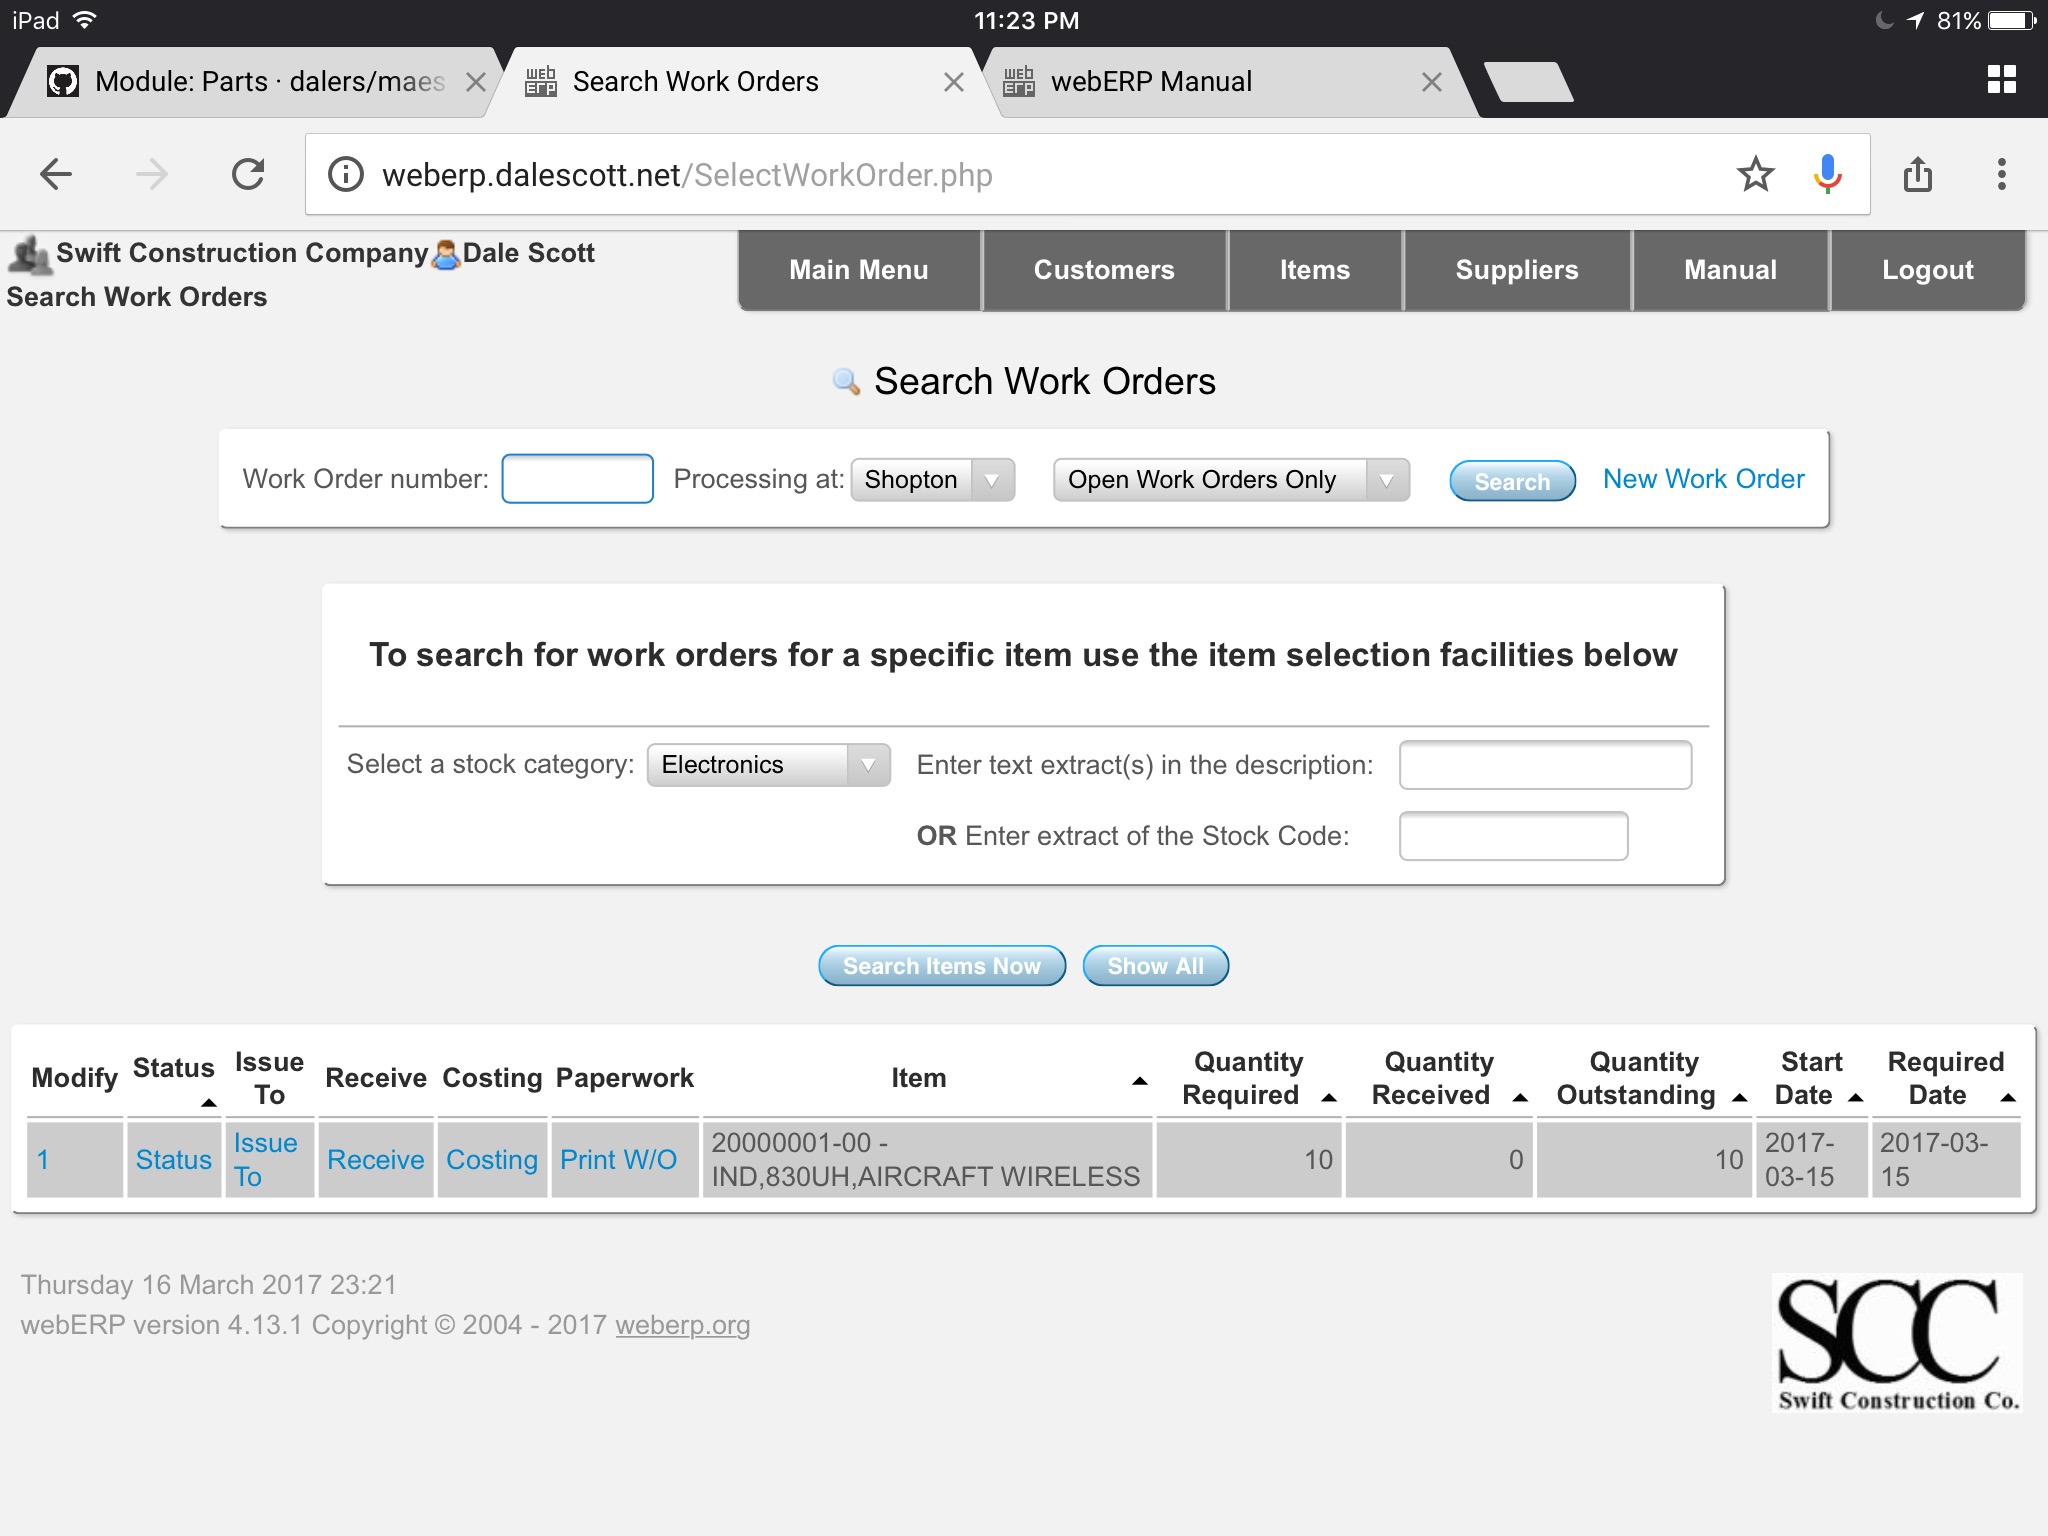
If you search for work orders you will see that the new work work is now recorded in the system.
The work order status shows demand for the raw materials needed to manufacture the inductor, which indicates they have not been issued.
You will also see that there is qty 10 of item 100-0004 on order.
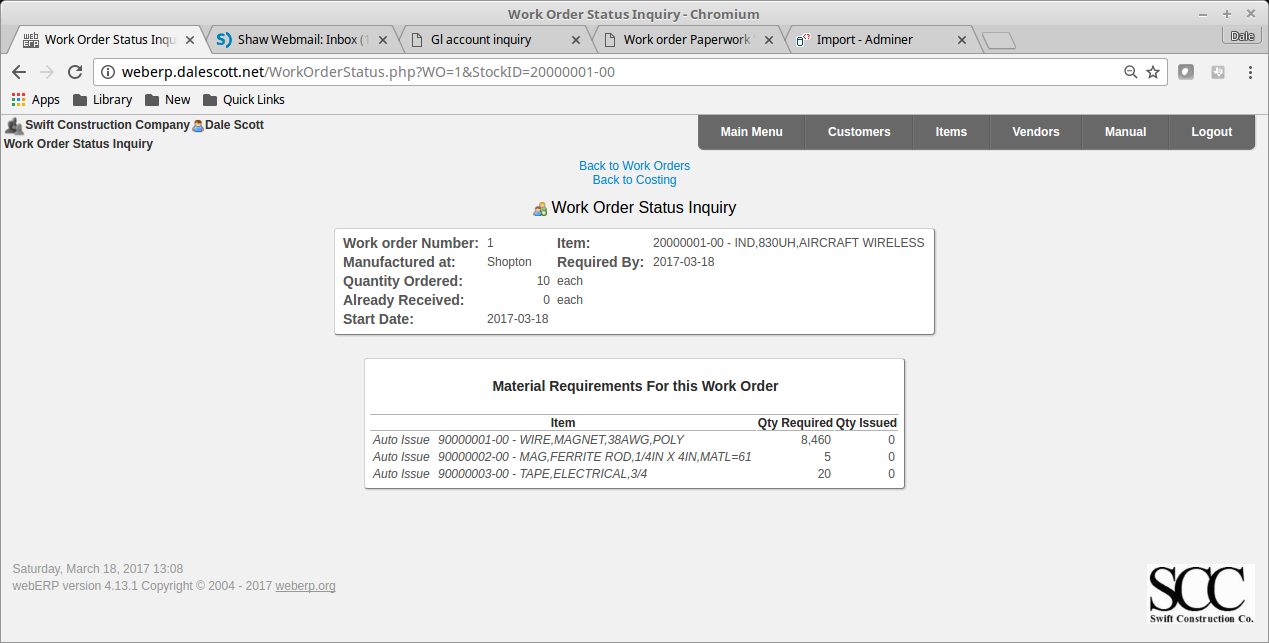
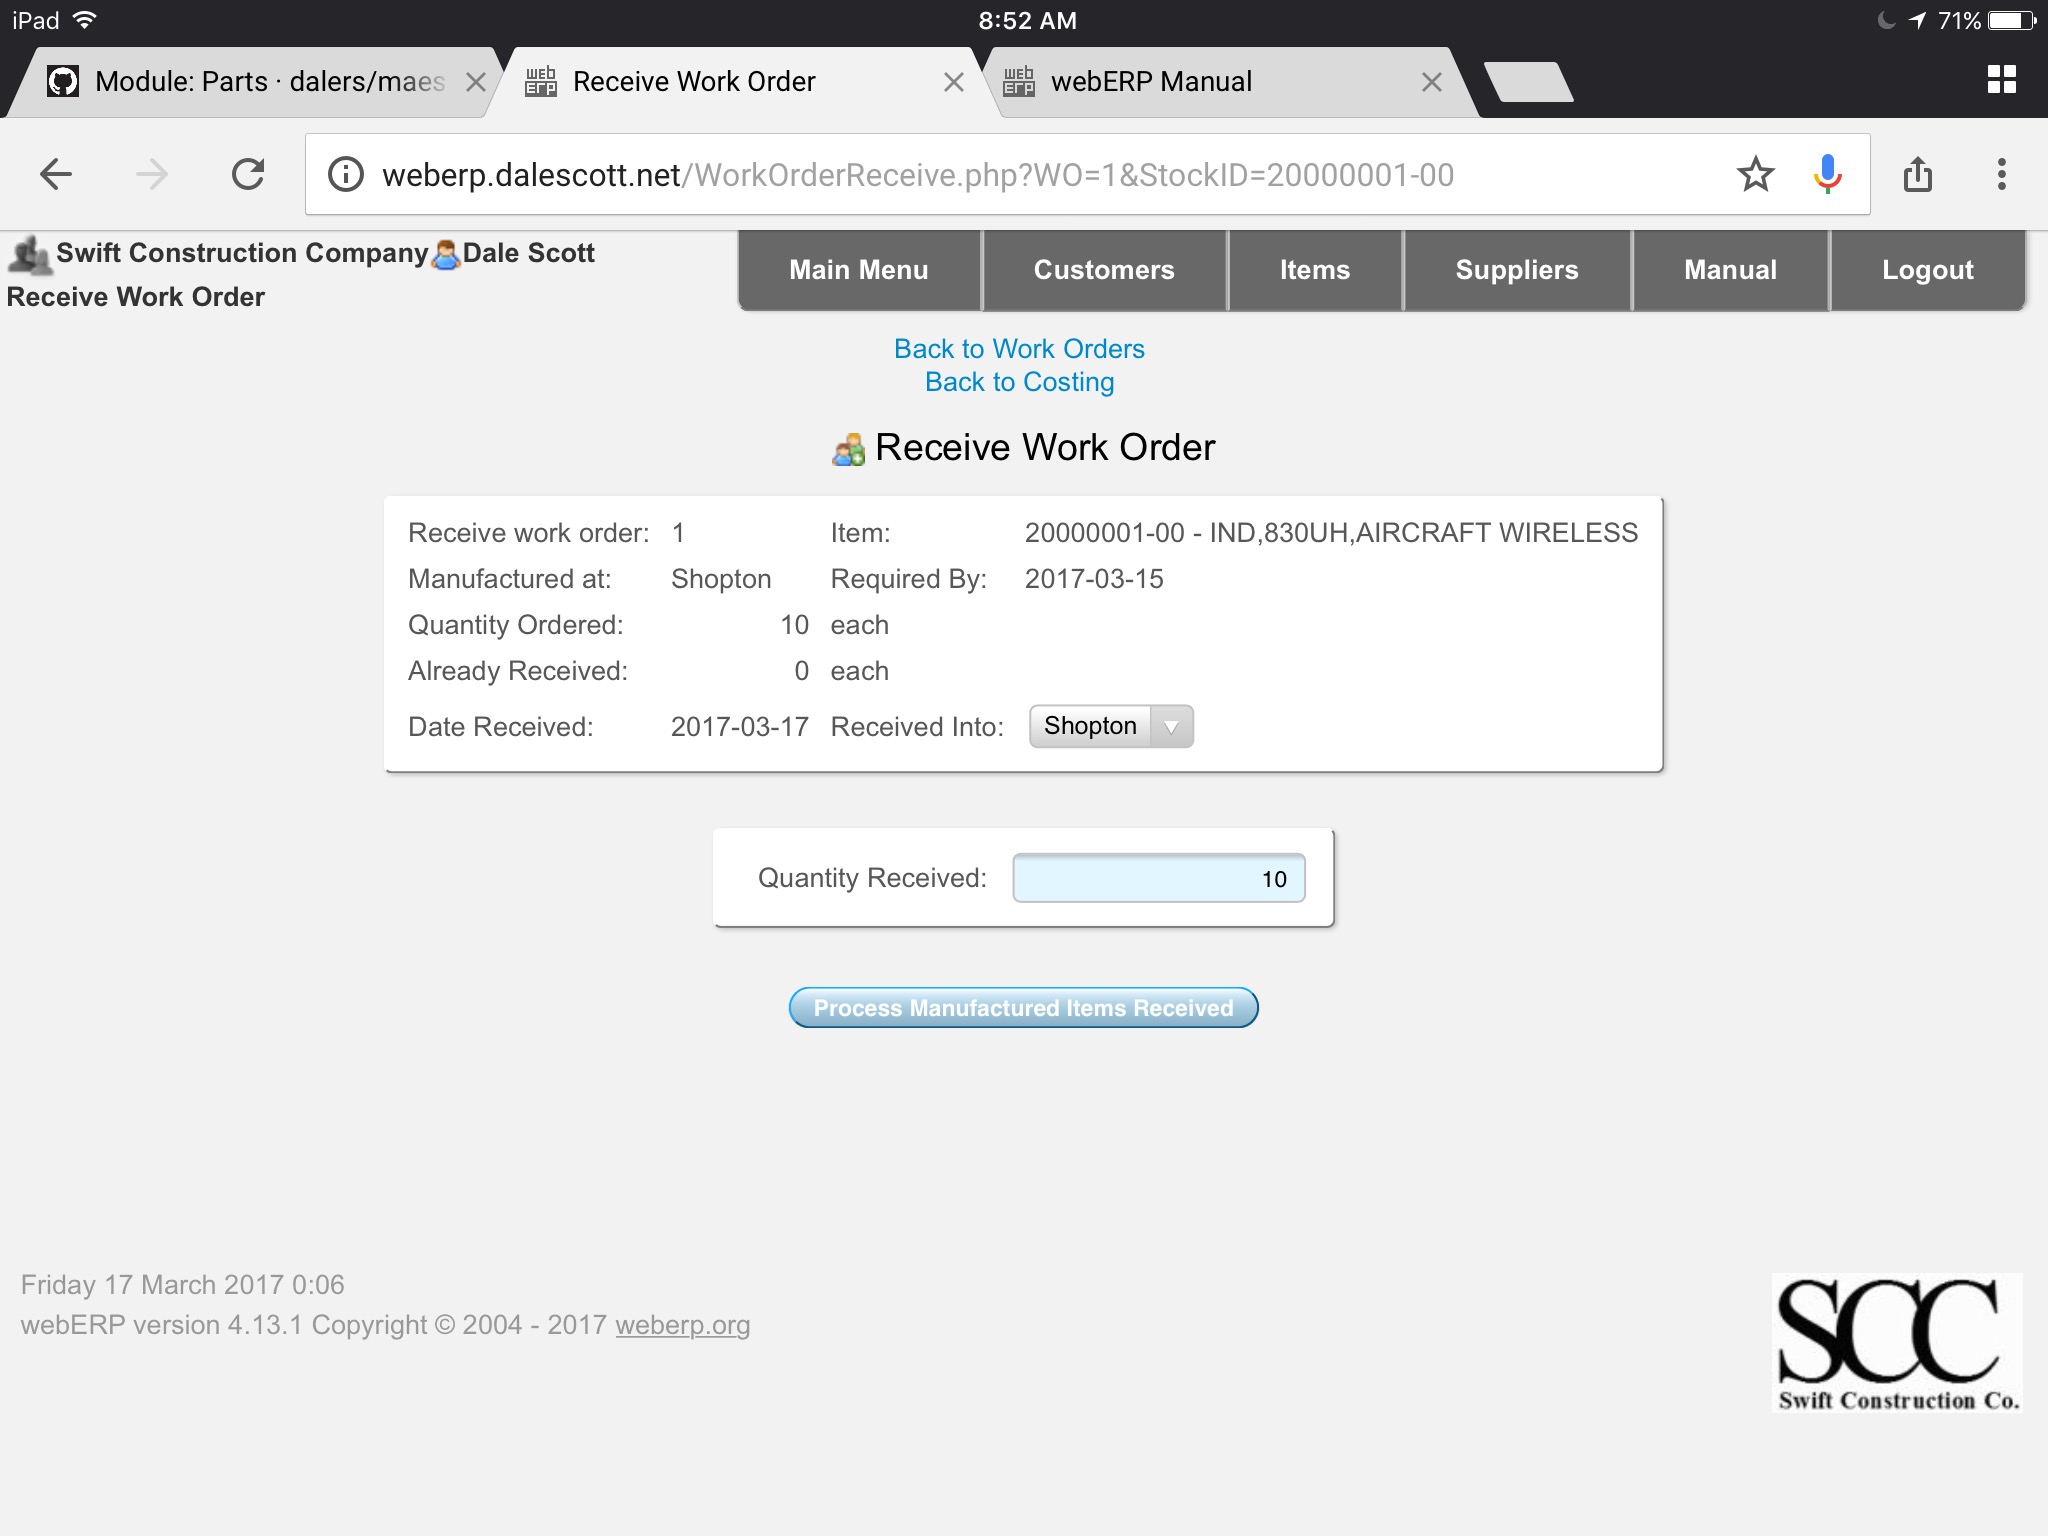
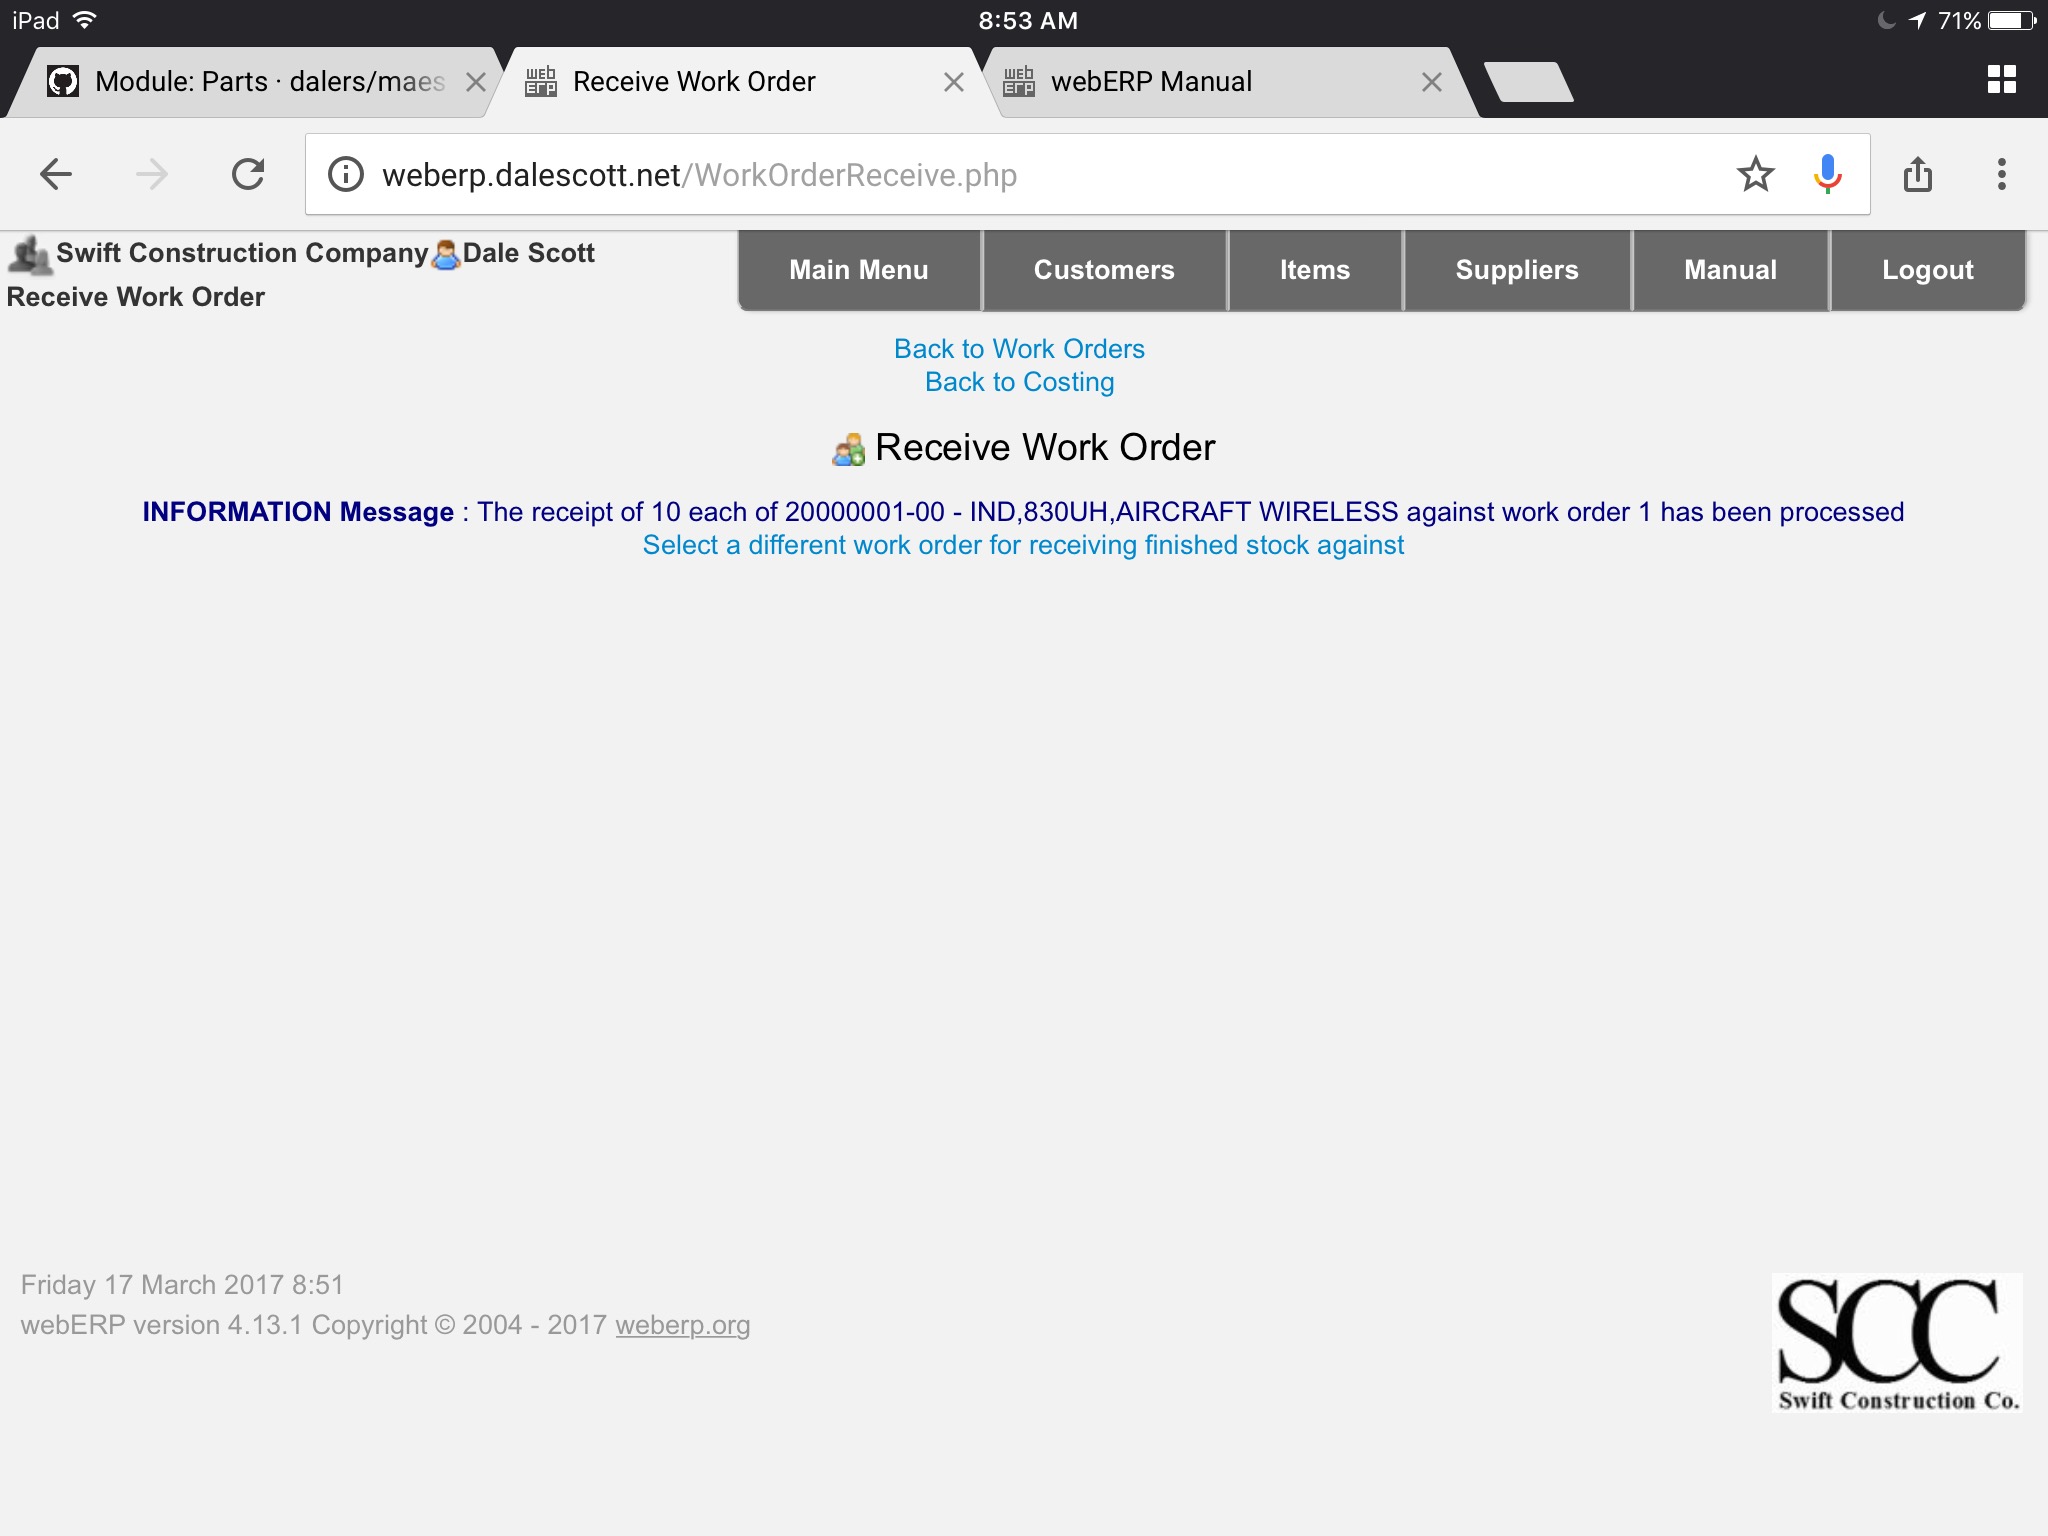
Receive Output Goods
When the output items have been manufactured they are received against the work order. For simplicity I will assume the manufacturing process was flawless, with no waste and all the manufactured items meet spec (see the manufacturing and test procedure filed in the Knowledge Base). TODO correct link
Items listed on the BOM as auto-issue will issue to the work order at this time.
Process Manufactured Items Received
TODO describe procedure.
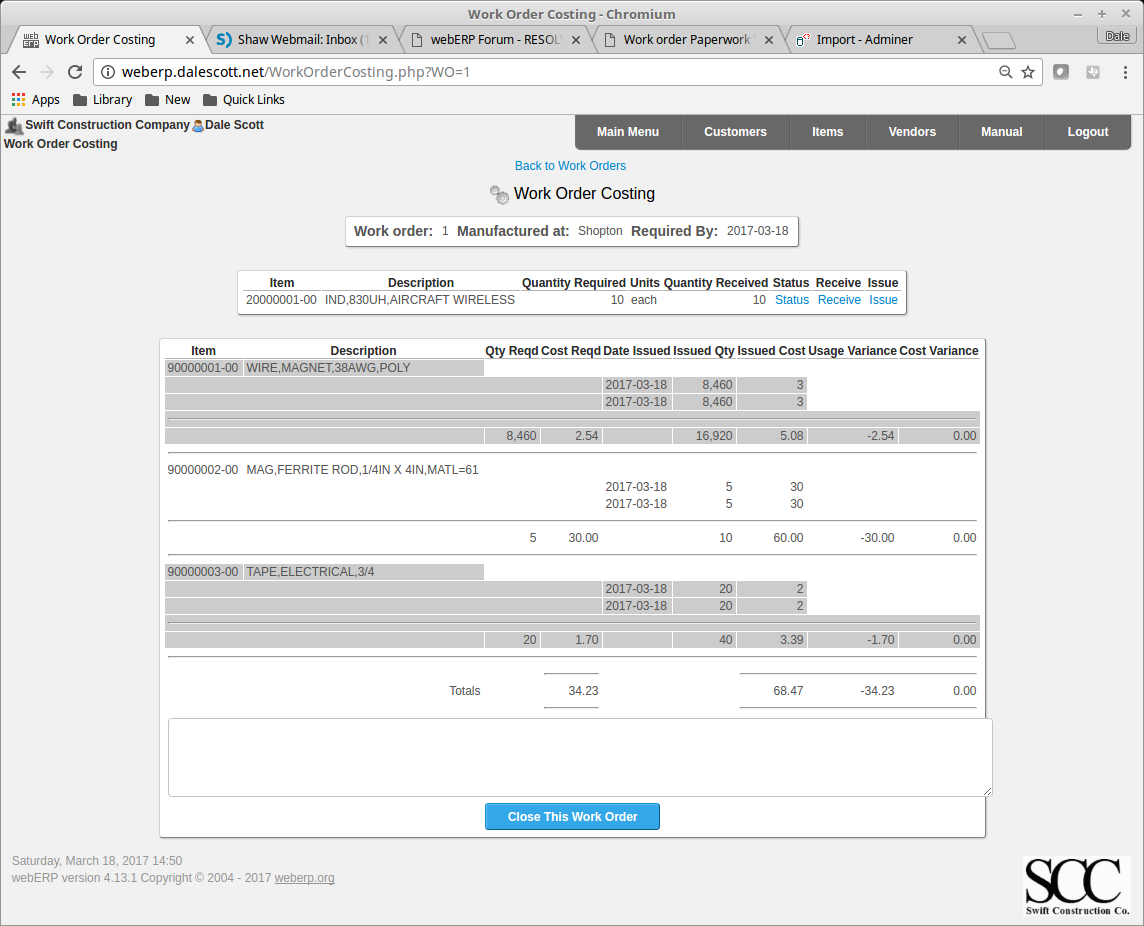
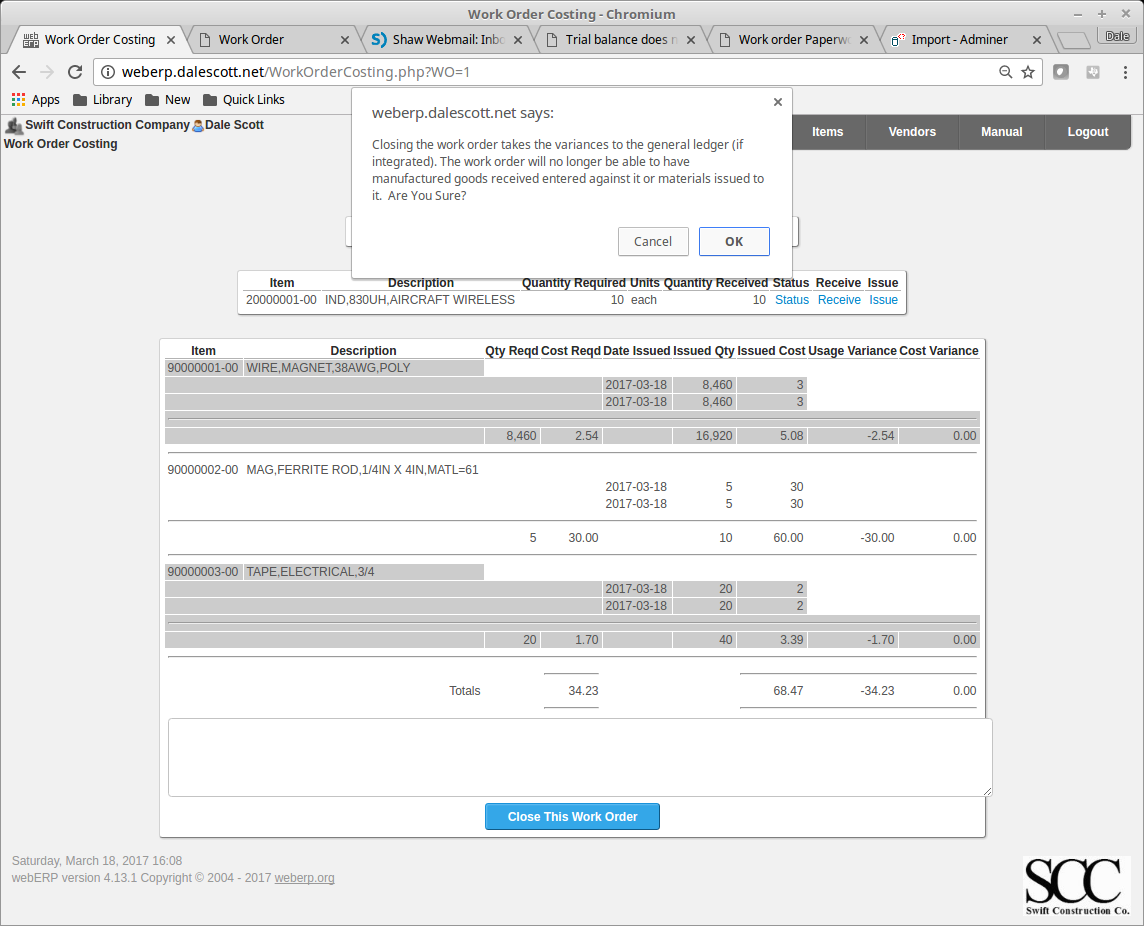
Close Work Order
Close the work order after all raw material has been issued to the work order and all manufactured items have been received against the work order. Review the work order costing,
[Main Menu > Manufacturing > Transactions > Select a Work Order > Select > Costing]
and close the work order.
Summary
This completes a basic introduction into the manufacturing process using webERP.
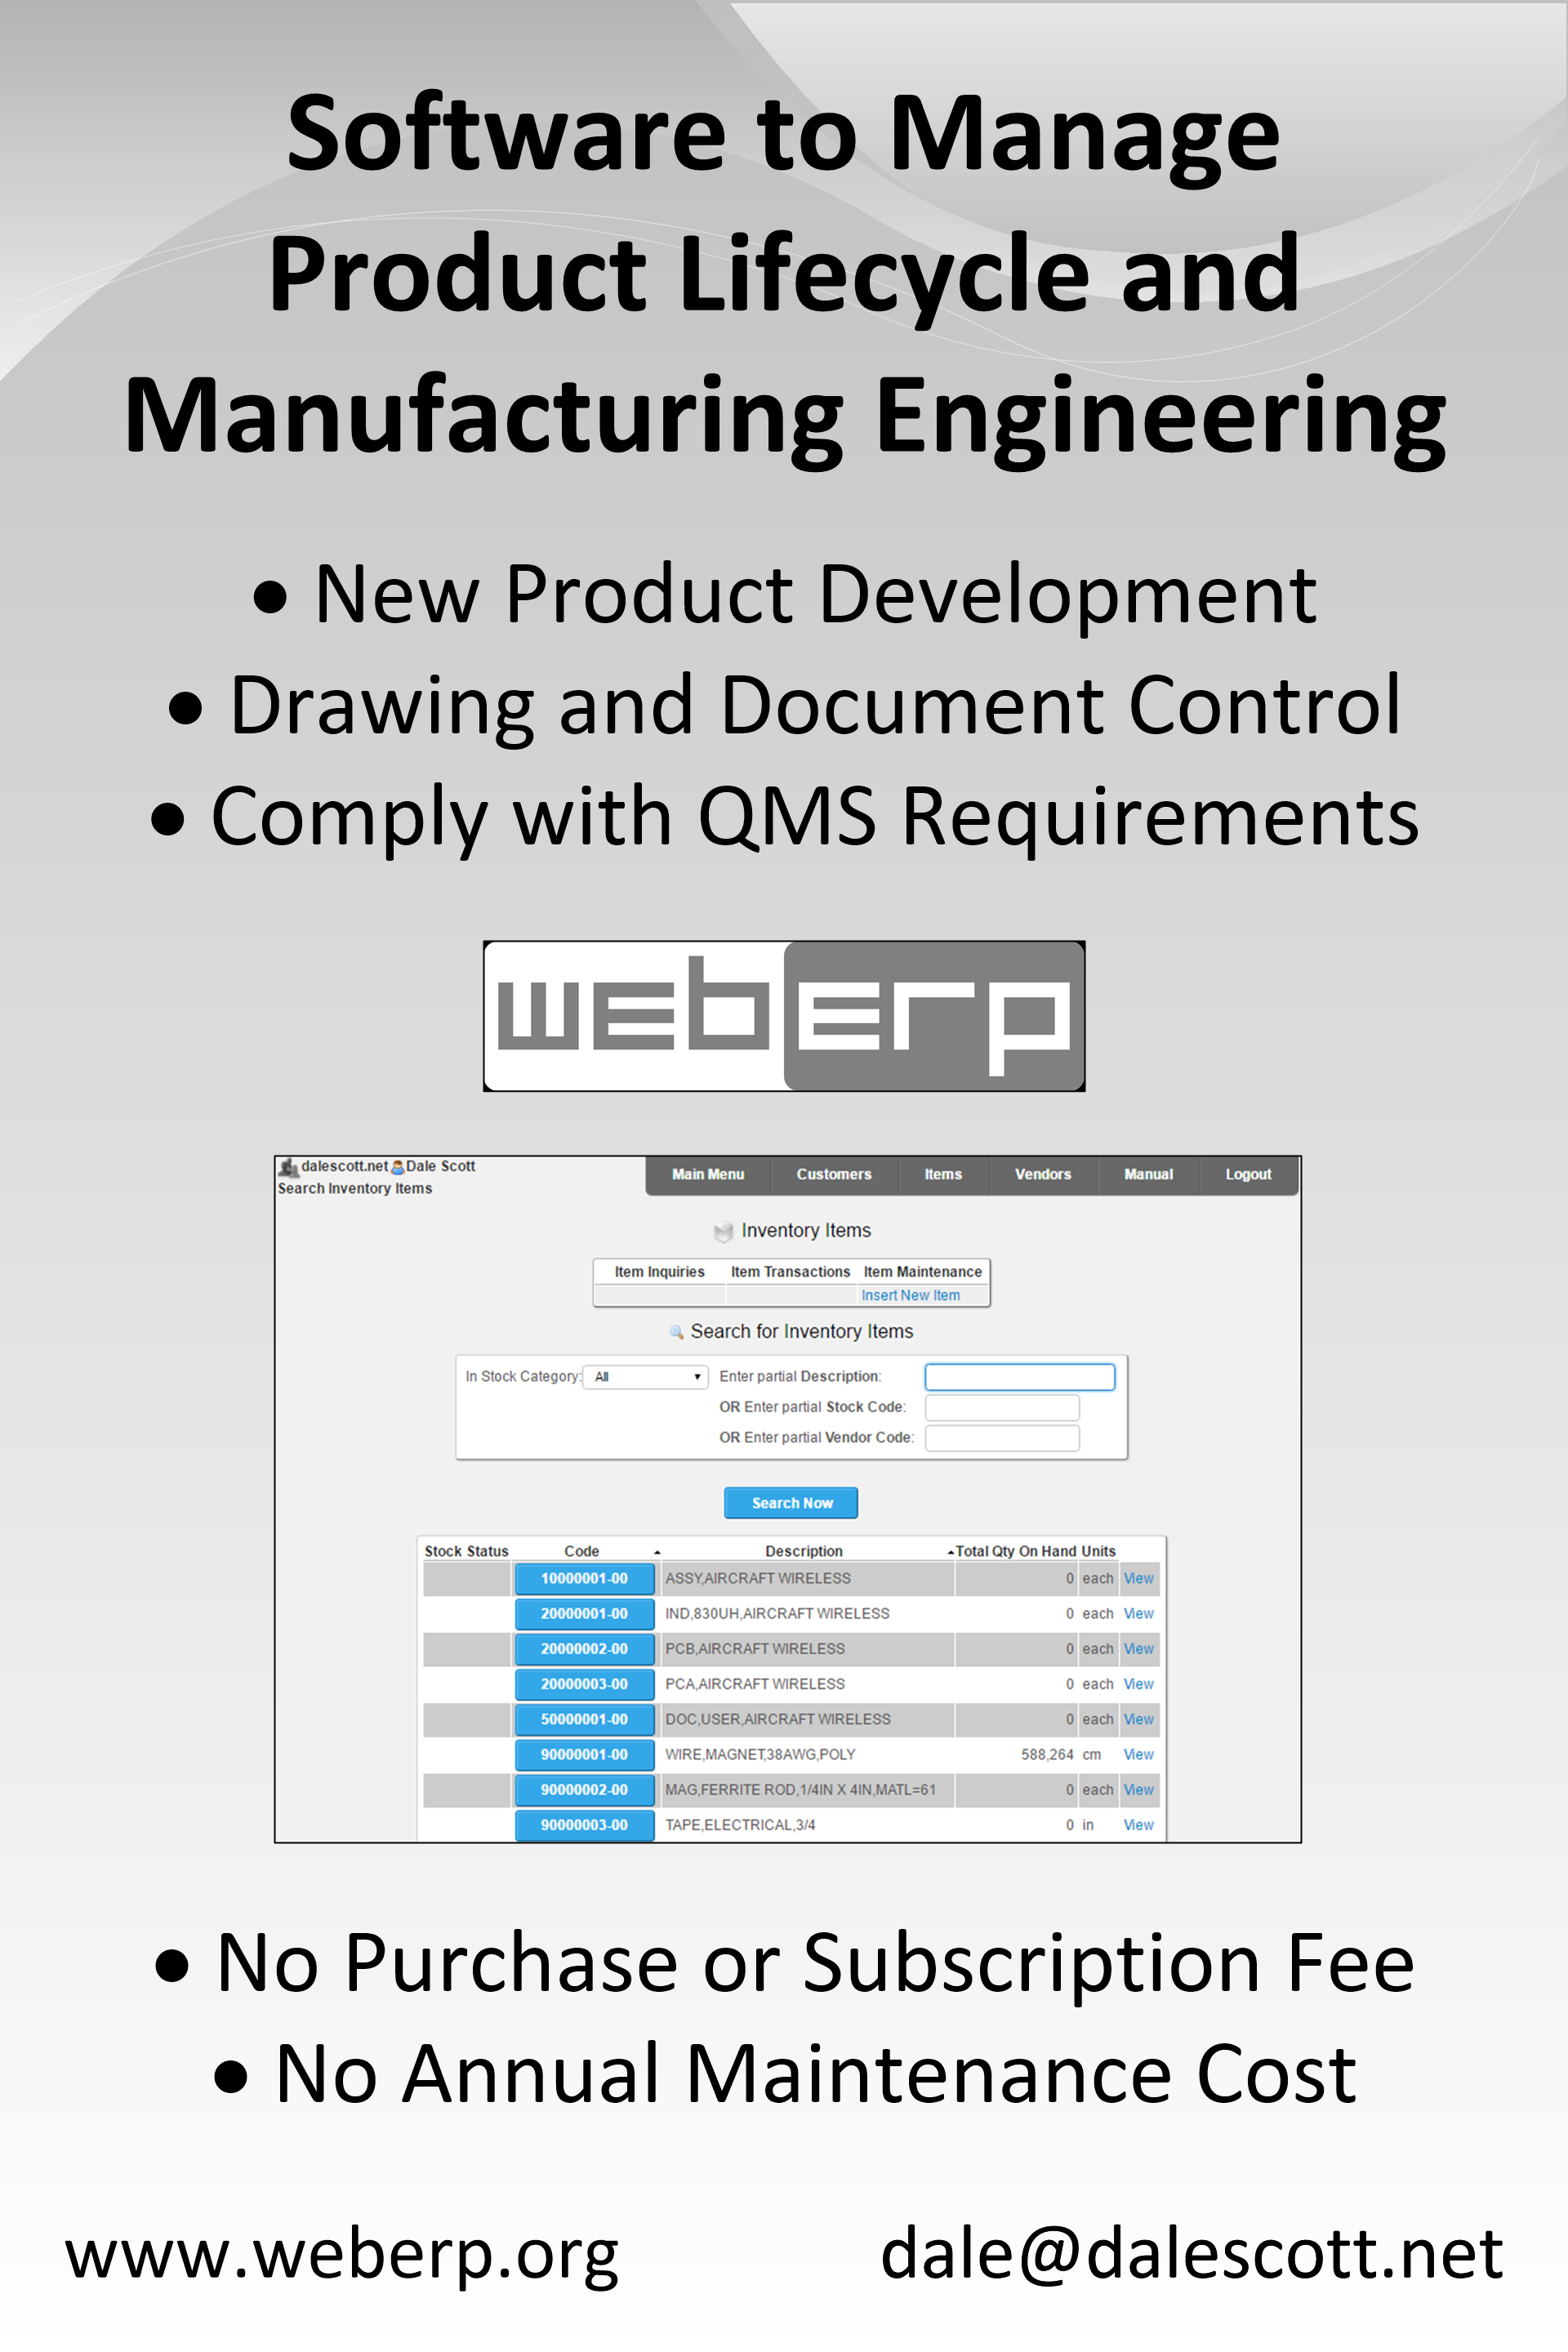
I will be at the EPTECH electronics exhibition in Calgary on March 9 to present webERP as the ideal platform for engineering PLM and to manage parts and orders for engineering prototyping and small-volume production. Watch for me if you’re going to be there, I would love to hear about the challenges facing you, and what strategies you have found work best.
Engineering teams need to manage part numbers for off-the-shelf and custom parts, and bills of materials for assemblies, including keeping track of selected COTS OEM part numbers and vendor information for purchasing, and the current revision of a custom part (and why it’s the current version). Engineering teams must also control source documents for custom parts, such as mechanical drawings, schematics and PCB fabrication files, and also often manage prototype and small-volume purchasing and manufacturing.
webERP is the ideal platform for an engineering team to organize and manage this information with trust and transparency, providing controlled access to anyone in the organization who needs it. webERP is a fully-featured enterprise-grade ERP system, but it is equally suitable for use at an engineering department level.
EPTECH is Canada’s only series of coast-to-coast national electronics shows, targeting electronics designers, engineers, technicians, technologists, purchasers, technical managers and researchers. A broad spectrum of the electronics industry will be on display, including passive and semiconductor devices, electro-mechanical components, test equipment, contract test and manufacturing services…. EPTECH is also a place where the local community can cross paths on an annual basis, the significance of which is often under-estimated.