Search for other ERPNext-related posts
Product Lifecycle Management (PLM) involves managing everything about a product from cradle to grave – from design and new product introduction (NPI) to termination or end-of-life. PLM encompasses product management, engineering design, product-specific business and manufacturing processes, new product introduction (NPI), and product data management. A PLM system integrates people, parts, processes and issues, and provides a trustable and transparent infrastructure backbone for the business.
Enterprise Resource Management (ERP) is a superset of PLM. ERP was born from a manufacturing need, but a modern ERP today includes accounting and financials, sales, customer relationship management, human resource management, and other core business systems – including PLM. However, modern ERP systems have also become complicated and expensive, and a successful implementation often requires that the business more conform to the ERP than vice versa. A new type of ERP is emerging, called Postmodern ERP. Postmodern ERPs are designed from the ground up to be simple and flexible, more capable of modelling a business than imposing conformity, and available to organizations of even modest requirements or means.
ERPNext is a postmodern ERP system, and includes basic PLM functionality. Although not as feature-rich as a dedicated PLM might be, ERPNext is capable for many situations, it is also less complicated, already integrated, and a capable starting point to build on. Features of ERPNext related to PLM include:
- Integrated data. Items (parts), purchase specifications, engineering design documents, revisions, projects, issues, etc. All information is conveniently managed in one consistent system.
- Visible, trusted, change management with social notification.
- Scaled according to number of users, number of items and complexity of product trees, supply chain complexity, etc.
This tutorial will follow the Aircraft Wireless product designed and manufactured by the fictional Swift Construction Company.
Goals
The goals of this tutorial are to:
- Create child and parent items to model an assembly.
- Identify item supplier information for purchasing, including purchase and OEM specifications.
- Demonstrate a suitable change management process.
Future revisions of this post will expand on topics such as including anticipated purchase, process and labour costs for preliminary cosgt analysis, and defining appropriate work centers in the manufacturing process.
Definitions
Here are some terms defined in the context here.
- CSV (Command Separated Value). CSV is a common text data interchange format, with data values separated by commas. E.g. ’12,”this is text, not a number”, 15.0′ might be one line from a CSV file (notice the text is quoted because of a contained comma). Although the acronym specifies the data element separator is a comma, other separator characters such as a tab or semi-colon are also often used.
- ECO (Engineering Change Order). The name of a change management process often found in an engineering or manufacturing environment, which defines the process for making a change to an item, and thereby changing its revision level. Sometimes the ECO process is preceded by an Engineering Change Request (ECR) process in a two-phase ECR/ECO process.
- OEM (Original Equipment Manufacturer). Items may be purchased from distributors, and there may be more than one distributor selling a particular OEM item. In this case, often it is the OEM item that is critical, not who it is purchased from.
- Release. A release is a milestone in the development life-cycle of a top-level or child item, and is associated with a specific revision-level. A release provides a convenient point for synchronizing various project activities, including product features and capability, purchasing and manufacturing activities, press releases, pre-production and trade show demos, etc.
- Revision Level. An item carries has a revision level, that can be used to reference the item, and its supporting documentation, as it existed at a particular point in time. An item, and its revision level, can be updated following a well-defined process.
Item Codes and Revision Levels
I will use an “8+2” format item code, with 8 digits to specify the unique item (aka part number), and 2 digits to specify the item’s revision level.
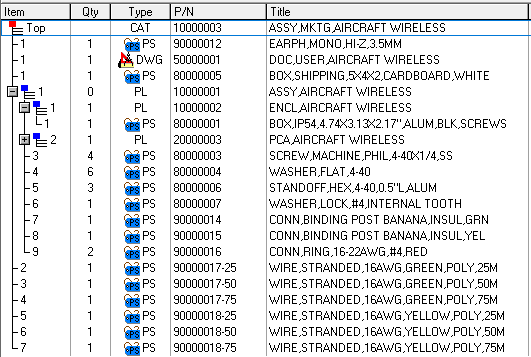
The following is the bill of materials for the custom inductor in the Aircraft Wireless.
20000001-00,"IND,830UH,AIRCRAFT WIRELESS"
|-- 90000001-00,"WIRE,MAGNET,38AWG,POLY"
|-- 90000002-00,"MAG,FERRITE ROD,1/4IN X 4IN,MATL=61"
\-- 90000003-00,"TAPE,ELECTRICAL,3/4"",BLUE,VINYL"
I will need to create the parts required for the SCC Aircraft Wireless Release-1 prototype . To create a new item, access the Item List in ERPNext and click New.
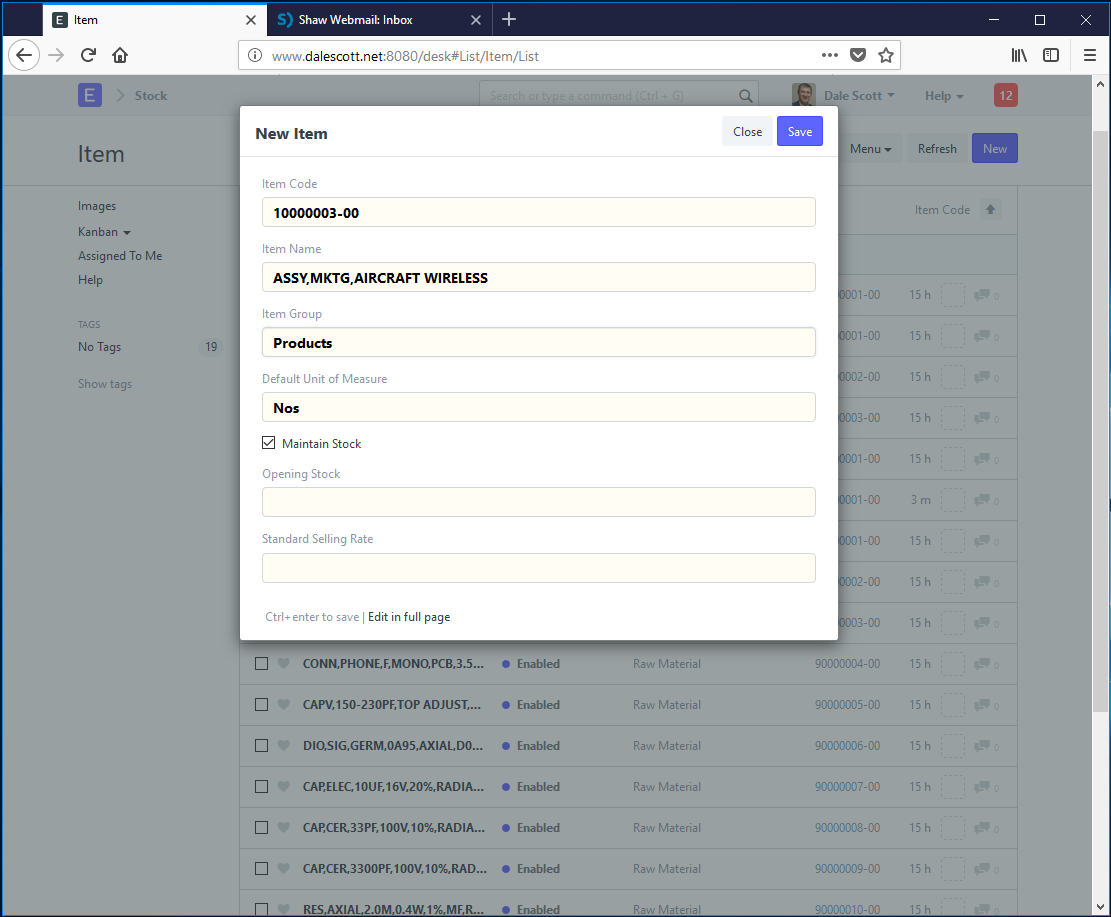
If necessary, a new unit of measure (UOM) can be created on the fly for the unit an item is managed in and consumed by.
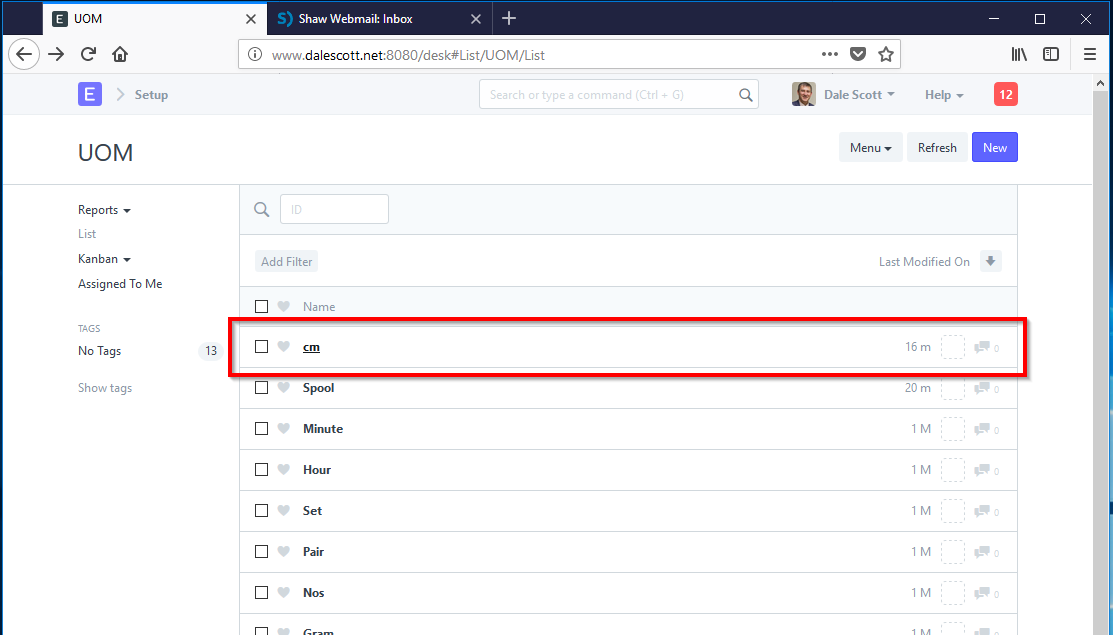
The unit of measure for the wire in the custom inductor (PN 90000001-00) is centimetres (cm), meaning the wire will be inventoried in cm and consumed by the cm. However, it will be purchased in the vendor’s unit of measure, which is a Spool. Both cm and Spool will need to be created as they are not already defined in ERPNext’s UOM List.
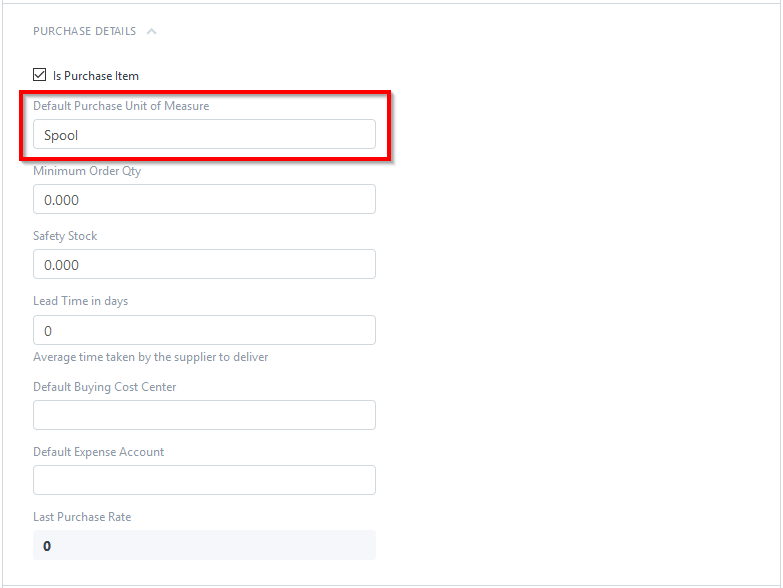
The purchase UOM for an item is specified in the Purchase Details section of the item master data.
Be aware that the default UOM also determintes the inventory stock quantity. Because the default UOM for the wire is centimeters, inventory will also be managed in centimeters. In an inventory audit, it will be necessary to convert from counted full spools to centimeters because the audit count will be in centimeters. Depending on the business, there are other out-of-box options which may work better in practise.
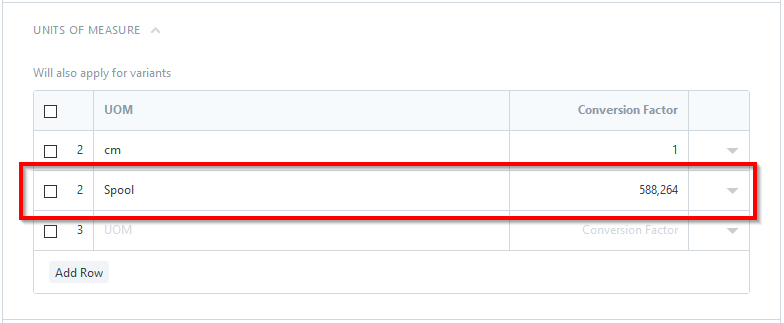
When the purchase UOM for an item is different from the item’s default UOM, the relationship or conversation factor must be specified in the Units of Measure section of the Item master data. In the case of the inductor wire, the conversion factor from spool to cm is 588,264 (the datasheet for the wire indicates a spool contains 19,300 feet of wire, and 19300 ft x 30.48 cm/ft gives 588,264 cm/Spool).
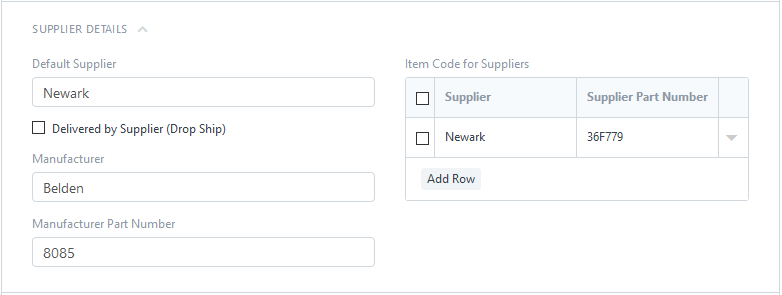
Supplier details are also entered in the Item master data, including specifying the OEM and OEM part number if relevant.
An image can be associated with an item in the item master data for the convenience of users in recognising or understanding the item. Files and other documents that specify or support the item can also be attached, such as the supplier catalogue page, a preliminary supplier quotation, or engineering design documents.
Attach Supporting Documentation
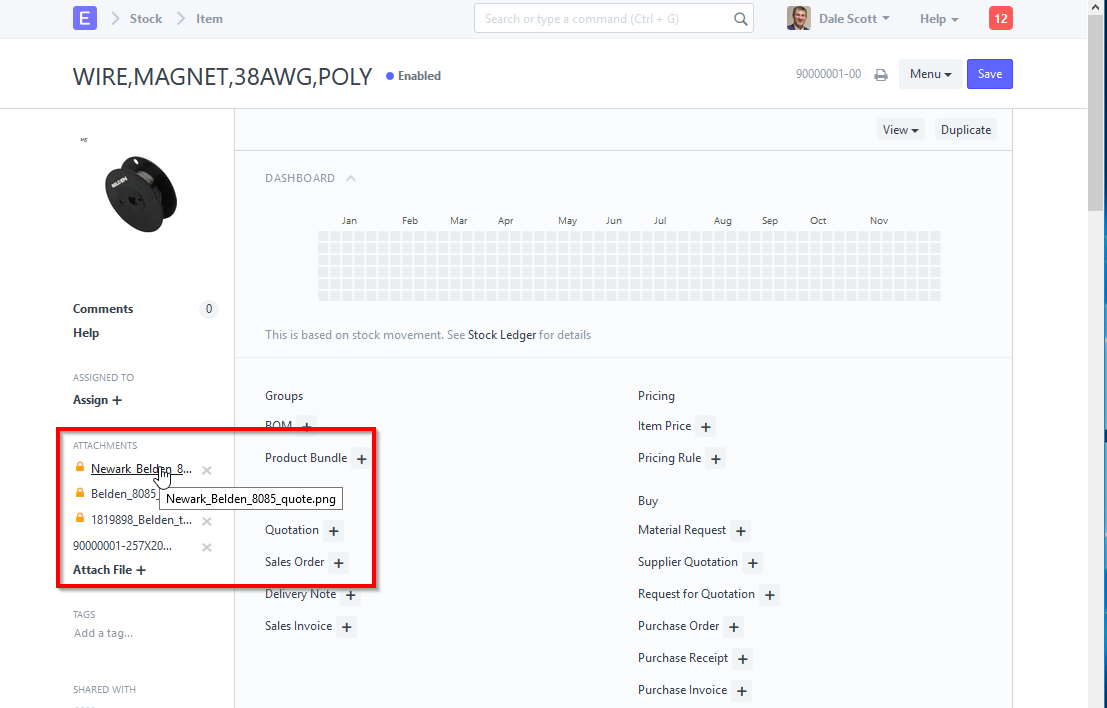
If a document already uploaded pertains to multiple items, the already-uploaded document can be attached instead of uploading a new document. It is also possible to enter item master data by importing CSV format data. This would likely be the preferred method when implementing ERPNext for an established organization.
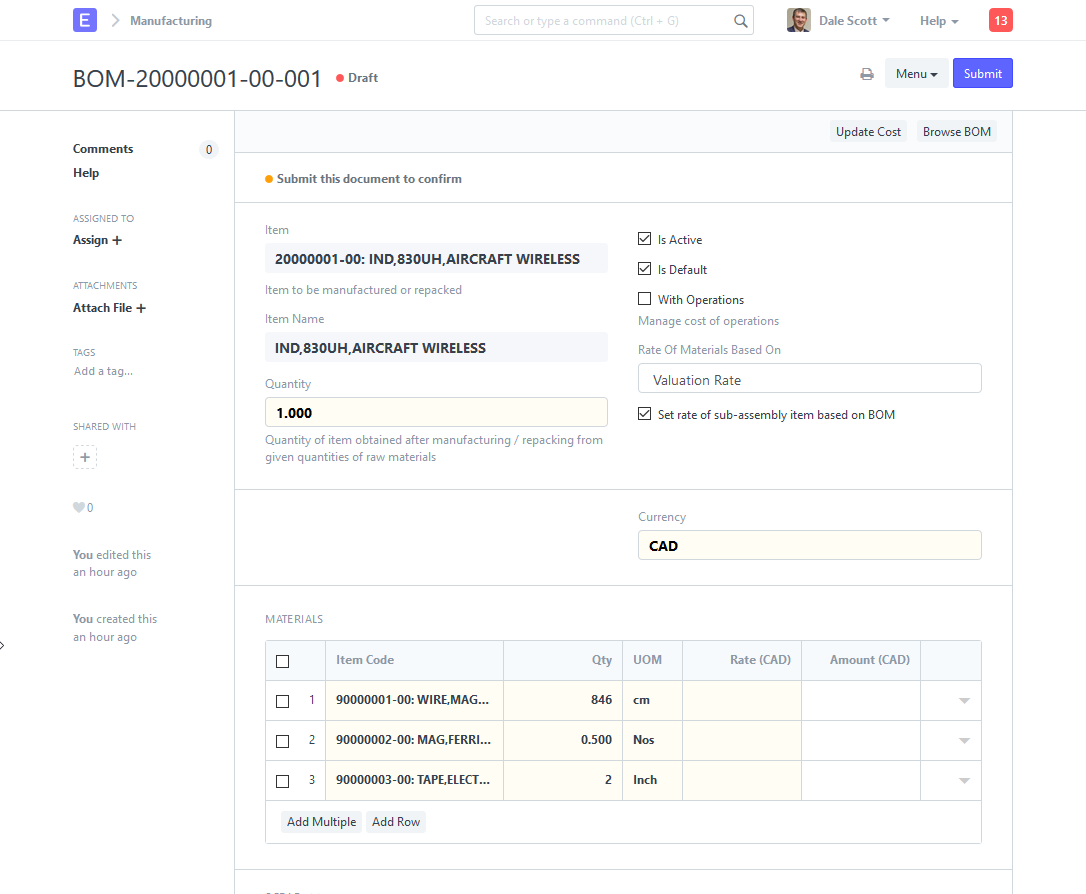
Create Bills of Materials
Child items of a parent are specified using a Bill of Materials (BOM), including child item quantities. ERPNext revisions BOMs independently from Items, and creates BOM-20000001-00-001 as the initial BOM for Item 20000001-00.
Managing Change
Using the revisioning strategy outlined here, revising a child item in ERPNext can be done by simply duplicating it and increase the revision level in the Item Code. The revision level of the child’s parent item may or may be changed, depending on the policies of the organization. Generally a change in fit, form, or function mandates at least a revision level change, if not a completely new item with new root item code. The revision level of the parent may not be required to change if the fit, form or function of the parent has not changed as a result of the child’s revision.
If the revision level of the parent is not required to change, the parent’s BOM can simply be updated with the new child revision level. ERPNext will create a new BOM revision level, but the revision level of the parent item is not affected. If the revision level of the parent does change, a new BOM will need to be created for the new revision level of the parent (and listing the child at its new revision level).
Organizations typically have an approval process for revising a product, often called an Engineering Change Order (ECO) process. An approval signature document is commonly used to capture approval from stakeholders, including product management, engineering, sales, manufacturing, quality and finance. The signed approval document can be attached to the related item or BOM in ERPNext.
Summary
This has been a short overview of PLM using ERPNext. Although ERPNext is not a dedicated PLM system, its out-of-box capabilities are more than adequate to support basic PLM operations. Should additional capabilities be necessary, they can be developed on the ERPNext platform itself, or dedicated PLM software (existing or custom developed) can be integrated with ERPNext.
Please leave a comment or use the contact form for more information.