Sometime, I don’t know when, schematics stopped being a way to communicate how an electronic circuit works, and instead seem to have become the bare minimum needed for a PCB design.
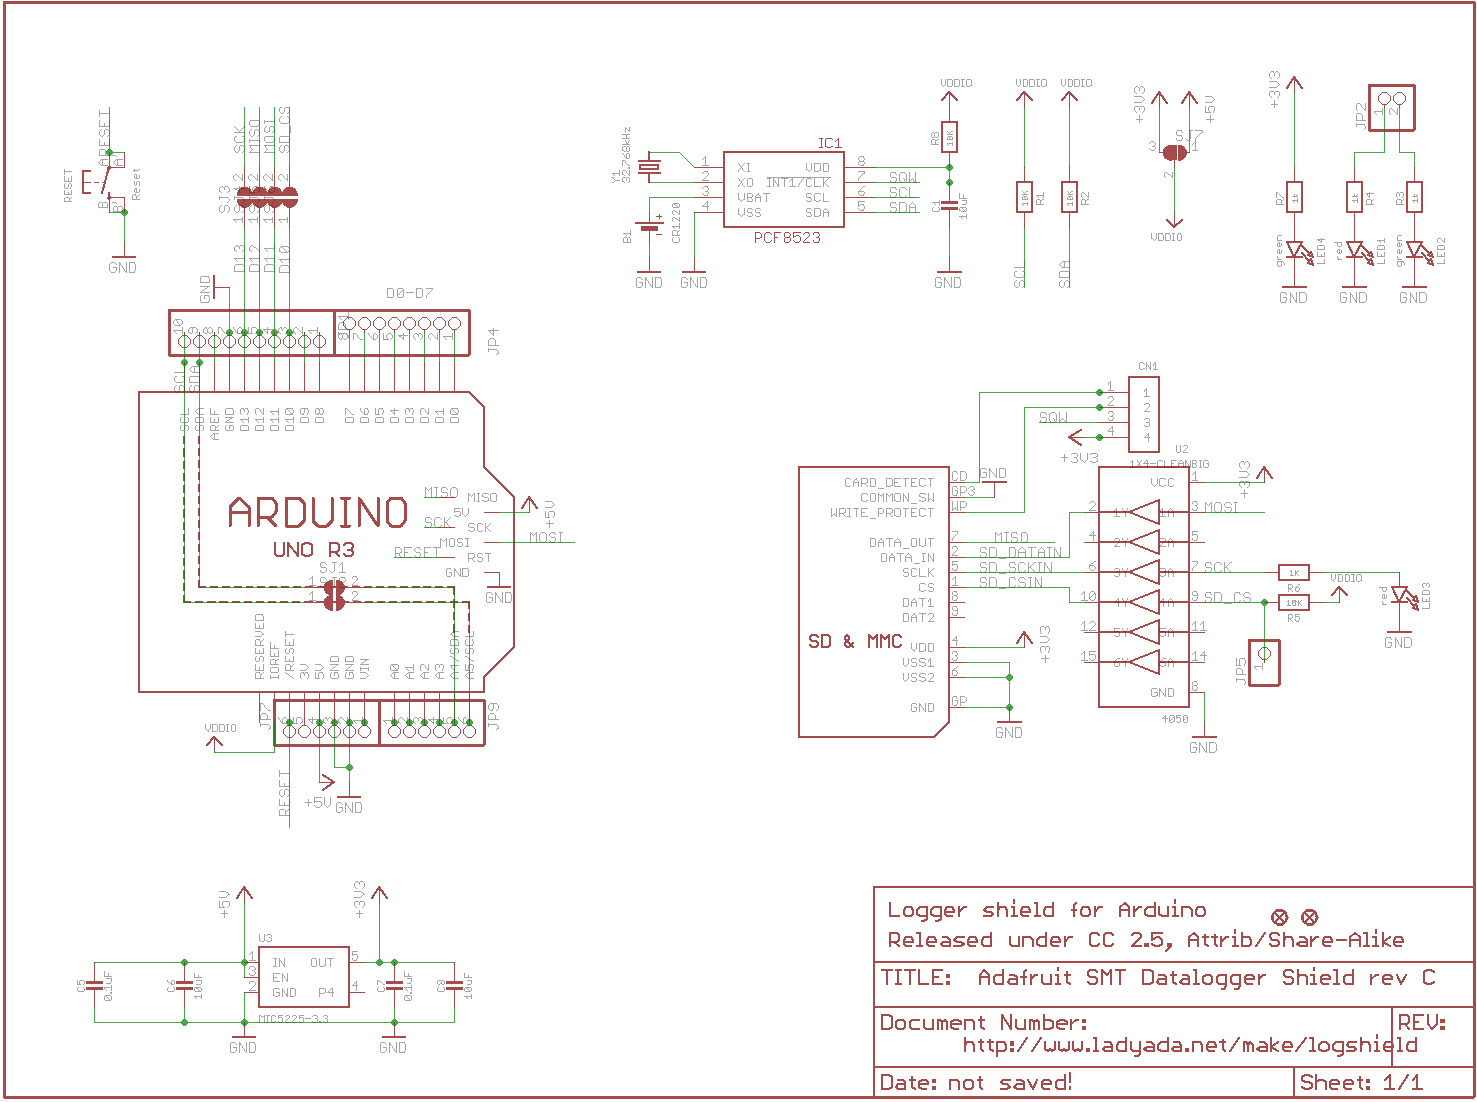
For example, here is the schematic for the Adafruit Data Logger Shield for the Arduino open-source electronics platform.
The schematic shows how the shield looks physically, and will provide a netlist for PCB design, but it’s a poor tool for conveying the intent and behavior of the design.
It takes some head scratching searching for net names and deciphering overlapping instance names just to glean what’s connected to what. In addition, while a number of jumpers make the shield more general purpose and can be conveniently used with different Arduino boards, there are no explanations!
The designer had the opportunity to make things simple for readers, but didn’t take advantage of it. Instead, we have to read the better half of a 68 page PDF companion document instead of having the information all in one place.
Here is a redrawn version of the same schematic.
Granted it doesn’t have the same expanse of white space, but it provides an order of magnitude of more information. The primary circuit paths can be readily followed visually, component instances are legible, and there are comments to explain the purpose of the jumpers.
Given an opportunity to make things simpler for your audience, why would you instead make it harder?
First, NEVER use a file synchronization service such as Nextcloud or Dropbox to synchronize git repos among multiple users. These and similar services should NEVER be used to synchronize git repo’s because they don’t synchronize everyone simultaneously.
For example, if I push to a local repo in my ~/Nextcloud directory, another developer could be pushing to their local repo at about the same time, and there will be a race between our Nextcloud clients to see whose updates make it to the Nextcloud server first. The best outcome is that Nextcloud will notify the loser of a sync collision (a file was modified locally at the same time it was modified on the server), and that the collision will need to be corrected manually. The worst outcome is that the loser will lose their commit entirely (their local repo will be overwritten by the copy on the server from the winning user), or the server repo will be corrupted with some files from the first user and some from the second user. Uggg! This is NOT what you want to have happen.
Only a git push command should be used to update an upstream server. The upstream repo will be locked and the push will be done in an atomic action. This is the only way to preserve repo integrity!
Here is my setup, note that it requires having ssh login capability to the server. I use FreeBSD for my server OS, but this procedure applies equally to Linux.
Step 1. Create a system login user (e.g. “git”), the git repos will be stored in the “git” user home directory. You can put more than one git repo in the user directory, but all the repos will have common access (i.e. control is to the user directory, not to the repos in the directory).
Step 2. Create a public/private ssh key to access the git repo with (more correctly, to access the user account that has the git repos), and add the public key to the /home/username/.ssh/authorized_keys file.
You can use a single ssh key and give the private key to each real user who needs access, or better, each real user has their own ssh key and you add all their public keys to the authorized_keys file (this way you can easily remove access from a single user by removing their public key from the authorized_keys file).
Step 3. Create a bare repo in the user directory. E.g. sudo -u username git init –bare repo_name.git
Now you have two choices, depending on whether you have started writing code yet.
Step 4a. If you have not started development yet, commit a README.md file from the server so the repo has at least one commit. Then from your dev workstation, clone the repo using the ssh protocol.
After that you write code, commit locally, and push your commits to the upstream origin repo as you would with any other cloned project.
Step 4b. If you have started writing code already (i.e. if you already have a repo with commits), add an origin or upstream ssh protocol remote to your local repo and push it to the empty repo on the server.
This approach maintains complete control over the repo and is easy to setup. It has worked well for me with small projects and a few developers. Compared to GitHub, the primary technical difference is the loss of pull requests (which is a GitHub workflow, not a feature of Git), but in a small team everyone is likely committing directly anyway.
RISC-V is an exciting new open source processor design which will be of particular interest to developers of custom IP. This short overview will help you understand RISC-V, its eco system, and the opportunities it presents.
RISC-V Foundation
The RISC-V Foundation is the governing body and holder of IP. https://riscv.org/
Technical Overview
Wikipedia has a good technical overview, including a list of open-source implementations which could be useful for bootstraping a project instead of starting from scratch with the low-level instruction set specification (the “ISA”). https://en.wikipedia.org/wiki/RISC-V
Some RISC-V Users
Google’s OpenTitan project seeks to provide an open-source silicon root of trust (RoT) using a RISC-V-based RoT design with integration guidelines for use in data center servers, storage devices and peripherals. https://opentitan.org/
Kneron is a California-based company known for its impressive line of AI SoCs. Kneron’s KL530 targets the autonomous vehicle edge computing market specifically. In addition to a RISC-V AI-coprocessor, the chip also includes a neural processing unit, a Cortex M4 core for system control, an image signal processor, and a dedicated security block. https://www.allaboutcircuits.com/news/knerons-risc-v-ai-chip-intends-to-bring-level-1-and-level-2-autonomy-to-any-vehicle
Western Digital is moving its consumption of IP cores (1B per year!) to RISC-V, as well as offering commercial RISC-V IP. https://www.westerndigital.com/en-ca/solutions/business/risc-v
Apple posted in September for a “RISC-V High Performance Programmer” to work in their Vector and Numerics Group (which is responsible for “designing, enhancing and improving various embedded subsystems running on iOS, macOS, watchOS and tvOS.”). Candidates should be experienced with RISC-V architectures, and ideally have a working knowledge of NEON micro architecture in ARM CPU cores. https://appleinsider.com/articles/21/09/03/apple-investigating-risc-v-processor-architecture-job-listing-shows
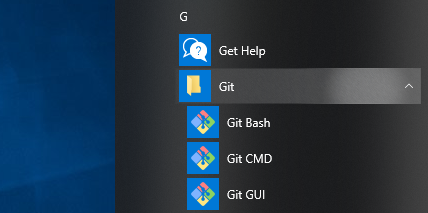
Microchip’s MPLAB X IDE includes a Git client for committing, pushing upstream, pulling downstream, etc, but not for cloning an existing project from a remote repository. In this post, I’ll show how to use the standard Git install for Windows from the Git project to clone a project from a remote repository, and then the basics for using MPLAB X’s built-in Git client for everything else.
I’ll be using MPLAB X on Windows. Although MAC OS X and Linux are also supported for MPLAB X, I don’t use OS X and I’ve been unable to use MPLAB X MCC (the MPLAB Code Configurator) on Linux.
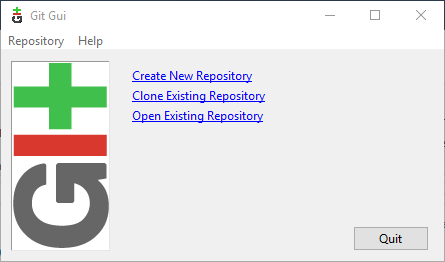
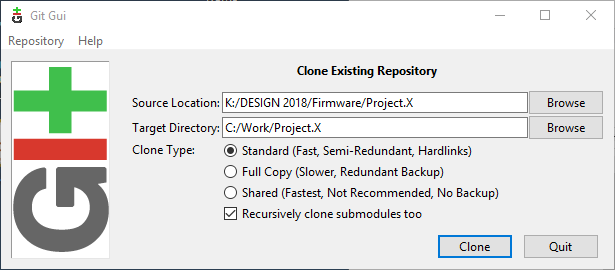
Clone the remote repository. In this example, I’m cloning from a Windows network drive.
You could also use the ssh protocol to clone from a remote server, in which case the source location will be something like the following (you will be prompted for your private ssh key passphrase after clicking Clone):
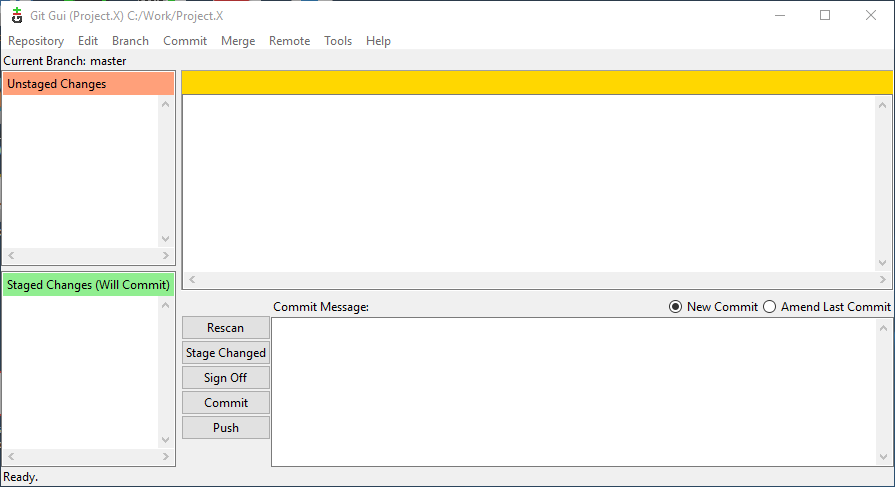
After the remote repo has been cloned, Git GUI will show the current status of the new local repository – which should show no modified files (i.e. no files either staged or unstaged).
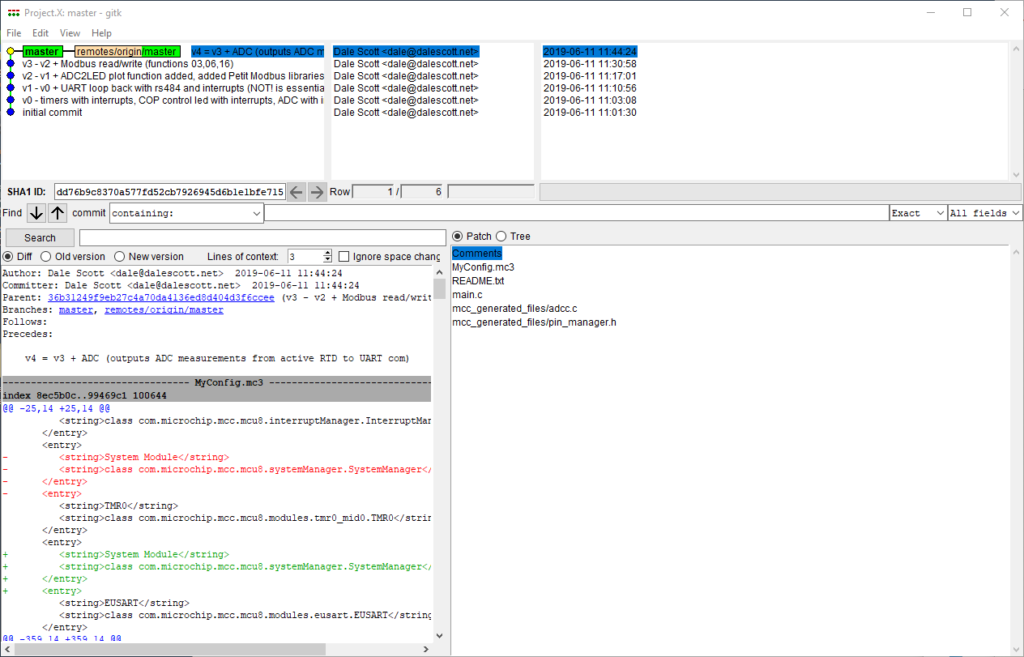
To confirm the repository was cloned correctly, you can check the commit history by accessing menu Repository > Visualize master’s History.
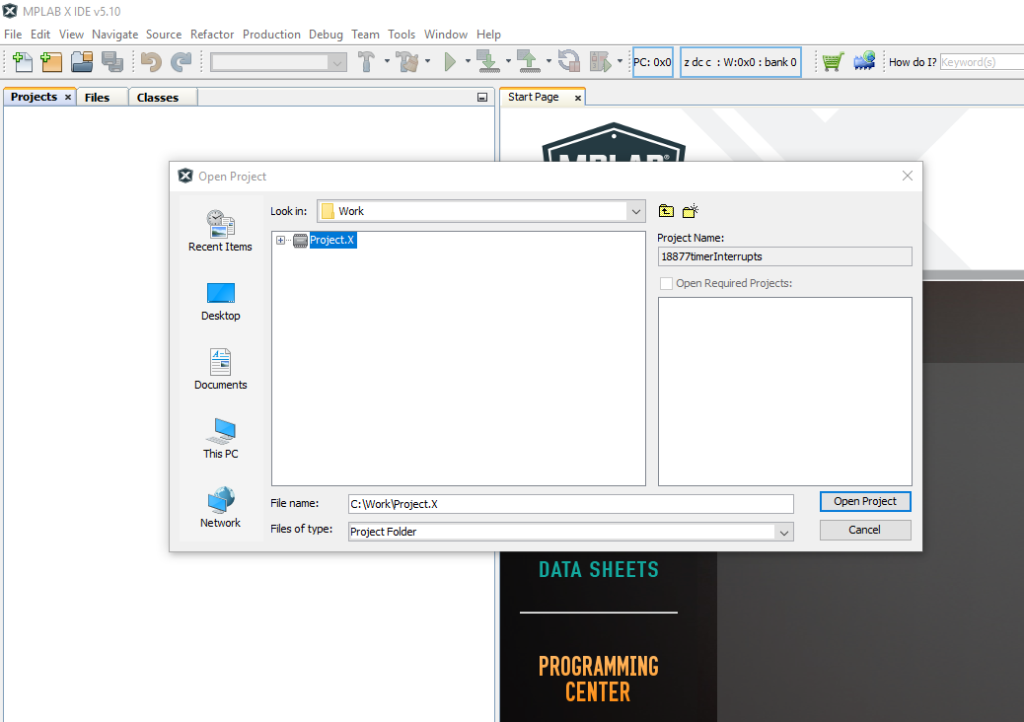
Open project in MPLAB X
Now you can open your cloned project in MPLAB X.
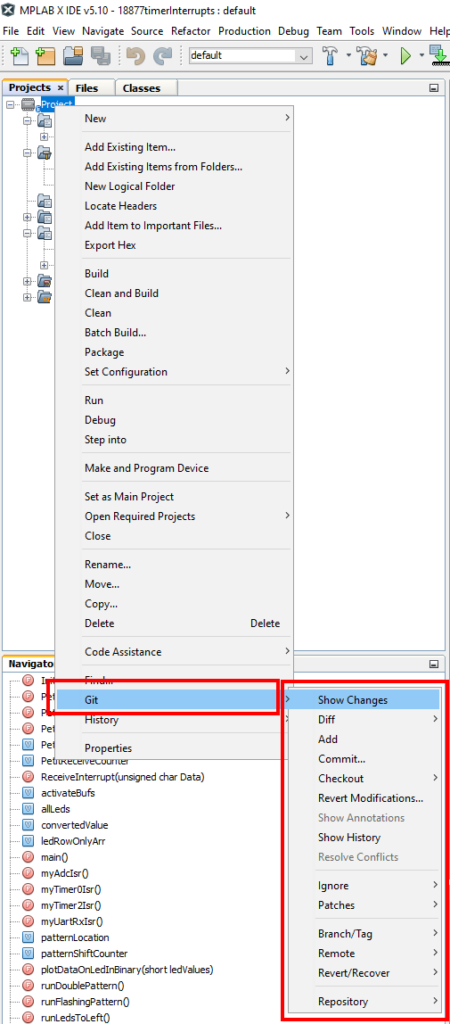
Git is primarily accessed using a project’s context menu from the Project window.
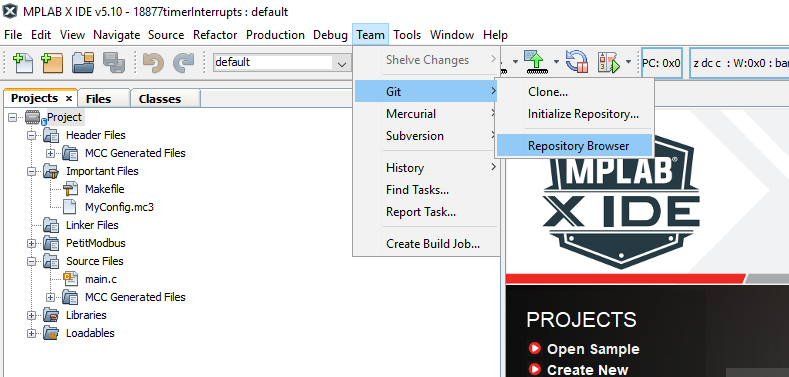
However, be aware there are a few Git commands under the Team menu, including a Repository Browser that aren’t available in the project context menu.
Try accessing Show History for the project (you will need to click “Search” in the Show History view that opens).
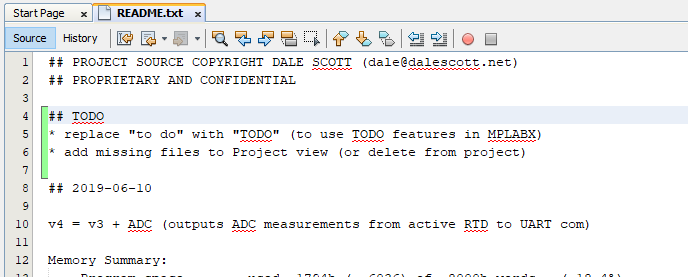
Now I’ll ready to start hacking on the source. I’ll keep it simple and just add some TODO’s to the README.txt file. Notice how the editor shows my changes compared to the last commit in real-time!
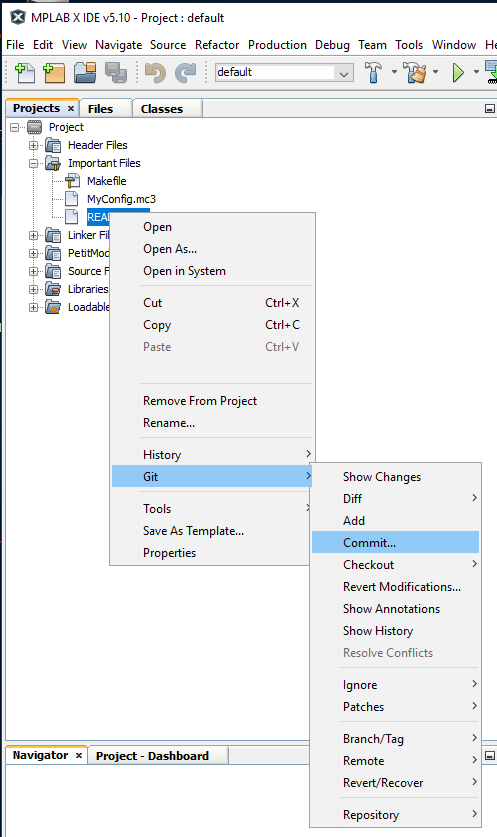
When I’m ready to commit my changes, I can commit just the modified README.txt file,
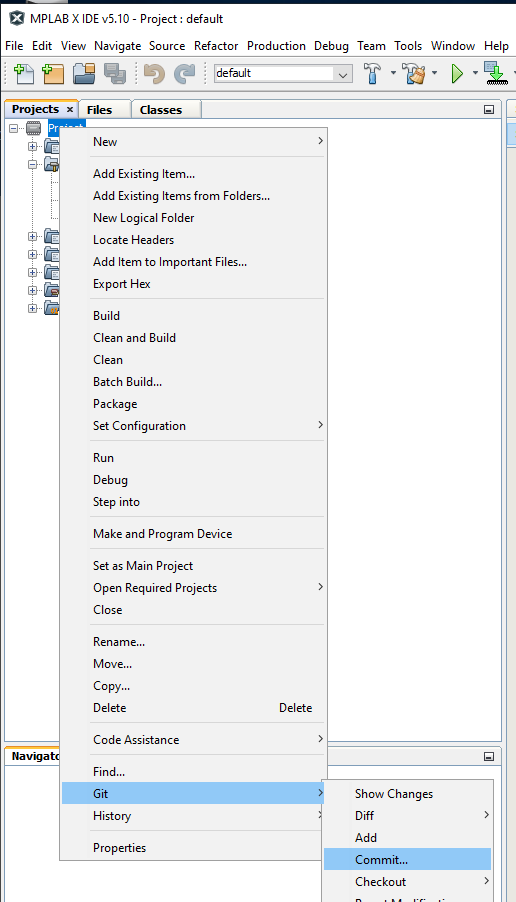
or I can commit all modified files in the project.
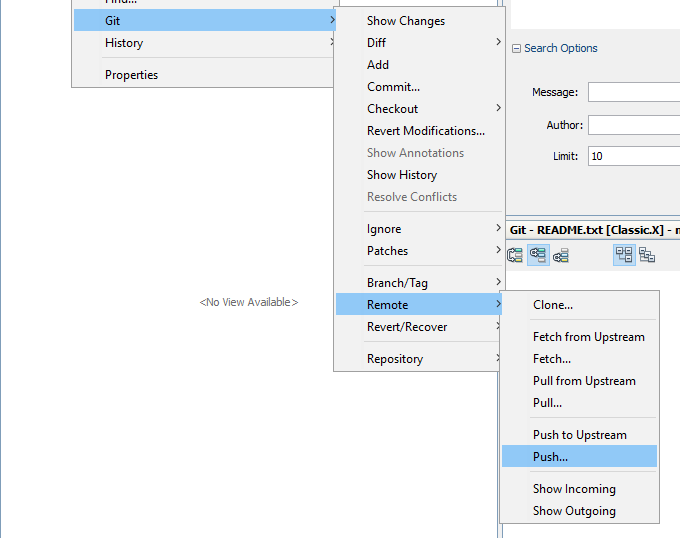
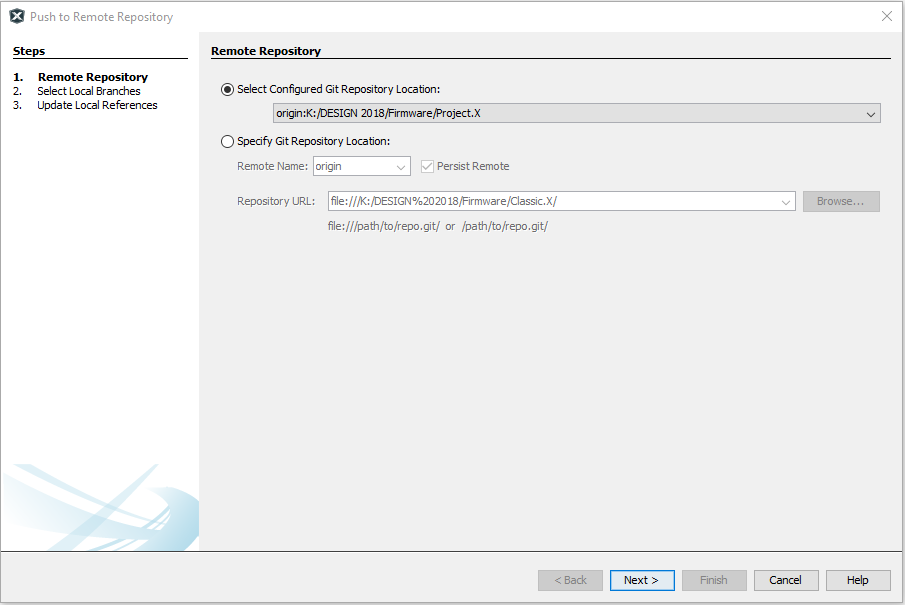
To push a local commit back to the upstream origin repo, use the general-purpose Remote > Push… selection from the Project context menu.
Origin is the only remote repo configured in the local clone, so it should be indicated automatically in the Push to Remote Repository wizard.
There, all done! Wasn’t that easy?
I didn’t do show it, but standard practice is to first Pull from the upstream repo (e.g. origin) before you try pushing a local commit to the upstream repository. If someone has pushed code since your last pull (or clone), you’ll need to merge their changes into your local project first, then push the combined changes to the upstream repo.