Install ERPNext on FreeBSD 11.2 using VirtualBox

Search for other ERPNext-related posts. You may also visit the demo on dalescott.net.

The simplest way to “install” ERPNext on FreeBSD is to simply use the Virtual Image provided by the ERPNext project with VirtualBox.

The ERPNext project provides the Easy Install script for bare-metal installation but it has a number of Linux dependencies and will not work without changes on FreeBSD. Happily, the project also provides a fully configured virtual machine (based on Ubuntu Linux).

It may also be possible to use bhyve, the BSD hypervisor, with the virtual image, but the OVF file must first be converted to bhyve’s raw format.

Install VirtualBox

Install the virtualbox-ose-nox11 package for running headless virtual machines.

% sudo pkg install virtualbox-ose-nox11

The VirtualBox kernel module (virtualbox-ose-kmod) will also be installed, but it must be re-compiled from source and re-installed (at the very least, the system will crash when next re-booted once it has been configured to load the kernel module at boot). 

Update the ports collection to prepare for compiling the kernel module. 

# portsnap fetch update

If the ports collection has not been installed, install.

# portsnap fetch extract

The FreeBSD sources are required to compile the kernel module. If not already installed, install the FreeBSD sources.

% fetch ftp://ftp.freebsd.org/pub/FreeBSD/releases/amd64/11.2-RELEASE/src.txz % tar -C / -xzvf src.txz

Compile and install the virtualbox-ose-kmod port. Make will first refuse to install the module because it is already installed (recall it was installed by being a dependency of virtualbox-ose-nox11). De-install the virtualbox-ose-kmod package, then re-install the newly compiled version.

% cd /usr/ports/emulators/virtualbox-ose-kmod
% sudo make
% sudo make install
% sudo make deinstall
% sudo make reinstall

Perform post-install configuration.

1) edit /boot/loader.conf to load the vboxdrv kernel module at boot,

# vi /boot/loader.conf
...
vboxdrv_load="YES"

2) increase AIO limits by editing /etc/sysctl.conf (my server is using AIO, for more information refer to the virtualbox-ose-nox11 pkg-message).

vfs.aio.max_buf_aio=8192
vfs.aio.max_aio_queue_per_proc=65536
vfs.aio.max_aio_per_proc=8192
vfs.aio.max_aio_queue=65536

Reboot the system to load the kernel module (or load it manually).

Make a mental note before doing an OS update to first edit /boot/loader.conf to not load the module. Otherwise the system will likely crash when next rebooted.

The user that VirtualBox runs as must be a member of the vboxusers group. For simplicity, I’ll run VirtualBox using my own username, although best practise would be to create a dedicated user.

# pw groupmod vboxusers -m dale

Edit /etc/rc.conf to run vboxwebsrv (the Virtual Box web interface daemon) using the provided startup script installed in /usr/local/etc/rc.d/

% sudo vi /etc/rc.conf

vboxwebsrv_enable="YES"
vboxwebsrv_user="dale"

and finally start the vboxwebsrv service.

% sudo service vboxwebsrv start
% sudo service vboxwebsrv status

The vboxmanage cli utility can be used to manage virtual machines but I will be using phpVirtualBox which provides a familiar GUI.

Install phpVirtualBox

phpVirtualBox can be installed from the FreeBSD ports collection but it currently has a dependency on PHP 7.1 while I have PHP 7.2. I installed phpVirtualBox manually to avoid pkg attempting to revert my PHP install to 7.1, and have not encountered any issues.

Download the latest release from the phpVirtualBox Github project . Follow the instructions in README.md file and on the wiki. Extract the project to /usr/local/www, and edit the configuration.

# vi /usr/local/www/phpvirtualbox/config.php

var $username = 'dale';
var $password = 'dale_login_password';

Configure the webserver to serve phpVirtualBox. I’m using the basic Apache 2.4 http server package. I added a virtual host definition to /usr/local/etc/apache24/extra/httpd-vhosts.conf to serve phpvirtualbox as a phpvirtualbox.dalescott.net.

<VirtualHost phpvirtualbox.dalescott.net>
  DocumentRoot "/usr/local/www/phpvirtualbox"
  <Directory "/usr/local/www/phpvirtualbox">
    allow from all
    Options None
    Require all granted
  </Directory>
</VirtualHost>

Change the default phpVirtualBox login password to something secure after logging in for the first time.

“Install” ERPNext

Download the desired ERPNext Virtual Machine image (*.ova).

% cd ~/downloads
% wget http://build.erpnext.com/ERPNext-Production.ova

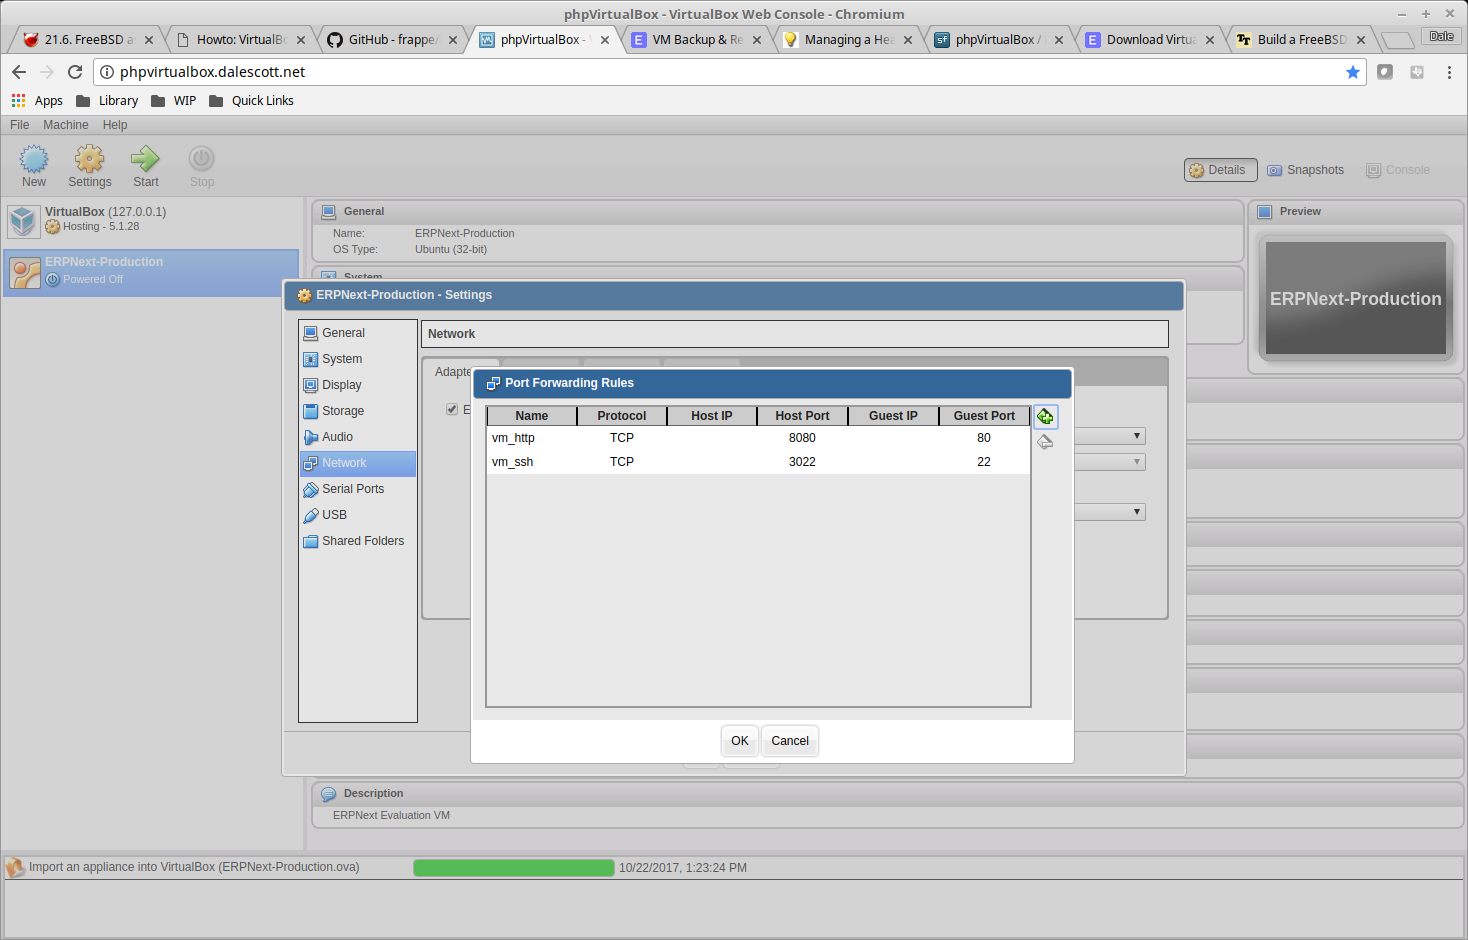
Using phpVirtualBox, create a new vm by importing the downloaded ERPNext-Production.ova Virtual Image file (File/Import). The OVF includes port forwarding rules to forward client port 80 to host port 8080 (for serving ERPNext) and a rule to forward ssh from client port 22 to host port 3022 (for system administration).

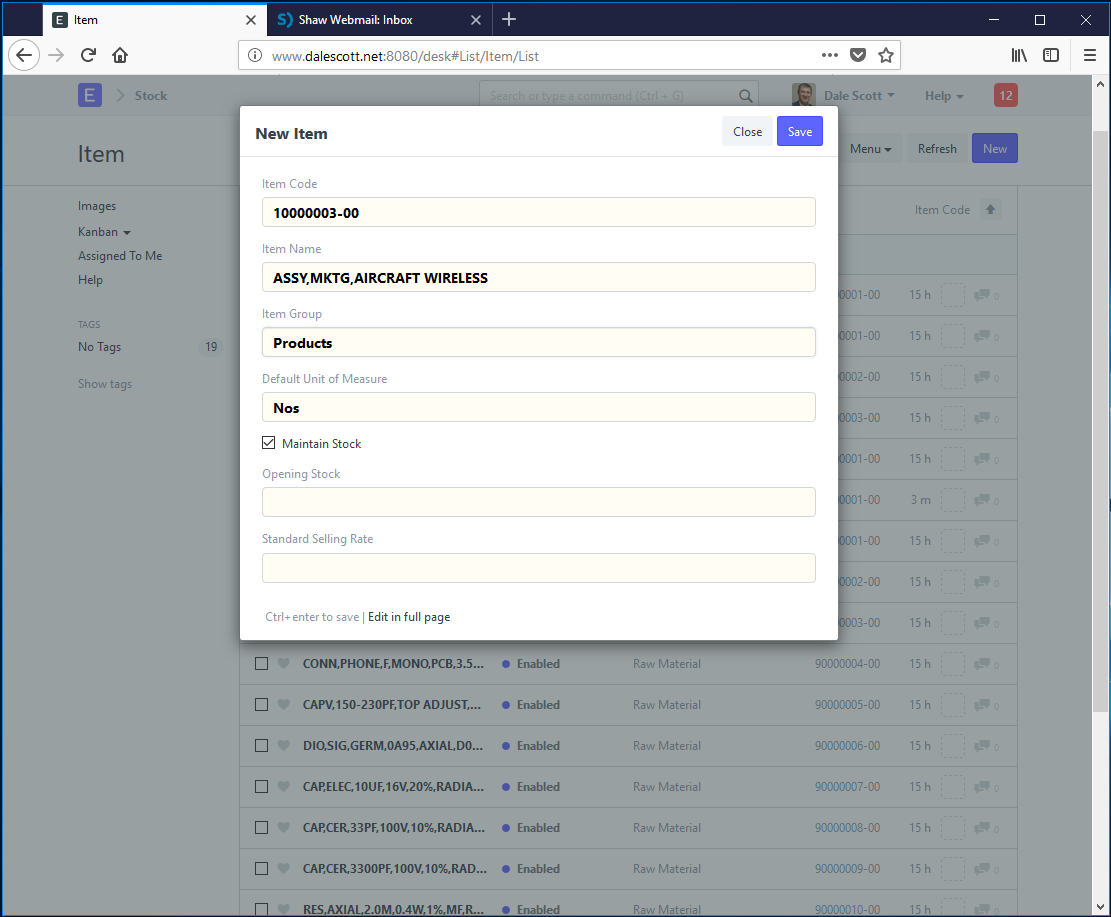
Start the vm and then login to ERPNext from a browser (e.g. www.dalescott.net:8080) using the default credentials. The new site wizard will run and lead you through ERPNext configuration. Use a secure password when defining the initial (admin) user, and the wizard will delete the initial Administrator user (with default password) when complete. 

Once logged into ERPNext, setup email processing so that users will receive notifications outside of ERPNext. This will be valuable to understanding and appreciating ERPNext’s significant social aspect. You will also want to change the system login (i.e. ssh) password for “frappe” user to something secure (or disable password authentication entirely in favor of key-based authentication).

Cheers,
Dale


Product Lifecycle Management (PLM) using ERPNext

Search for other ERPNext-related posts

Product Lifecycle Management (PLM) involves managing everything about a product from cradle to grave – from design and new product introduction (NPI) to termination or end-of-life. PLM encompasses product management, engineering design, product-specific business and manufacturing processes, new product introduction (NPI), and product data management. A PLM system integrates people, parts, processes and issues, and provides a trustable and transparent infrastructure backbone for the business.

Enterprise Resource Management (ERP) is a superset of PLM. ERP was born from a manufacturing need, but a modern ERP today includes accounting and financials, sales, customer relationship management, human resource management, and other core business systems – including PLM. However, modern ERP systems have also become complicated and expensive, and a successful implementation often requires that the business more conform to the ERP than vice versa. A new type of ERP is emerging, called Postmodern ERP. Postmodern ERPs are designed from the ground up to be simple and flexible, more capable of modelling a business than imposing conformity, and available to organizations of even modest requirements or means.

ERPNext is a postmodern ERP system, and includes basic PLM functionality. Although not as feature-rich as a dedicated PLM might be, ERPNext is capable for many situations, it is also less complicated, already integrated, and a capable starting point to build on. Features of ERPNext related to PLM include:

  • Integrated data. Items (parts), purchase specifications, engineering design documents, revisions, projects, issues, etc. All information is conveniently managed in one consistent system.
  • Visible, trusted, change management with social notification.
  • Scaled according to number of users, number of items and complexity of product trees, supply chain complexity, etc.

This tutorial will follow the Aircraft Wireless product designed and manufactured by the fictional Swift Construction Company.

Goals

The goals of this tutorial are to:

  • Create child and parent items to model an assembly.
  • Identify item supplier information for purchasing, including purchase and OEM specifications.
  • Demonstrate a suitable change management process.

Future revisions of this post will expand on topics such as including anticipated purchase, process and labour costs for preliminary cosgt analysis, and defining appropriate work centers in the manufacturing process.

Definitions

Here are some terms defined in the context here.

  • CSV (Command Separated Value). CSV is a common text data interchange format, with data values separated by commas. E.g. ’12,”this is text, not a number”, 15.0′ might be one line from a CSV file (notice the text is quoted because of a contained comma). Although the acronym specifies the data element separator is a comma, other separator characters such as a tab or semi-colon are also often used.
  • ECO (Engineering Change Order). The name of a change management process often found in an engineering or manufacturing environment, which defines the process for making a change to an item, and thereby changing its revision level. Sometimes the ECO process is preceded by an Engineering Change Request (ECR) process in a two-phase ECR/ECO process.
  • OEM (Original Equipment Manufacturer). Items may be purchased from distributors, and there may be more than one distributor selling a particular OEM item. In this case, often it is the OEM item that is critical, not who it is purchased from.
  • Release. A release is a milestone in the development life-cycle of a top-level or child item, and is associated with a specific revision-level. A release provides a convenient point for synchronizing various project activities, including product features and capability, purchasing and manufacturing activities, press releases, pre-production and trade show demos, etc.
  • Revision Level. An item carries has a revision level, that can be used to reference the item, and its supporting documentation, as it existed at a particular point in time. An item, and its revision level, can be updated following a well-defined process.

Item Codes and Revision Levels

I will use an “8+2” format item code, with 8 digits to specify the unique item (aka part number), and 2 digits to specify the item’s revision level.

The following is the bill of materials for the custom inductor in the Aircraft Wireless.

20000001-00,"IND,830UH,AIRCRAFT WIRELESS"
|-- 90000001-00,"WIRE,MAGNET,38AWG,POLY"
|-- 90000002-00,"MAG,FERRITE ROD,1/4IN X 4IN,MATL=61"
\-- 90000003-00,"TAPE,ELECTRICAL,3/4"",BLUE,VINYL"

I will need to create the parts required for the SCC Aircraft Wireless Release-1 prototype .  To create a new item, access the Item List in ERPNext and click New.

If necessary, a new unit of measure (UOM) can be created on the fly for the unit an item is managed in and consumed by.

The unit of measure for the wire in the custom inductor (PN 90000001-00) is centimetres (cm), meaning the wire will be inventoried in cm and consumed by the cm. However, it will be purchased in the vendor’s unit of measure, which is a Spool. Both cm and Spool will need to be created as they are not already defined in ERPNext’s UOM List.

The purchase UOM for an item is specified in the Purchase Details section of the item master data.

Be aware that the default UOM also determintes the inventory stock quantity. Because the default UOM for the wire is centimeters, inventory will also be managed in centimeters. In an inventory audit, it will be necessary to convert from counted full spools to centimeters because the audit count will be in centimeters. Depending on the business, there are other out-of-box options which may work better in practise.

When the purchase UOM for an item is different from the item’s default UOM, the relationship or conversation factor must be specified in the Units of Measure section of the Item master data. In the case of the inductor wire, the conversion factor from spool to cm is 588,264 (the datasheet for the wire indicates a spool contains 19,300 feet of wire, and 19300 ft x 30.48 cm/ft  gives 588,264 cm/Spool).

Supplier details are also entered in the Item master data, including specifying the OEM and OEM part number if relevant.

An image can be associated with an item in the item master data for the convenience of users in recognising or understanding the item. Files and other documents that specify or support the item can also be attached, such as the supplier catalogue page, a preliminary supplier quotation, or engineering design documents.

Attach Supporting Documentation

If a document already uploaded pertains to multiple items, the already-uploaded document can be attached instead of uploading a new document. It is also possible to enter item master data by importing CSV format data. This would likely be the preferred method when implementing ERPNext for an established organization.

Create Bills of Materials

Child items of a parent are specified using a Bill of Materials (BOM), including child item quantities. ERPNext revisions BOMs independently from Items, and creates BOM-20000001-00-001 as the initial BOM for Item 20000001-00.

Managing Change

Using the revisioning strategy outlined here, revising a child item in ERPNext can be done by simply duplicating it and increase the revision level in the Item Code. The revision level of the child’s parent item may or may be changed, depending on the policies of the organization. Generally a change in fit, form, or function mandates at least a revision level change, if not a completely new item with new root item code. The revision level of the parent may not be required to change if the fit, form or function of the parent has not changed as a result of the child’s revision.

If the revision level of the parent is not required to change, the parent’s BOM can simply be updated with the new child revision level. ERPNext will create a new BOM revision level, but the revision level of the parent item is not affected. If the revision level of the parent does change, a new BOM will need to be created for the new revision level of the parent (and listing the child at its new revision level).

Organizations typically have an approval process for revising a product, often called an Engineering Change Order (ECO) process. An approval signature document is commonly used to capture approval from stakeholders, including product management, engineering, sales, manufacturing, quality and finance. The signed approval document can be attached to the related item or BOM in ERPNext.

Summary

This has been a short overview of PLM using ERPNext. Although ERPNext is not a dedicated PLM system, its out-of-box capabilities are more than adequate to support basic PLM operations. Should additional capabilities be necessary, they can be developed on the ERPNext platform itself, or dedicated PLM software (existing or custom developed) can be integrated with ERPNext.

Please leave a comment or use the contact form for more information.

ERPNext Tutorials

Enterprise Resource Management (ERP) was born from a manufacturing need, but a modern ERP today includes accounting and financials, sales, product lifecycle management (PLM), customer relationship management (CRM), human resource management (HRM), and other core business systems. However, modern ERP systems have also become complicated and expensive, and a successful implementation often requires the business more conform to the ERP than vice versa. A new type of ERP is emerging, called Postmodern ERP. Postmodern ERPs are designed from the ground up to be simple and flexible, more capable of modelling a business than imposing conformity, and available to organizations of even modest requirements or means.

ERPNext is a postmodern ERP. Rushad and his team created not only an incredible open-source software application, but also an entire eco-system, including a community of users and independent consultants, a supportive peer-to-peer help forum, and a recent addition, the ERPNext Foundation for project stewardship.

I will be taking a somewhat chronological journey through ERPNext, from an engineering perspective. Starting with the engineering team creating a prototype, then continuing through general customer release, the journey continues with changes to enhance quality, satisfy new customer needs, and reduce cost.

I will be following the Swift Construction Company’s development of the Aircraft Wireless in this tutorial, documented in the Maestro project. Also this list will be updated with links to the tutorials as they are published.

#1. Installing ERPNext

I started with the virtual machine image provided by ERPNext.org, hosting the vm using VirtualBox on FreeBSD.

#2. Product Lifecycle Management (PLM) using ERPNext

All the parts needed to build the initial Aircraft Wireless prototype will be created, including sub-assemblies with bills-of-materials (BOMs). Purchasing and supplier data will be entered for bought-in items, and appropriate documents will be submitted for custom or manufactured items. Revision levels will be used to assist in managing inevitable change.

#3. Purchasing using ERPNext (not yet published )

The parts needed to build a sub-assembly of the prototype (a custom inductor) will be purchased, received to stock, and paid for, with the development project bearing the costs. Initially, purchasing will be driven by the engineering project, then later by manufacturing scheduling after the Aircraft Wireless reaches production status.

#4. Manufacturing using ERPNext (not yet published )

Similar to the Purchasing tutorial, manufacturing will initially be driven by the engineering project, then later by manufacturing scheduling after the Aircraft Wireless reaches production status. Work orders will be created to manage work and collect cost.

#5. Managing projects using ERPNext (not yet published )

The concept of a project was first introduced in the Purchasing tutorial, when prototype costs were allocated to the Aircraft Wireless engineering project. Here project management will be explored further, including capturing time spent by engineering staff on the development project, and using Kanban project management (equivalent in many ways to the agile scrum process).

Other topics being considered include:

  • Purchasing from a BOM using ERPNext.
  • Managing Controlled Stock using ERPNext.
  • CRM using ERPNext.
  • Managing a Production ERPNext Site (keeping an ERPNext site up to date and QA considerations for business-critical software infrastructure systems).
  • Receiving  serialized stock items.
  • Serialize certain non-serialized stock when received (serialized with either vendor or local serial number).
  • Manufacture serialized stock in the form of sub-assemblies and final assemblies, using serialized and non-serialized stock.
  • “Un-manufacture” serialized product to sub-assemblies,  returning sub-assemblies to inventory following a QA re-verification process.
  • Reporting serialized sub-assemblies included in a serialized product (current and historical).

Please leave a comment if any of these topics are relevant to you, or to suggest other topics of particular interest.

Dale