Configure a company with webERP

Click to search for other posts here on webERP

Updated for webERP v5.

webERP is mature web-based open-source ERP (Enterprise Resource Planning) software that supports best practises and multi-user business administration, purchasing, sales, manufacturing and standard double-entry accounting.

The webERP Knowledge Base stores notes and documents/files related to Items, Suppliers and Customers. webERP will be configured to use WackoWiki for its underlying CMS.

Goal

  • Configure webERP to use for the Swift Construction Company (the SCC),

    The SCC is a manufacturing company located in Calgary, Alberta, Canada, operates in Canadian funds and interacts with Canadian and international suppliers and customers.

Procedure

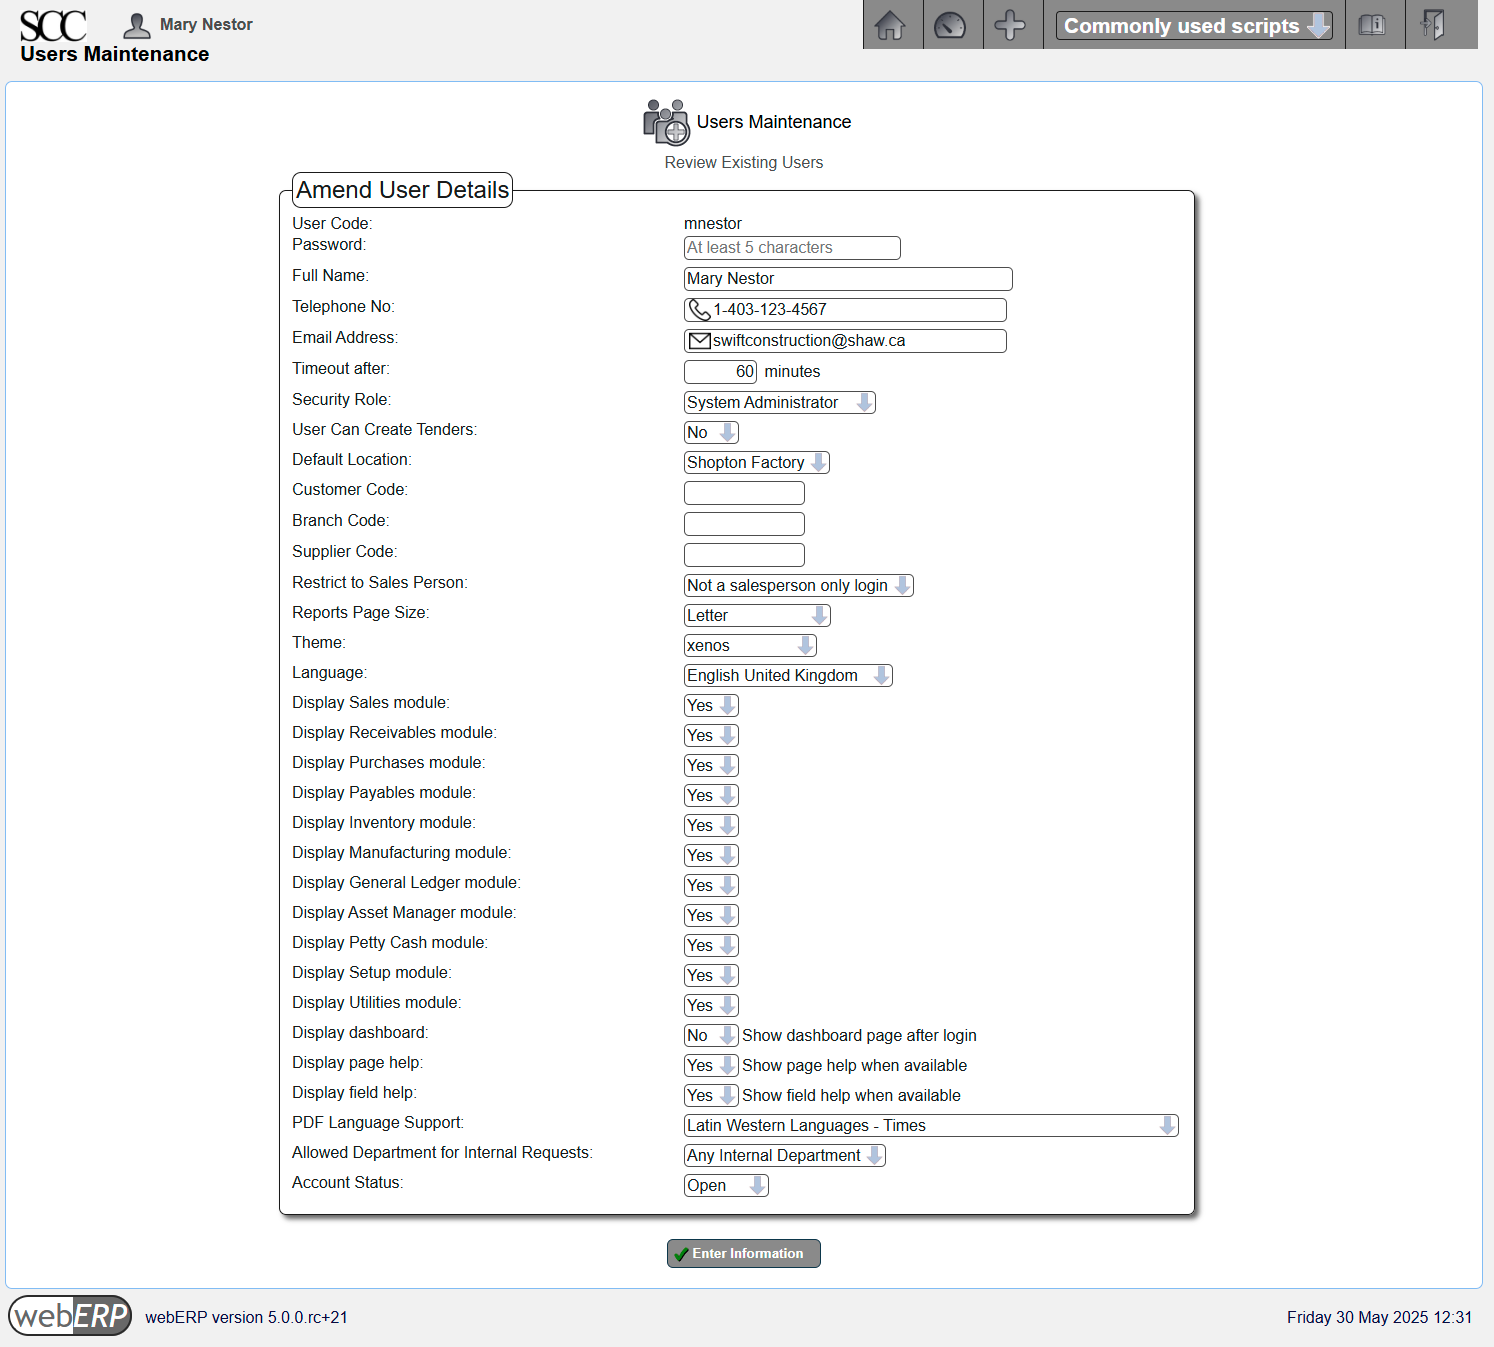
Log into a webERP site using the admin user credentials provided by your systems administrator (the credentials entered into the new site web auto-installer) and create a new user with administrator privileges (e.g. “mnestor” (Mary Nestor).

  • email: e.g. mnestor@swiftconstruction.com
  • system administrator privileges

The original admin user cannot be deleted because it is the start of the tracability chain.

In actual use however it is important each user has their own login with a password only they know. This allows correctly identifying the person performing an operation and provides tracibility. This is especially important if you will be using webERP in a regulated or controlled environment.

Default (out-of-the-box) security permissions generally satisfy a common demonitor of the webERP community, but eventually may be found lacking. Should that happen, it may be more efficient to develop bespoke security roles and security token assignments based on the structure, staff and relationships of the company, than to re-define the default implemention.

Some data may exist in a new database and can generally be deleted if desired to avoid user distraction and confusion.

Location

I will create a new location “Shopton” for the SCC headquarters.

[Main Menu > Setup > Inventory Setup > Inventory Locations Maintenance]

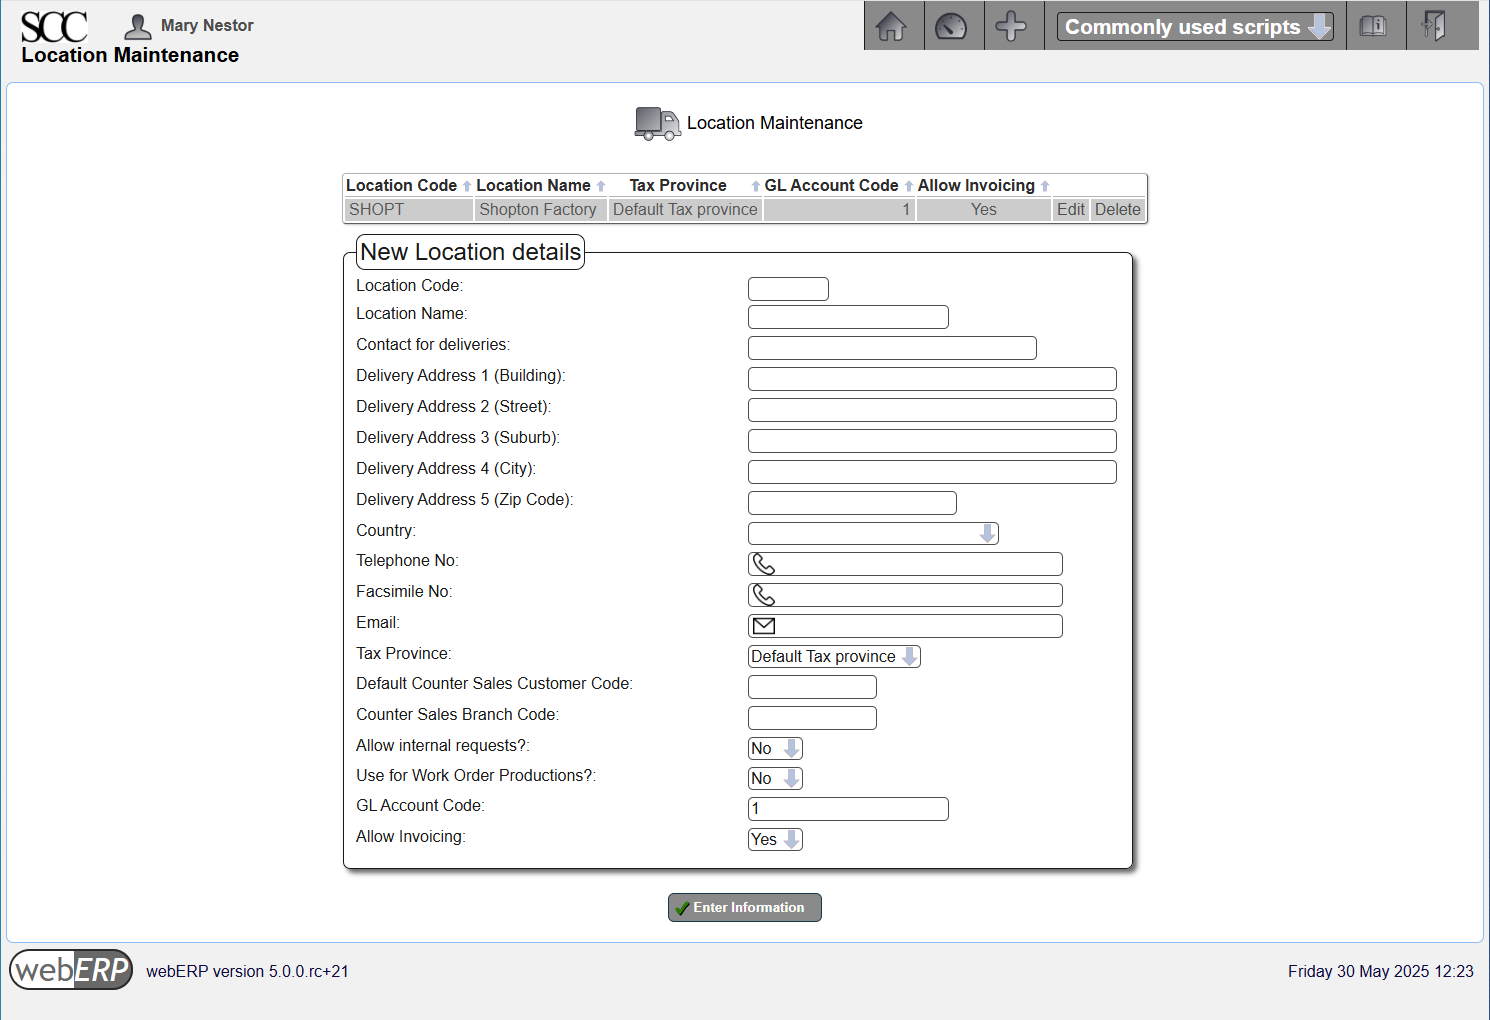
Note: Delivery Address 1 must be given a value (e.g. attempting to create a purchase order without line 1 will cause a “missing delivery address” error).

After creating the new location, change the location of the administration user to the new location (and also the location of any other users). 

Currencies

I will create a new CAD currency as some items will need to be purchased in Canadian dollars. webERP will obtain currency exchange rates from either Google or the European Central Bank (Main > Setup > General > System Preferences).

“CAD” is called the “Functional Currency” because it is the currency the Swift Construction Company operates in.

[Main Menu > Setup > General Setup > Currency Maintenance]
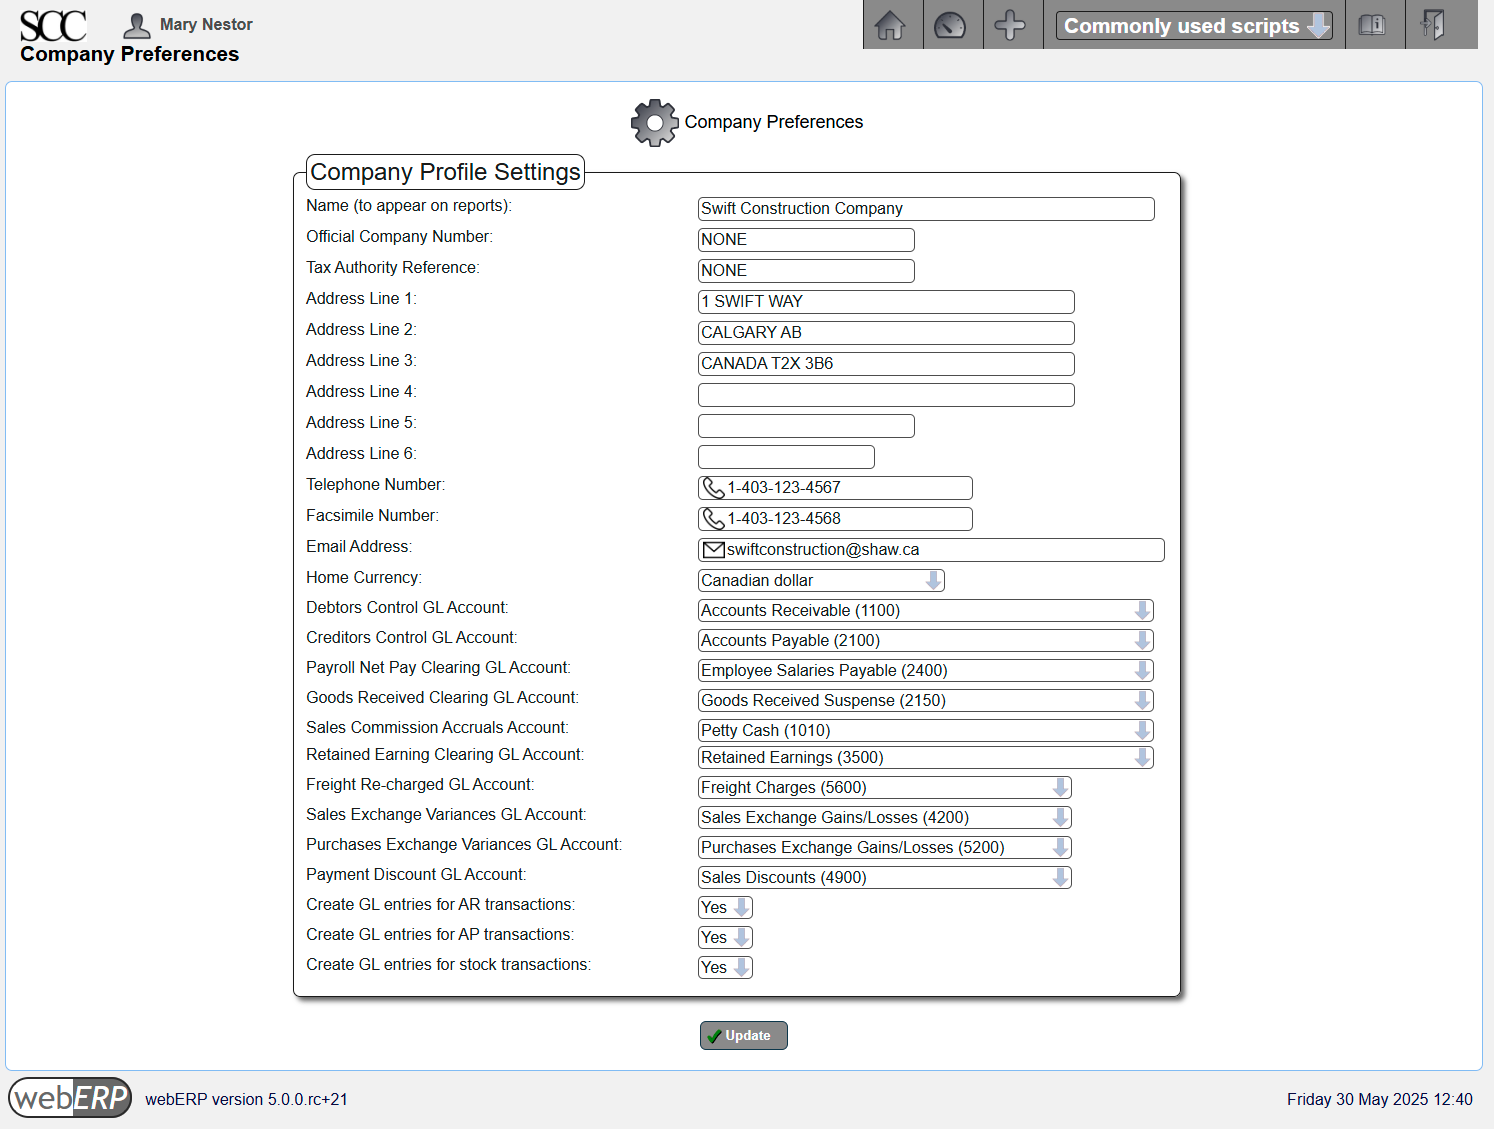
Company Preferences

Operating practices for a specific company are configured in the Company Preferences screen (webERP supports multiple companies and the desired company is selected at login). 

[MainMenu > Setup > General > Company Preferences]
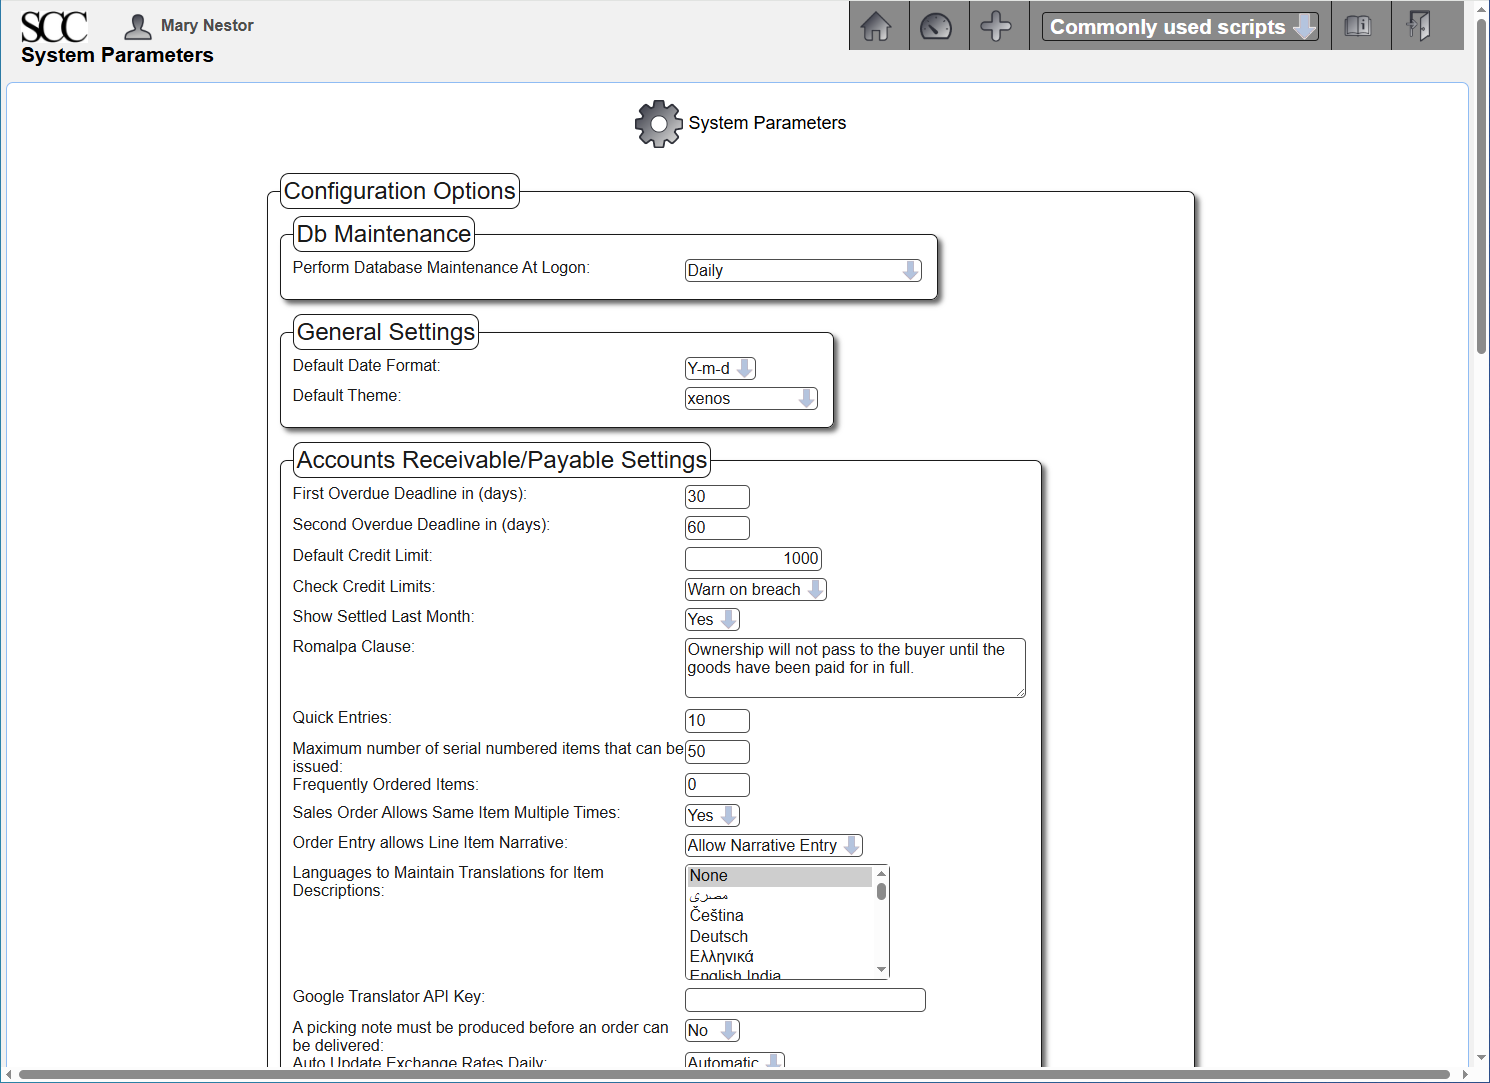
System Parameters

General system-wide behavior is configured in the System Preferences screen. I will quickly review some interesting parameters and give more detail on a a few.

  • Db Maintenance: Daily
    • The “OPTIMIZE DATABASE” query runs daily when the first admin user logs in. Setting this to ‘Allow ‘SysAdmin Access Only” prevents normal users from logging in which can be useful when performing maintenance but users already logged in are not affected (will need to work with your server system administrator if for some reason you require that no users can be logged in except yourself).
  • Date format: Y-m-d.
    • Unless you are forced, use ISO 8601 dates for clarity over familiarity (e.g. 2017-03-08 instead of March 8, 2017 – or is that August 3rd?.
  • Frequently Ordered Items: 0.
    • I don’t know how this variable is used and will have to experiment later.
  • Sales Order Allows Same Item Multiple Times: Yes
    • In general, I don’t want to block any operations and will assume users know what they are doing (and have a backup).
  • Languages to Maintain Translations for Item Descriptions: None
    • Don’t complicate things initially.
  • Picking note must be produced before an order can be delivered: No
    • Again, don’t complicate the process to start with.
  • Auto Update Exchange Rates Daily: Automatic
    • Rates sourced from the EU.
  • Create Debtor Codes Automatically: No
    • I will use my own mnemonic codes (if set to Yes, a sequential integer will be assigned).
  • Create Supplier Codes Automatically: No
    • I will use my own mnemonic codes.
  • Country of operation: Canada
    • Used when calculating shipping costs.
  • Purchase Order Allows Same Item Multiple Times: Yes
    • I will revisit this later, but at least initially I don’t want anything to block operation.
  • Automatically authorise purchase orders if user has authority: Yes.
    • Will disable when someone else is creating new purchase orders.
  • Financial year ends on: December
    • Most common.
  • Maximum Size in KB of uploaded images: 300
    • Default value, may require new photos and screenshots to be reduced before uploading.
  • Directory to store images: part_pics
    • Same name used in weberpdemo company.
  • Directory to store reports: reports
    • Same name used in weberpdemo company.
  • Wiki application: WackoWiki
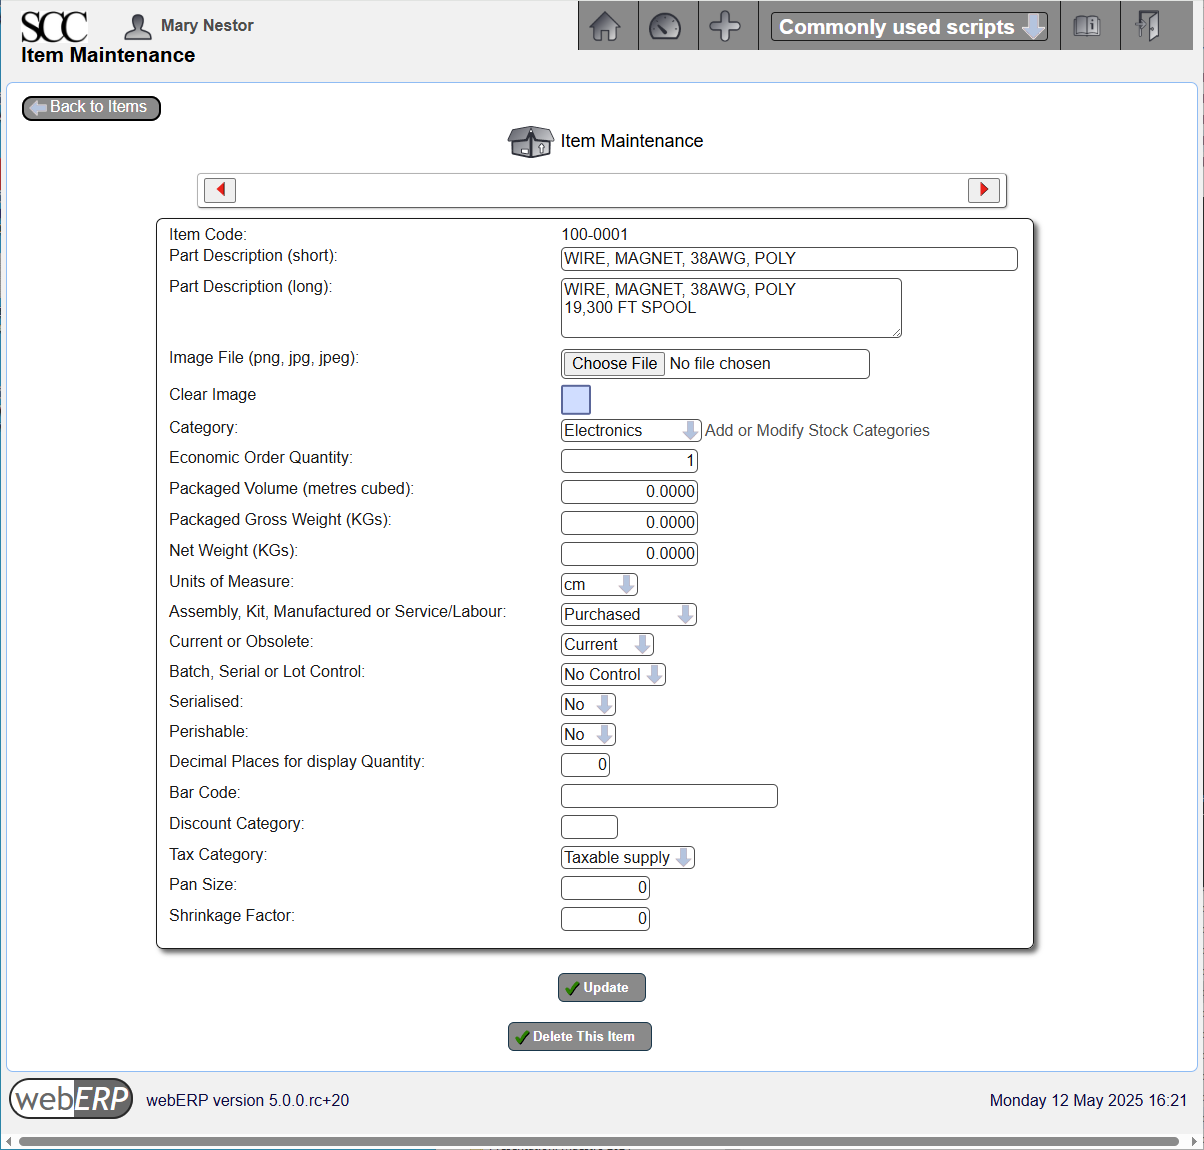
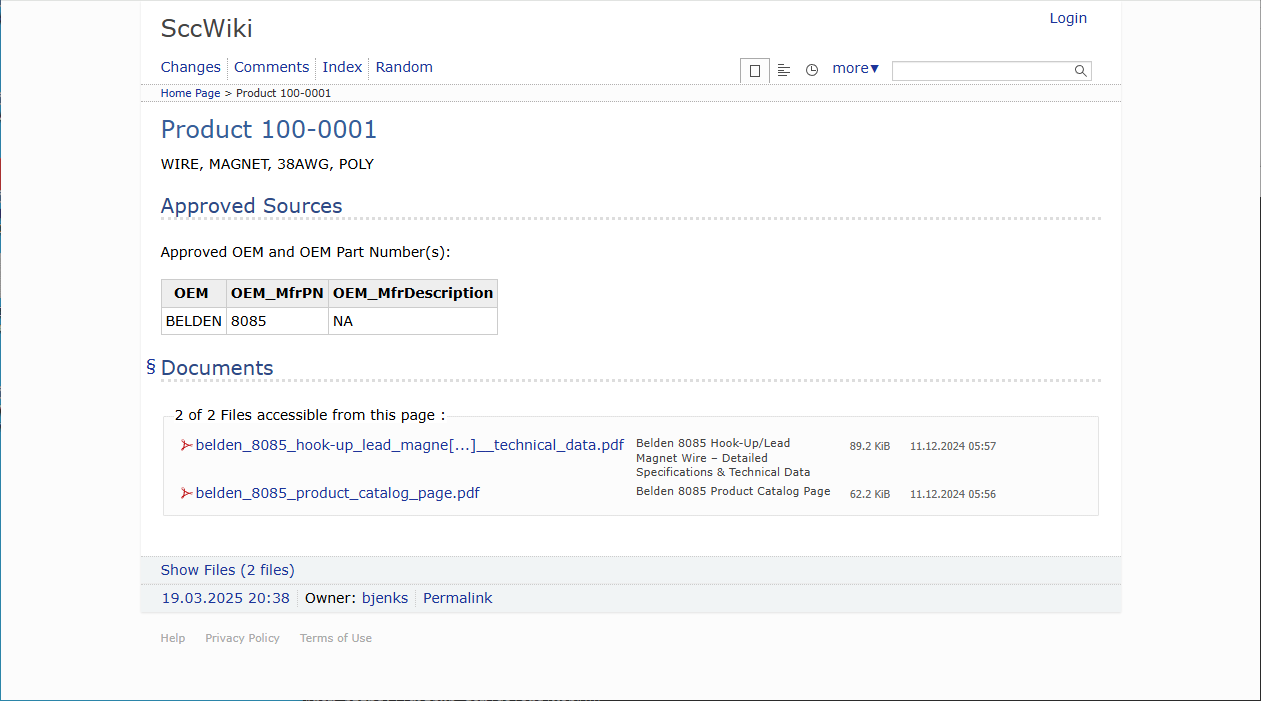
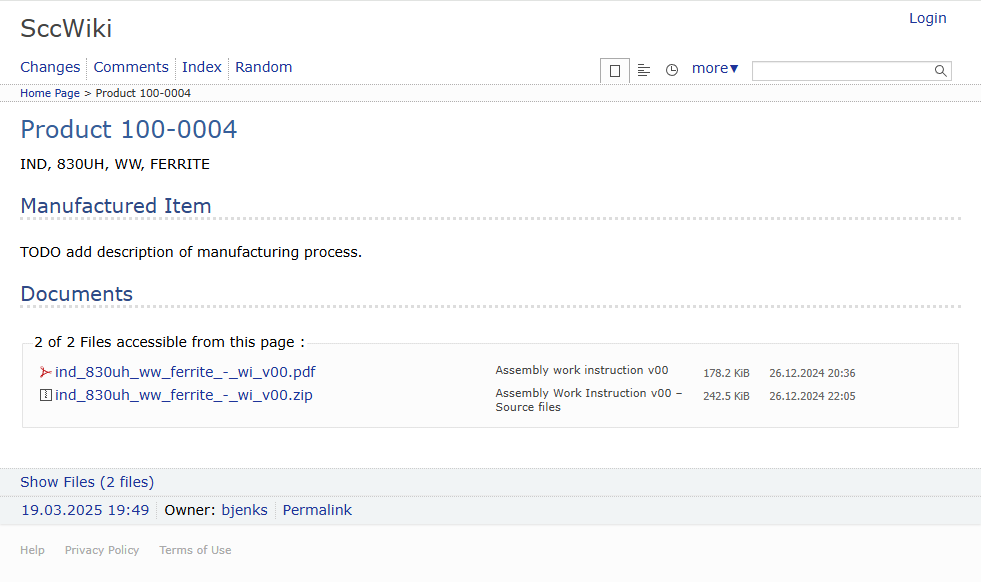
    • Items, Suppliers and Customer pages have a link to the “Wiki Product Knowledge Base” where supporting notes can be entered, including links to related information and document files (e.g. PDF, DWG, etc.). WackoWiki must be seperately installed and configured and Wiki Path provided by your system administrator.
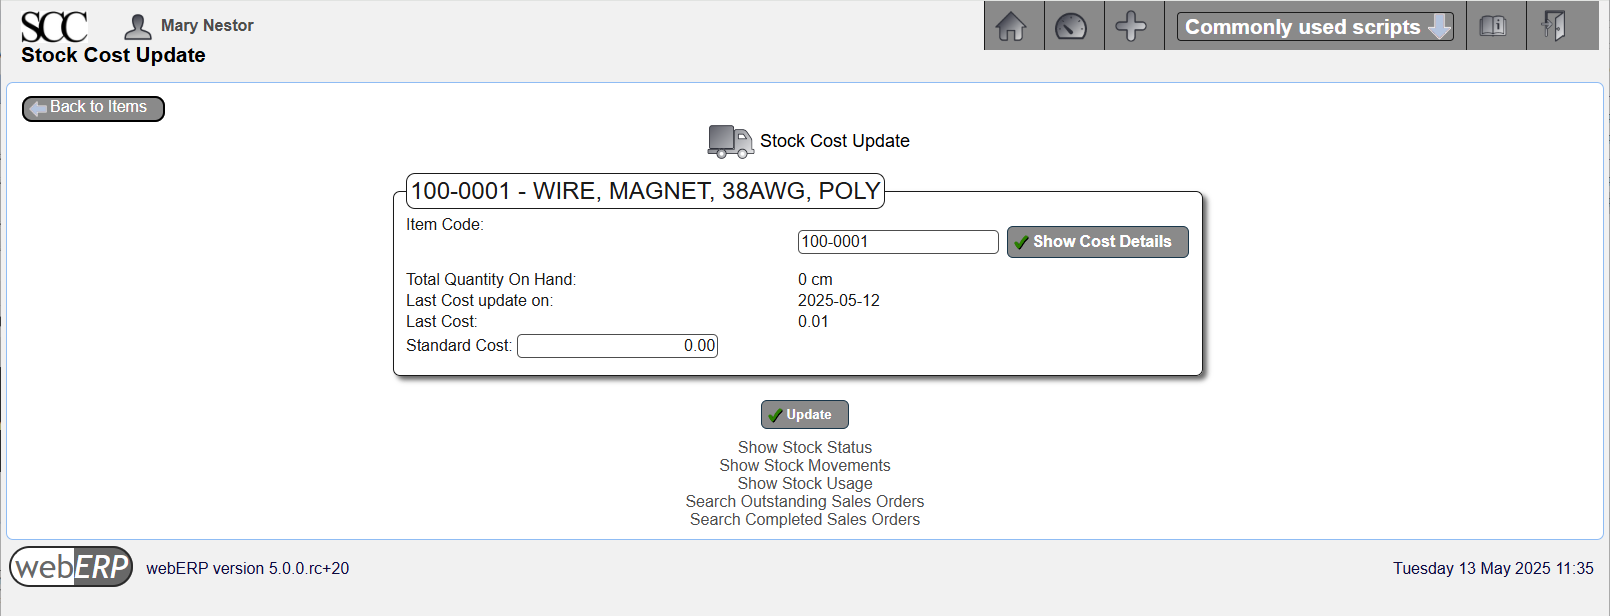
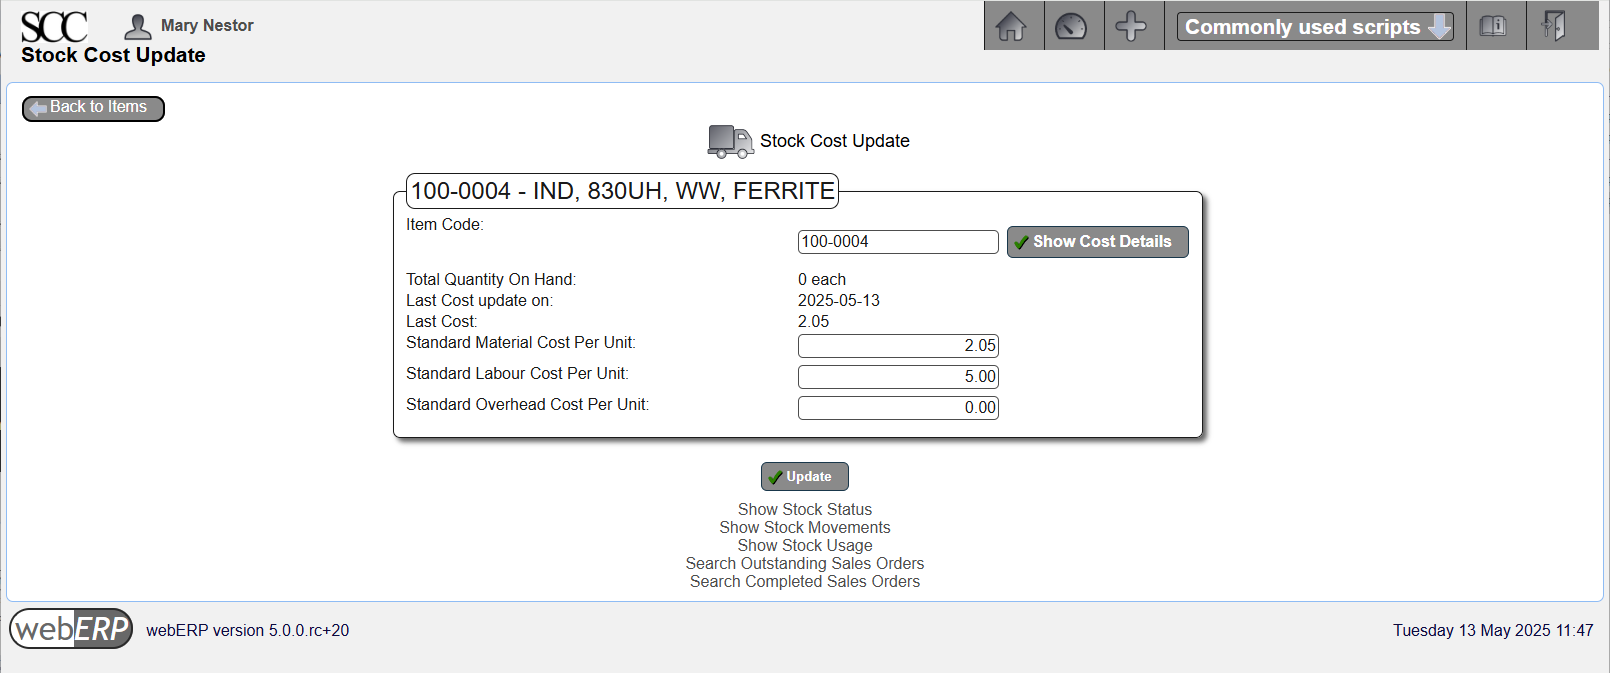
  • Inventory Costing Method: Standard
    • webERP also supports weighted average but Standard Costing is more obvious for starting with.
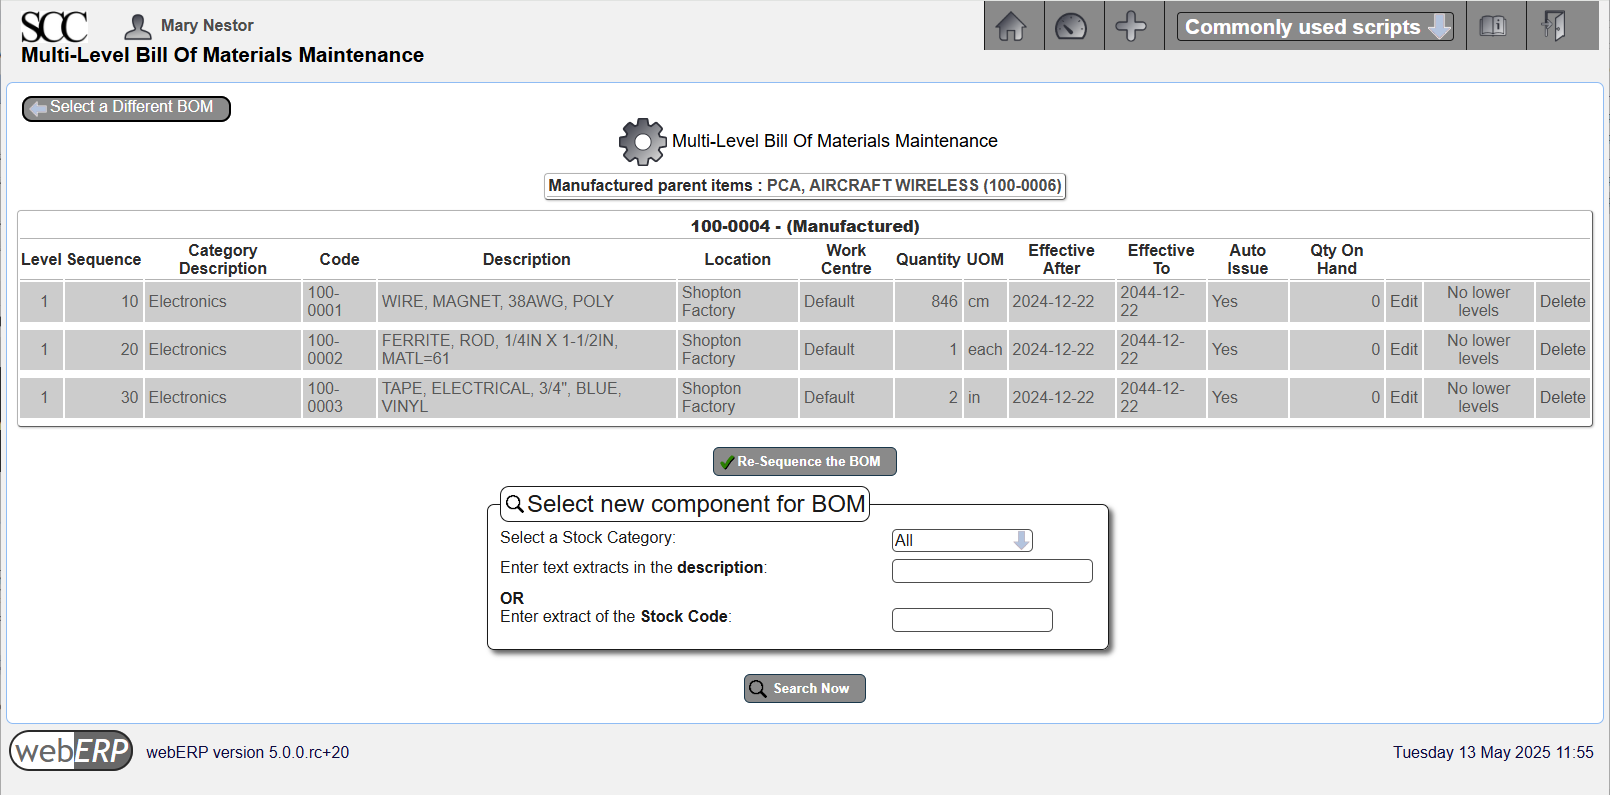
  • Auto issue components: Yes
    • Automatically decrement items from stock according to the BOM for an Item when it is manufactured to reduce admin effort.
  • Prohibit Negative Stock: No
    • Keep operations non-blocking but this may be safe to assume and will enable later. I don’t know how this is implemented or if it has an effect on system performance.
  • Log Severity Level: All
    • In general, it is good to see all log entries initially for familarity and reduce later as you more familiar with system. You will need system user access to the server to vew the log files(“Path to log files” is provided by your system administrator).
  • Controlled Items Defined At Work Order Entry:
    • Yes. When set to yes, controlled items (items with individual or batch/lot identification) are defined when a work oeswe at the time of the work order creation (otherwise controlled items ) are entered at the time the finished items are received against the work order
  • Auto Create Work Orders: Yes
    • This causes work orders to be automatically created for the default factory location if a sales order is entered and cannot be satisfied by the current inventory quantity.
  • Default Factory Location: Shopton
    • The location for automatically created work orders.
  • Manager email addresses: provided by your IT services provider
    • You may want to use a common email address for manager email messages at least while becomming familiar with webERP.
  • Using Smtp Mail: credentials provided by your email service provider

[Main Menu > Setup > General > System Parameters]

Summary

This completes basic webERP configuration. More complex configuration will be explained in context. E.g. bank accounts will be presented in the contect of Purchasing or Selling.

Manage Parts, Suppliers and BOMs with webERP

Click to search for other posts here on webERP

Updated for webERP v5.

Product lifecycle management (PLM) is the process of managing a product from top-level assembly to the lowest child item, from concept through design, manufacturing and sales, sustaining engineering, and finally termination. PLM integrates people, data, processes and business systems, and provides a trustable and transparent product information backbone for operations.

Features of using webERP for PLM include:

  • Integrated data – projects, people, hours, other expenses, purchase orders, production builds, bills of materials, etc., are all conveniently managed in one system.
  • A visible, trusted, change management process providing chain of truth.
  • Scales with number of users, items and complexity of item trees.

The custom inductor in the Aircraft Wireless will be used to explore basic PLM using webERP. Documentation will be stored in the webERP Knowledge Base (integration with WackoWiki CMS).

Goals

  • Create child and parent items to model an assembly.
  • Define appropriate work centers.
  • Capture expected manufacturing labour.
  • Identify item vendor information for purchasing.
  • Identify item manufacturer information for purchasing through distribution.(manufacturer part number vs vendor part number).
  • Describe a change management process.

Items and Documentation

Some terms that will will be used include:

  • An Item is something that is sold, purchased or consumed in the operation of the SCC. It can be a tangible and physical, or intangible or virtual.
    • Items are identified using a unique Item Code and also a Part Description. The part description should also be unique but it is not imposed by webERP. After an item has been created, the fit, form and function of the item are not allowed to change. Because an item is essentially not allowed to change it does not have a revision level.
    • A Part Description is typically contructed by combining the most important attributes of the item.
  • Item Documentation describes an an item and can be revised, for example to correct errors, improve clarity or adapt to changing needs. Documents have a revision level and the revision level is updated when the document is changed following a change management process, such as an Engineering Change Order (ECO) process.
  • A Release is a milestone in the lifecycle of a product, and generally is a gate between one phase of the item lifecycle and the next (such as from design to manufacturing).

User Permissions

We will login as user “mnestor” (Mary Nestor), who is assigned the Administrator security role so it won’t be necessary to understand the inner workings of the webERP role-based user security scheme before actually working with webERP. The Administrator role has all the necessary permissions for most operations (except occassionally a user with the Accountant security role will be needed for finance related operations).

In actual use however it is important each user has their own login with a password only they know. This allows correctly identifying the person performing an operation and provides tracibility. This is especially important if you will be using webERP in a regulated or controlled environment.

The default (out-of-the-box) user permissions and security configuration will generally be sufficient to get you started. Eventually though you will want to create bespoke security roles and token assignments based on the structure, staff and relationships of your company.

Create Inventory Categories

The Swift Construction Company, like many engineering services and product companies, grew organizationally from a single-person engineering department to eventual separate mechanicals and electronics development teams. Knowing if a thing is a “mechanical thing”, or an “electronics, firmware, or basically anything but a mechanical thing” indicates which department is responsible for it.

As a result of the SCC’s organization structure, physical things are categorized as either either ELEC or MECH for either electrical or mechanical consumable raw materials and CAT for finished goods (catalogue items).

[Main Menu > Setup > Inventory Setup > Inventory Categories Maintenance]

ELEC Inventory Category

The ELEC category is used for electronics raw material items which are consumed in the production process for other items.

MECH Inventory Category

The MECH category is used for mechanical raw material items which are consumed in the production process for other other items.

CAT Inventory Category

The CAT (short for “catalogue”) are items which are sold (and either purchased or manufactured).

Define Units of Measure

An item’s Unit of Measure (UOM) specifies how the item is to be inventoried and consumed. webERP supports different purchase units, for example to purchase in US gallon jugs but inventory and consume in millilitres. 

A new unit of measure is typically created if needed when a new item is created, but knowing we will need centimeters and inches they can be added now.

[Main Menu > Setup > Inventory Setup > Units of Measure]

Create Suppliers

SCC policy is to identify and/or create a supplier when a new bought-in Item is created. A new supplier may also be created when changing suppliers for an existing Item.

Access menu [Main Menu > Payables > Maintenance > Add Supplier] to add a new supplier.

Suppliers can be imported from a CSV file which may be convenient if migrating to webERP from another system. 

We will ignore some supplier details, such as the tax group, which are not required until the item is to be purchased (this will be covered in Purchase with webERP).

[Main Menu > Payables > Maintenance > Select Supplier > Search]

Create Items

Create the inductor item as well as the items that will be in the bill of materials (BOM) for the inductor, according to the inductor design.

The SCC defines an Item Code as a 7-digit sequentially assigned integer, starting with 1000001 but written with a hyphen after the third digit for easy recollection per SCC QSP Product Lifecycle.

The Part Description follows the Noun-Adjective-Size-Modifier (NASM) rule, starting with a noun that describes the essence of the item per SCC QSR Part Name.

Item CodePart Description
100-0001WIRE, MAGNET, 38AWG, POLY
100-0002MAG, FERRITE ROD, 1/4IN X 4IN, MATL=61
100-0003TAPE, ELECTRICAL, 3/4″, BLUE, VINYL
100-0004IND, 830UH, AIRCRAFT WIRELESS

100-0001 Wire, Magnet

The unit of measure (UOM) for the wire will be centimeters (cm), which means the wire will be received, stocked (kept in inventory) and consumed measured in centimeters. However, it will be purchased by the spool, which is the supplier’s UOM (the datasheet for the wire indicates a spool has 19,300 feet).

The consumption unit of measure will generally be the most relevant for any transaction other than purchasing or inventory control. When purchasing, the unit of measure will generally be determined by the vendor, and webERP supports a separate purchase unit when creating a purchase order. This means in an inventory audit that it will be necessary to convert from the counted number of full spools, add fractions of a spool for any partial spools, and convert to centimeters. However, the conversion factor can be found in the item master purchasing data and the math is not complicated.  

[Main Menu > Inventory > Maintenance > Add A New Item]

Enter Purchasing Information

In addition to the supplier details, notice a conversion factor of 588,264 was entered. This is the multipler to convert the supplier UOM to the item UOM.

The conversion factor was determined based on the spool length of 19,300 feet according to the supplier’s and manufacturer’s datasheets.

19,300 feet × 12 inches per foot ​× 2.54 cm​ per inch = 588,264 cm

[{item} > Item Maintenance > Maintain Purchasing Data]

Enter Standard Cost

The standard cost per cm is $0.0002632.

$0.0002632 = $154.83 per spool divided by the conversion factor of 588,264 cm per spool.

A standard cost for an item of less than 0.01 per UOM in the associated currency may not produce meaningful analysis due to the precision of calculations and loss of precision due to potential truncation and rounding. In this case, for more accurate results use either inventory cost (using the selected inventory costing model) or the actual order cost taken from purchase orders.

[{item} > Item Maintenance > Maintain Standard Cost]

Upload Documentation

Upload the manufacturers’ datasheet to the Product Knowledge Base Wiki.

[{Item} > Item Inquiries > Wiki Product Knowledge Base]

Exactly what documentation should be uploaded will vary for each item, but can always be added to later should information be found wanting. Documentation can also be updated if a newer version becomes available.

For more rigorous control over manufacturing documentation, consider using SeedDMS which uses a submit, review, approval workflow.

100-0002 Mag, Ferrite

[Main Menu > Inventory > Maintenance > Add A New Item]

Enter Purchasing Information

[{item} > Item Maintenance > Maintain Purchasing Data]

Enter Standard Cost

[{item} > Item Maintenance > Maintain Standard Cost]

Upload Documentation

Upload the catalogue page, datasheet and application note to the Knowledge Base.

[{Item} > Item Inquiries > Wiki Product Knowledge Base]

100-0003 Tape

[Main Menu > Inventory > Maintenance > Add A New Item]

Enter Purchasing Information

[{Item} > Items > Item Maintenance > Maintain Purchasing Data]

Enter Standard Cost

[{Item} > Items > Item Maintenance > Maintain Standard Cost]

Upload Documentation

Upload the product datasheet and MSDS (Masterial Safety Data Sheet) to the Knowledge Base.

[{Item} > Item Inquiries > Wiki Product Knowledge Base]

100-0004 Inductor

Item 100-0004 is a custom inductor that will be manufactured using the items listed in its’ Bill of Material (BOM). An item must be explicitly specified as Manufactured in the Item Properties to enable creating a BOM.

[Main Menu > Inventory > Maintenance > Add A New Item]

Enter Standard Cost

Set the standard cost to be the total calculated cost including labor and any fixed overhead costs.

[{Item} > Item Maintenance > Maintain Standard Cost]

Enter Standard Price

If an item will be sold, it must have a price associated with it. For example, the SCC sells the 100-0004 inductor seperately as a repair item for maintenance technicians (the inductor can be damaged by a nearby lightning strike).

[{Item} > Item Maintenance > Maintain Pricing]

Create Bill of Materials

The raw materials needed to manufacture qty 1 of item 100-0004 are specified in a Bill of Materials (simply, the “BOM”). Materials listed in a BOM are also called child items or children of the parent item.

Child items on the BOM for the inductor will be auto-issue, which will simplify creating a manufacturing work order later.

[Main Menu > Manufacturing > Maintenance > Bills Of Material]

To print a BOM, use one of the available reports for the best results:

  • [Main Menu > Manufacturing > Inquiries and Reports > Bill of Material Listing ]
  • [Main Menu > Manufacturing > Inquiries and Reports > Indented Bill of Material Listing ]

Upload Documentation

Upload manufacturing process documentation such as a Work Instruction to the Knowledge Base.

[{Item} > Item Inquiries > Wiki Product Knowledge Base]

Change Management Process

As mentioned previously, convention prohibits the essence of an item (its’ fit, form and function) to be changed once created. Because an item is not allowed to change, it by definition cannot be revised and hence does not have a revision level.

However, documentation releated to an item is allowed to change. This results when improvements or changes are made to an item (but without affecting the item’s fit, form or function), or simply to correct errors or omissions. Organizations often define a two-level revision code, with the major code indicating a change to the item and the minor code indicatiing a change to the document but not the item (e.g. a correction or clarification).

An organization often defines a change management process, which generally uses a form listing the affected Items and documentation, the reason for the change, and record of approval by all affected parties.


Git for the color blind and other tips

Here are several tips that have helped me, someone who uses Windows most of the time and Linux some of the time, finds color coded output a visual nightmare and prefers simplicity.

Ignore File-mode Changes on Windows

Git thinks executable files have changed when going between ‘nix and Windows systems, when it’s only that the file mode is being interpreted differently. On a Windows system, set your global config (~/.gitconfig) to ignore file mode changes. You may also need to check the local (repository) configuration.

Check your global and local configs:

$ git config --global core.filemode
$ cd gitrepo
$ git config core.filemode

Set configuration to ignore file mode changes (as needed):

$ git config --global core.filemode false
$ cd gitrepo
$ git config core.filemode false

Disable Color-coded Git Output

Many developers couldn’t live without color-coded command-line output, but you may find (as I do) that less than perfect color vision combined with high ambient lighting and some screen glare results in a display that is largely incompressible.

To disable color-coded output in a particular repository::

$ git config color.ui false
$ git config color.diff false
$ git config color.status false
$ git config color.branch false
$ git config color.interactive false

To globally disable color coding, add the –global option (but be aware you may also need to configure the global ~/.config file) .

Use .gitignore

Applications can dynamically generate files, such as compiled templates, that you don’t want Git to do anything with. Achievo writes files to achievotmp/, which can be added to the project’s .gitignore file (which may already be done if you are cloning the canonical project repository in GitHub).

achievotmp/

Also, your development environment, especially is you are using an IDE (Integrated Development Environment) such as PhpStorm or NetBeans, may create its own project directory that you also want Git to ignore. Because this is developer-specific, add an entry to your global ~/.gitignore file for Git to ignore them.

.idea/

Further Reading

Yes, open source software still has a license…

Someone recently posted to a popular electronics consultant forum:

Great thing about using opensource tools is that there is no problem with licenses, because there are none.

What they were trying to say (and acknowledged afterwards) was that open source software doesn’t require purchasing a license. Open source software still has a license – either a permissive license such as the BSD or MIT license, or a copyleft license such as the GNU GPL.

I’m not making the point to single anyone out or to intentionally be pedantic, it’s a common simplification but overlooks the importance of the license. Without the license it’s unlikely any significant open source software would exist, and clearly we appreciate the existence of open source software.

The open source license limits the liability of the developer (who would willingly be liable for damages if their code didn’t work correctly in a situation that was never anticipated or intended?), and copyleft licenses further prevent creation of closed-source variants, which is a philosophical must for many open source developers.

Open source software has been with us now for over 40 years, the BSD license was first used in 1980, the GNU GPL was first used in 1989 and the Linux kernel was released using the GNU GPL in 1992. At least for me, it’s hard to imagine where software development would be today if we hadn’t have been able to stand on the shoulders of the giants who came before us.