This post is #2 in a series on using webERP, and is a work-in-progress. Search for “webERP” to find other posts in the series.
Product lifecycle management (PLM) is the act of consciously managing a product from concept through design, into manufacturing and sales, supporting on-going production and sales through sustaining engineering, and finally winding down. PLM integrates people, data, processes and business systems, and provides a trustable and transparent product information backbone for operations.
Features of using WebERP for PLM include:
- Integrated data. Projects, people, hours, other expenses, purchase orders, production builds, bills of materials, etc., are conveniently managed in one controlled system.
- A visible, trusted, change management process providing chain of truth.
- Scales with number of users, items and complexity of item trees.
I will explore webERP’s PLM features using the Swift Construction Company’s development of the Aircraft Wireless as an example, following the SCC Product Management process.
Goals
The goals of this exercise will be to:
- Create child and parent items to model an assembly.
- Define appropriate work centers.
- Capture expected manufacturing labour.
- Identify item vendor information for purchasing.
- Identify item manufacturer information for purchasing through distribution.(manufacturer part number vs vendor part number).
- Identify an appropriate change management or ECO process. COMING SOON
Definitions
Here are some terms in the context I will be using them.
- Revision Level. Each item has a unique revision level, indicating changes made to the item or its supporting documentation since it was initially defined. The revision level is changed following a well-defined sequence.
- Release. A release is the creation or update of a logical set of items and supporting documentation. This may be to publish information for review, to support processes such as purchasing or manufacturing, or to recognize a milestone in the development project.
- ECO (Engineering Change Order). A well-defined process for making changes to a part or assembly, usually custom.
Setup
Create Inventory Categories
The Swift Construction Company, like many engineering services and product companies, grew organizationally from a single-person engineering department to eventual separate mechanicals and electronics development teams. Knowing if a thing is a “mechanical thing”, or an “electronics, firmware, or basically anything but a mechanical thing” indicates which department is responsible for it.
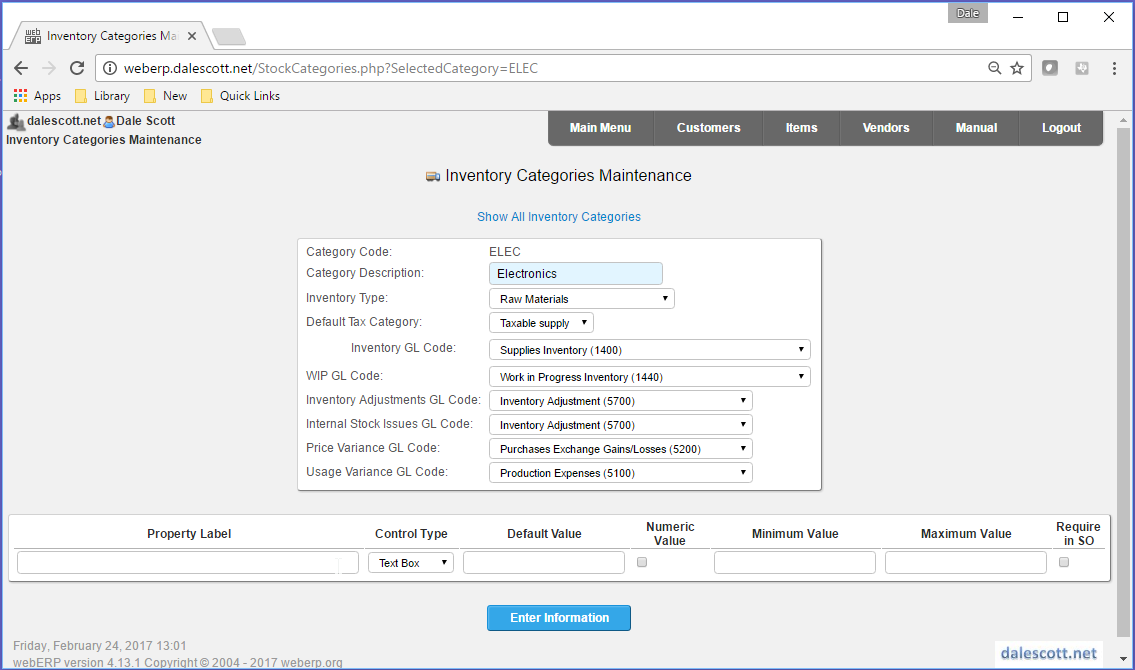
As a result of the SCC’s organization structure, physical things are categorized as either either ELEC or MECH for raw materials and parts, or RADIOS for finished goods (currently the SCC’s only product line).
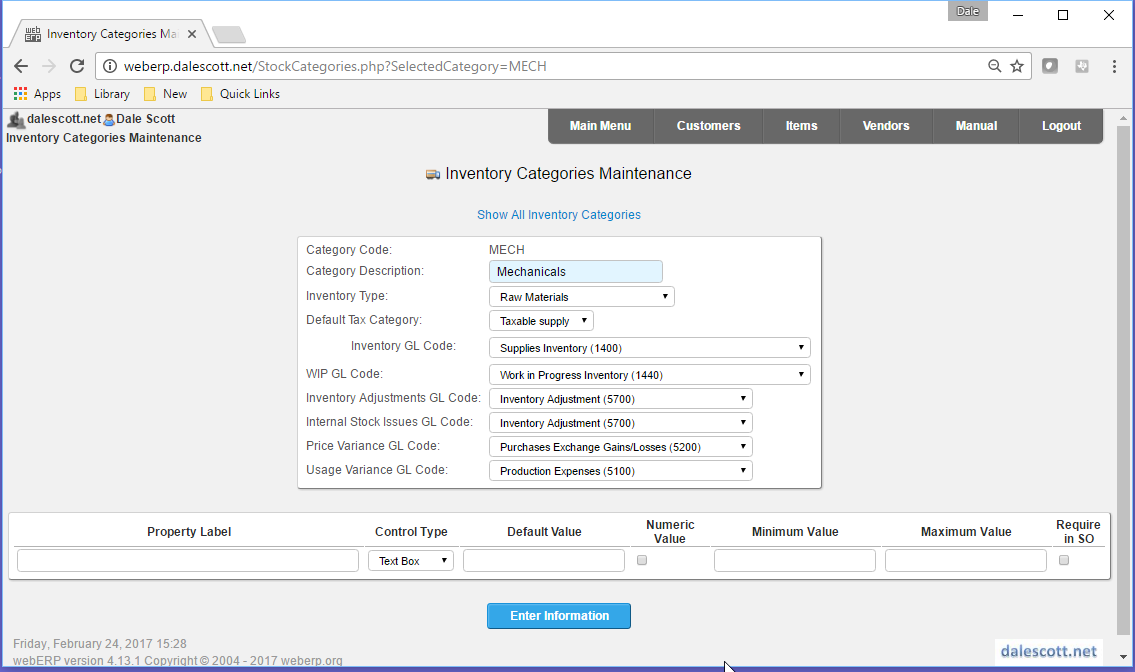
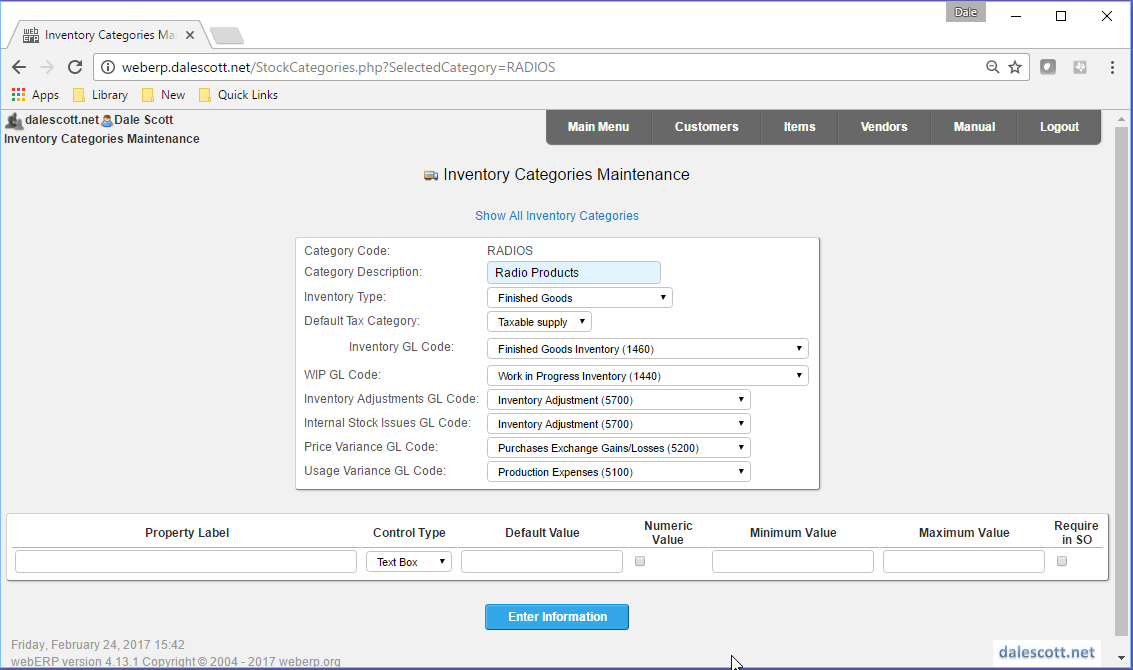
Main > Setup > Inventory Setup > Inventory Categories Maintenance
ELEC Inventory Category
MECH Inventory Category
RADIOS Inventory Category
Create Units of Measure
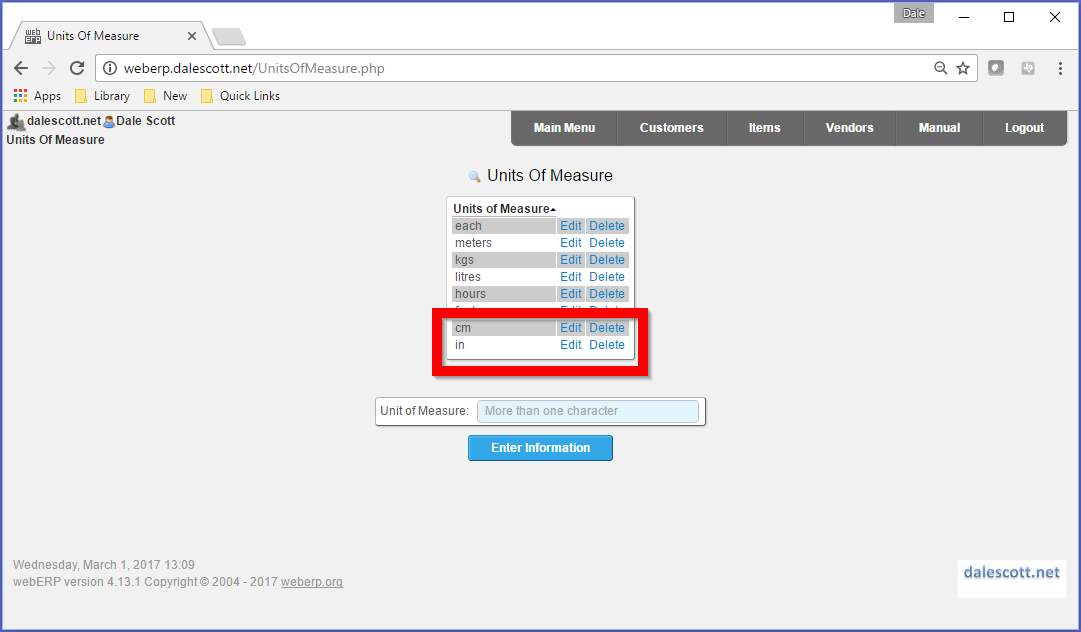
An item’s Unit of Measure (UOM) specifies how the item is to be inventoried and consumed. webERP supports different purchase units, for example to purchase in US gallon jugs but inventory and consume in millilitres.
A new unit of measure is typically created if needed when a new item is created, but using the SCC Aircraft Wireless development project documentation we can create all necessary units of measure now.
Main > Setup > Inventory Setup > Inventory Units of Measure
Create Vendors
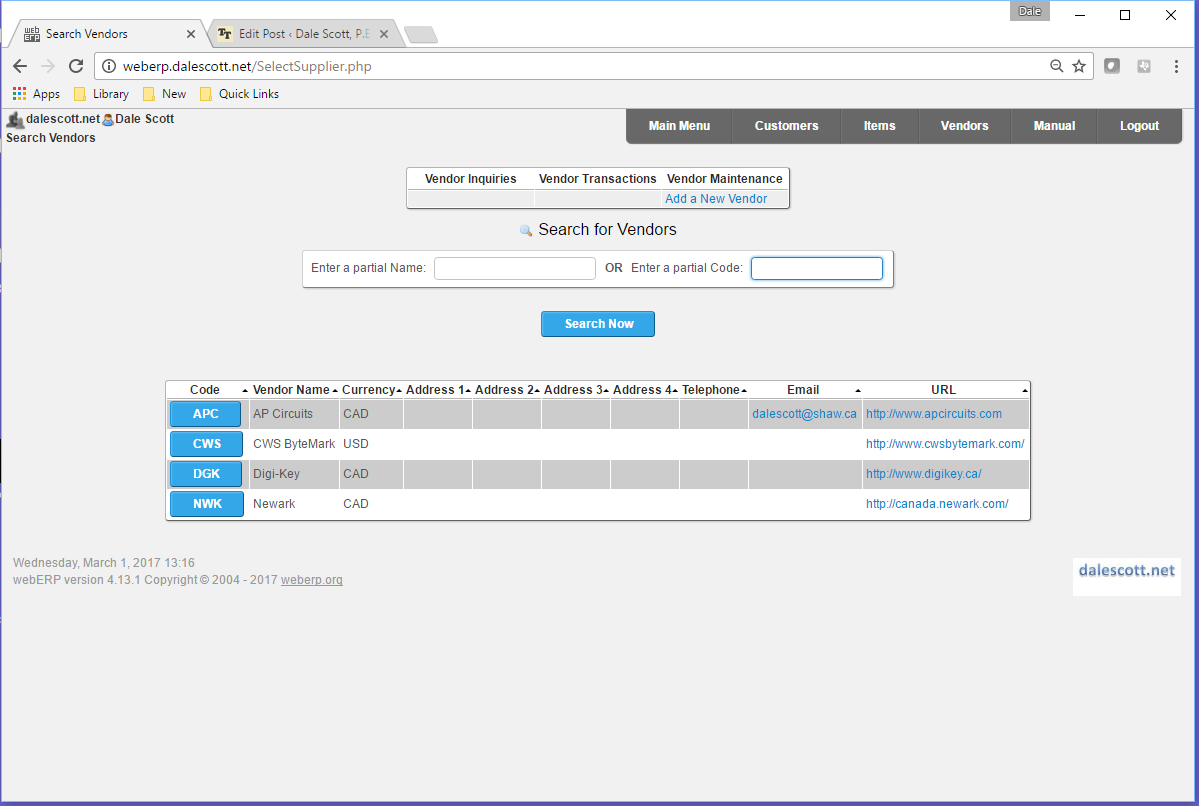
A new vendor is typically created ad hoc, but using the SCC Aircraft Wireless development project documentation we can create each vendor now (vendors can also be imported from a CSV file).
Main > Vendors > Add a New Vendor
Create Items
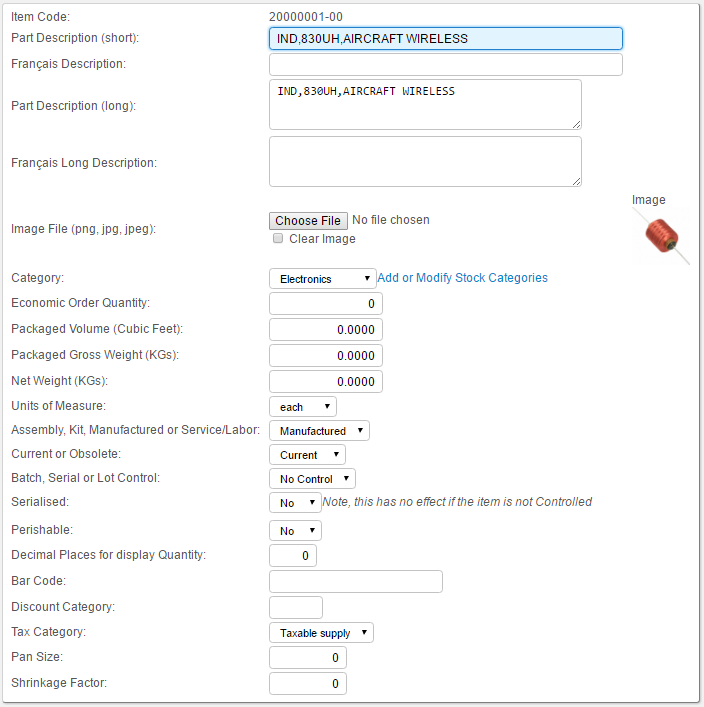
Create new items according to the SCC Aircraft Wireless development project. I will shjow details for creating sub-assembly 20000001-00 (a custom inductor), and the rest of the items and bills of materials will be similar.
20000001,"IND,830UH,AIRCRAFT WIRELESS"
|-- 90000001,"WIRE,MAGNET,38AWG,POLY"
|-- 90000002,"MAG,FERRITE ROD,1/4IN X 4IN,MATL=61"
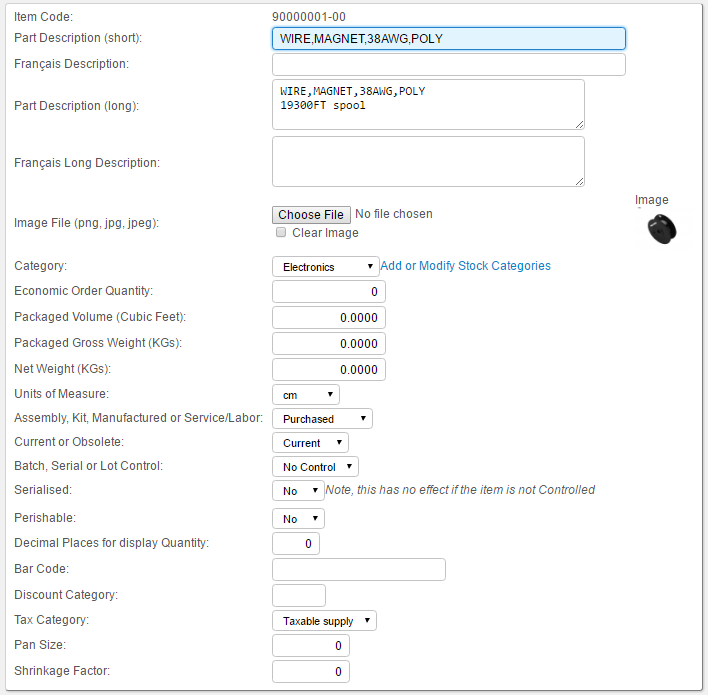
\-- 90000003,"TAPE,ELECTRICAL,3/4"",BLUE,VINYL"90000001-00 Magnet Wire
The unit of measure for the wire will be centimetres, meaning the wire will be inventoried and consumed by the centimeter. However, it will be purchased by the spool, which is the vendor unit of measure (the datasheet for the wire indicates a spool has 19,300 feet).
The consumption unit of measure will generally be the most relevant for any transaction other than purchasing or inventory control. When purchasing, the unit of measure will generally be determined by the vendor, and webERP supports a separate purchase unit when creating a purchase order. This means in an inventory audit that it will be necessary to convert from the counted number of full spools, add fractions of a spool for any partial spools, and convert to centimeters. However, the conversion factor can be found in the item master purchasing data, and the math is not too laborious.
Items > Create New Item
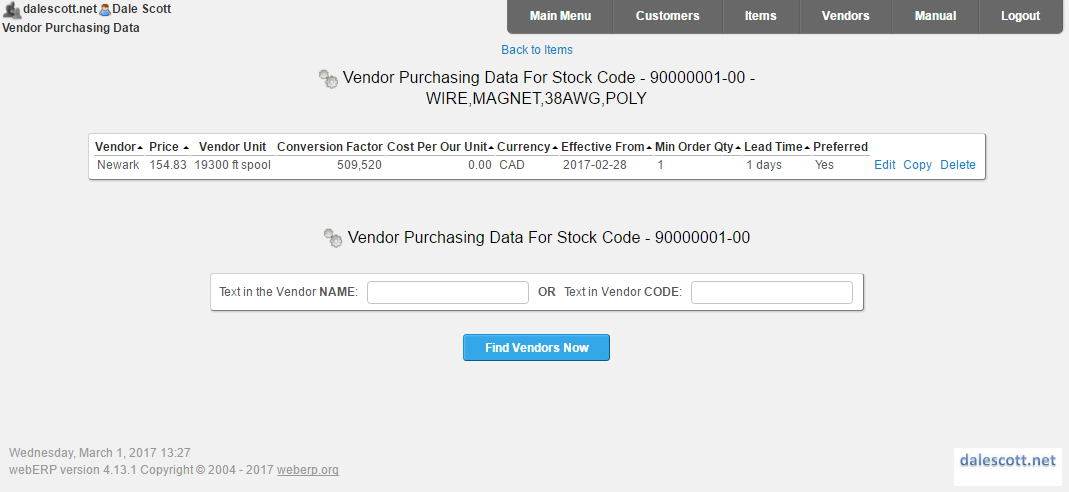
Enter Purchasing Information
Items > Item Maintenance > Maintain Purchasing Data
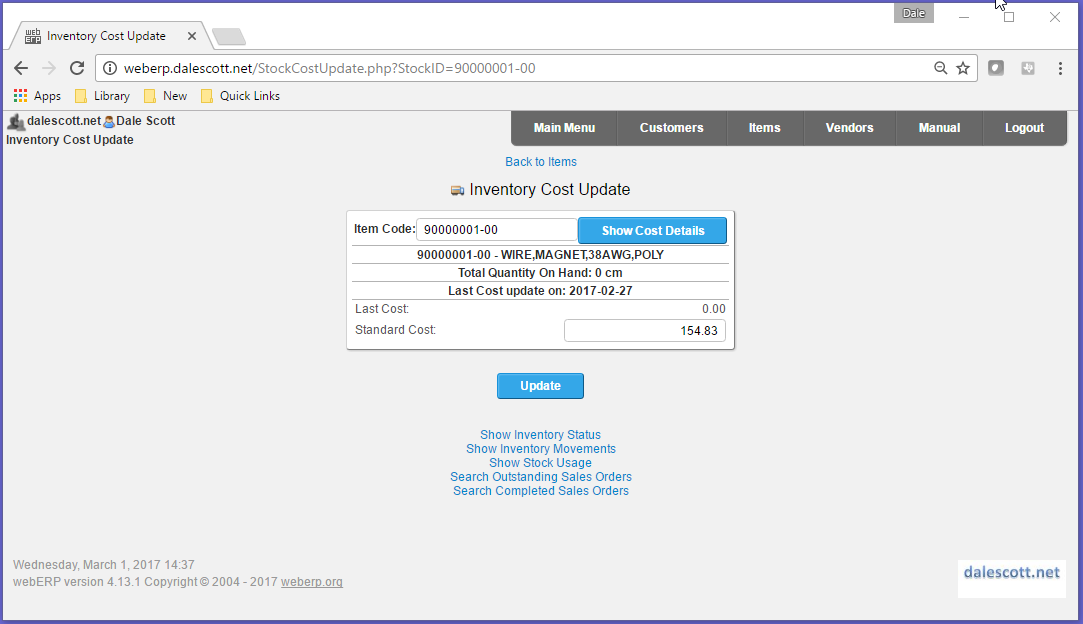
Enter Standard Cost
The standard cost for cm UOM is C$0.00026308 per cm (C$154.83/spool x [ 1 / [ 19300ft x 30.48cm/ft ] ] ).
Items > Item Maintenance > Maintain Standard Cost

Upload Documentation
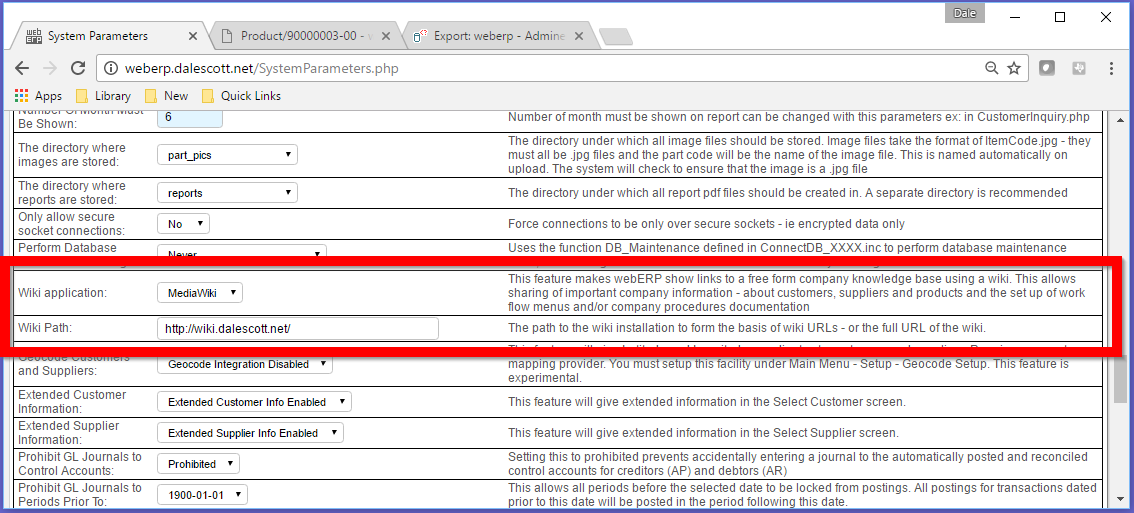
Upload the manufacturers’ datasheet to the Knowledge Base.
Items > Item Inquiries > Wiki Product Knowledge Base
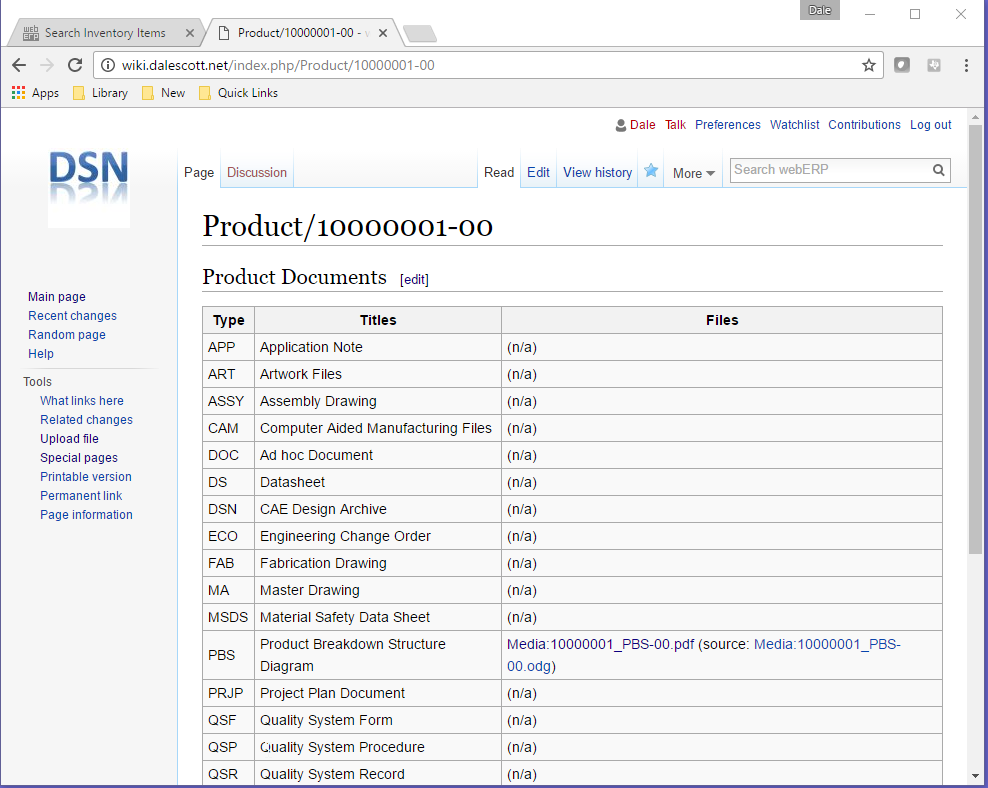
I’m using the same template for each page. It is essentially a list of categories of typical documentation. It’s a judgement call at the time the part is created what is required though.
90000002-00 Ferrite Rod
Items > Create New Item
Enter Purchasing Information
Items > Item Maintenance > Maintain Purchasing Data
Enter Standard Cost
Items > Item Maintenance > Maintain Standard Cost
Upload Documentation
Upload the catalogue page, datasheet and application note to the Knowledge Base.
Items > Item Inquiries > Wiki Product Knowledge Base
90000003-00 Tape
Items > Create New Item
Enter Purchasing Information
Items > Item Maintenance > Maintain Purchasing Data
Enter Standard Cost
Items > Item Maintenance > Maintain Standard Cost
Upload Documentation
Upload the product datasheet and MSDS to the Knowledge Base.
Items > Item Inquiries > Wiki Product Knowledge Base
20000001-00 Inductor
Item 20000001-00 is a custom inductor that will be manufactured in-house using the parts listed in a Bill of Materials (BOM). An item must be explicitly specified as Manufactured in the Item Properties for a creation of an associated BOM to be allowed.
Items > Create New Item
Enter Standard Cost
Set the standard cost to be the total calculated cost including labor and any fixed overhead costs.
Items > Item Maintenance > Maintain Standard Cost
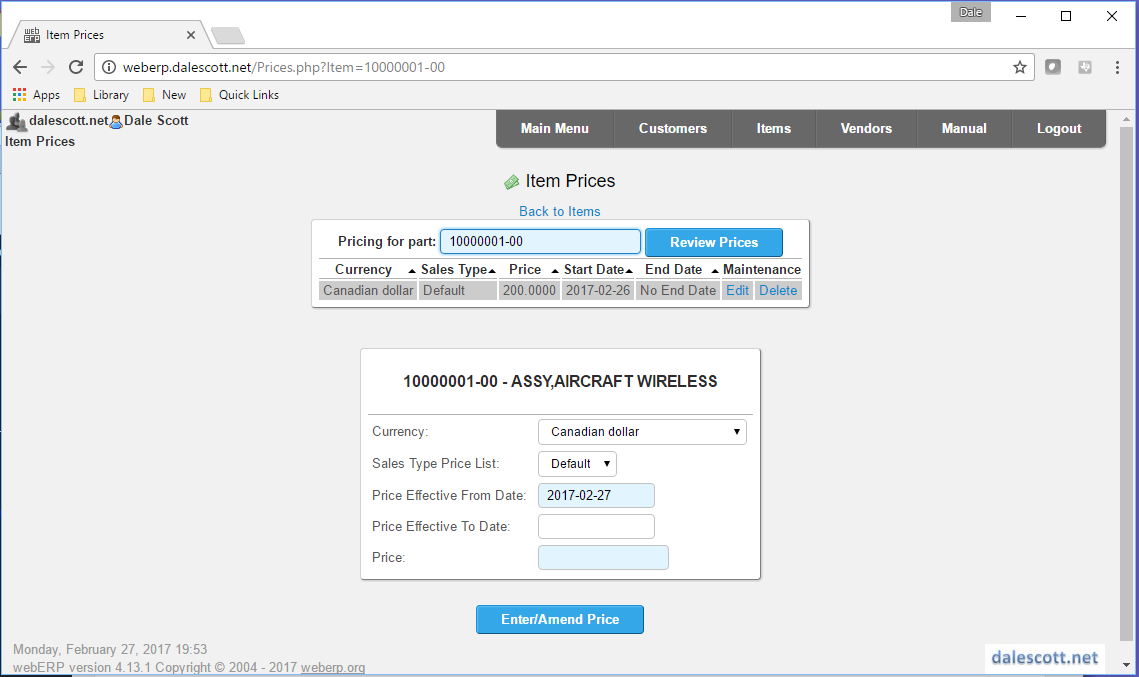
Enter Standard Price
Items which may be sold require pricing. It is expected field technicians may wish to purchase 20000001-00 for maintenance repair.
Items > Item Maintenance > Maintain Pricing
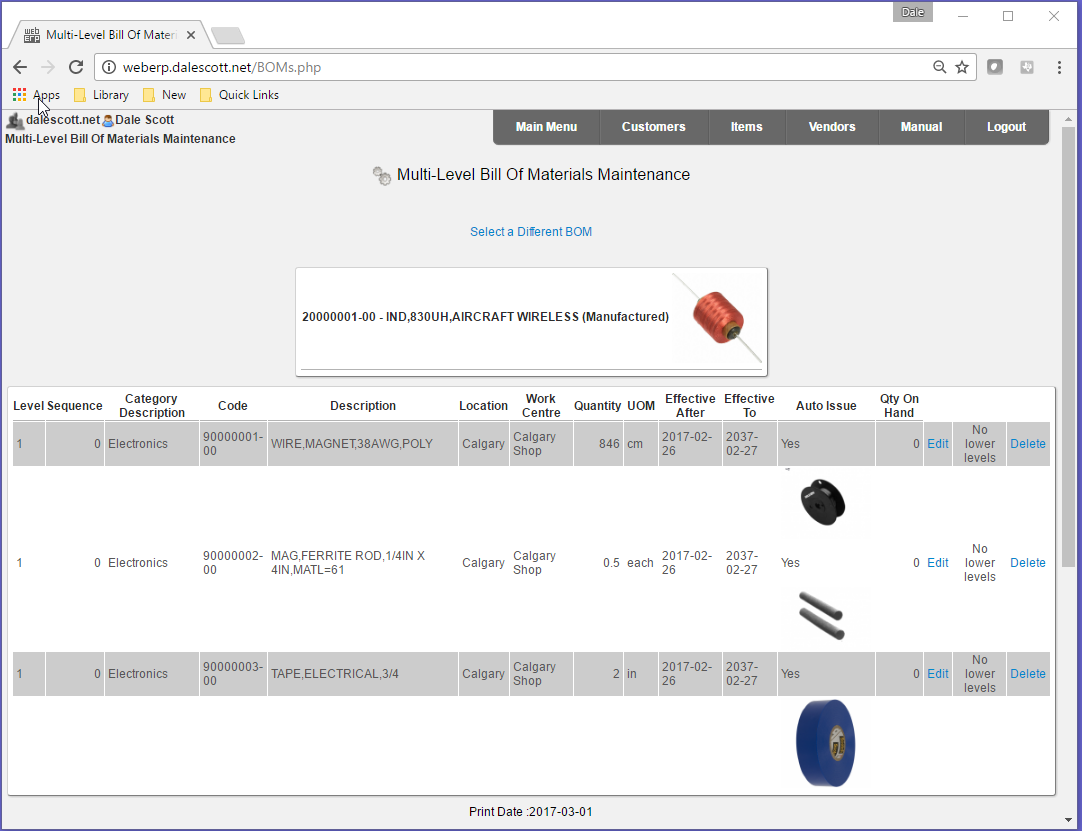
Create Bill of Materials
The raw material required to manufacture one item 20000001-00 are specified by creating a Bill-of-Materials, including quantities. The raw materials are also referred to as child items of the parent 20000001-00, and are set to auto-issue, which will simplify creating a manufacturing work order later.
Main > Manufacturing > Maintenance > Bills Of Material